
Loving this app! Absolute genius and SO affordable. It fills in the gap when I need to get something done and I’m not near Illustrator.
(2025 update – looks like it’s abandonware and FREE – download at Softonic. I sure hope the developer is okay but THANK YOU for making the full version FREE instead of just allowing it to vanish!)
I couldn’t find much in the way of a manual or tutorials, so here I’m compiling my own guide page as I figure things out. Have patience with a work in progress and send me your suggestions for what instructions you’d like to see, or have found out for yourself, please.
- Various Tips
- Screen Overview / Toolbox
- Projects / Applications
When I first went shopping for a vector graphics editor for Android, it was pretty easy to narrow down to Ivy Draw and Vector Ink. Vector Ink had so many powerful capabilities that it was close to being an Adobe Illustrator replacement (at least for my basic needs) but Ivy Draw was simply more fun. I found myself wanting to play with it. At only six bucks each I figured I might as well get them both, Vector Ink to get work done and Ivy Draw just because I like it.
Vector Ink can do some amazing things when it’s working, but unfortunately, all those complaints about it being buggy and unstable were right. It’s so fiddly that I got frustrated. There’s a wealth of tutorials for it and I started trying to follow along– “trying” because you have to hold your mouth just right and then maybe sometimes it works like the instructions. Then the program forgot I had paid for it and reverted back to the limited version. It wouldn’t even load my previous artwork. I complained to the developer. No answer. I tried to get a refund from the Google Play store but they said no, which surprised me– no refund even though I had paid for nothing? I complained to the developer again. Still no reply. My credit card took back the six bucks so that’s that. Several days later the developer replied to say that the program only works when you’re online and logged in. Well, that wouldn’t have worked for me anyway since I’m about to move out where there’s no internet. Ivy Draw works OFFLINE.
I was kinda glad to be left with Ivy Draw. I just like it. There are things it doesn’t do, but the things it does, it does competently, in a stable, non-frustrating fashion. It’s very easy to use after an initial learning curve. Now that I’m in the groove and a fan, I’ve figured out ways to make it work and it’s part of my toolbox. Between this and the fabulous free IbisPaint (which is already amply covered by instructions and tutorials) I can get things done.
Don’t know what’s up with the dev for Ivy Draw. I hope he’s okay. I hope the program continues to be available. But he doesn’t seem to answer emails so I guess we’re on our own.
I began this instructional page for myself, to write down all the tool names from the tooltips so that when I forget where something is I’d have a listing to go back and search for it.
This sign ** is to mark where there’s something I still have a question about.
Various Tips
Moving Around the Screen
Use one finger to move a selected object. Use two fingers to move the screen around or to zoom in and out.
Tooltips
Long-touching a tool with your finger brings up a floating tooltip to let you know what tool it is. I’ve written down a bunch of these below for reference.
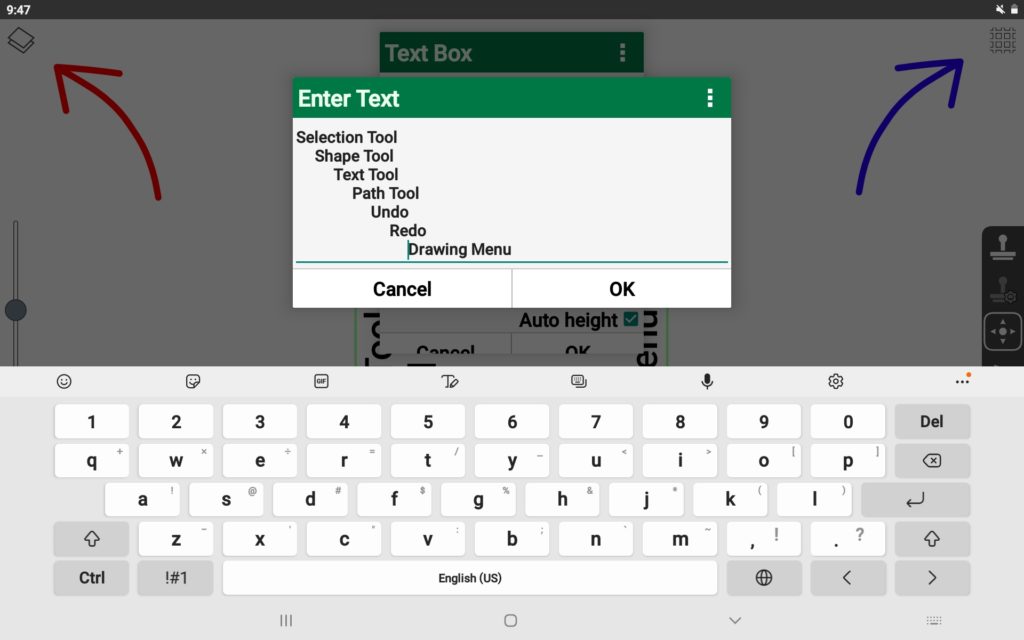
Where’s the Okay button?
Sometimes the dialog box doesn’t have enough space to show the Okay button, but it’s there at the bottom. Scroll down a little.
How to quit a drawing and start a new one
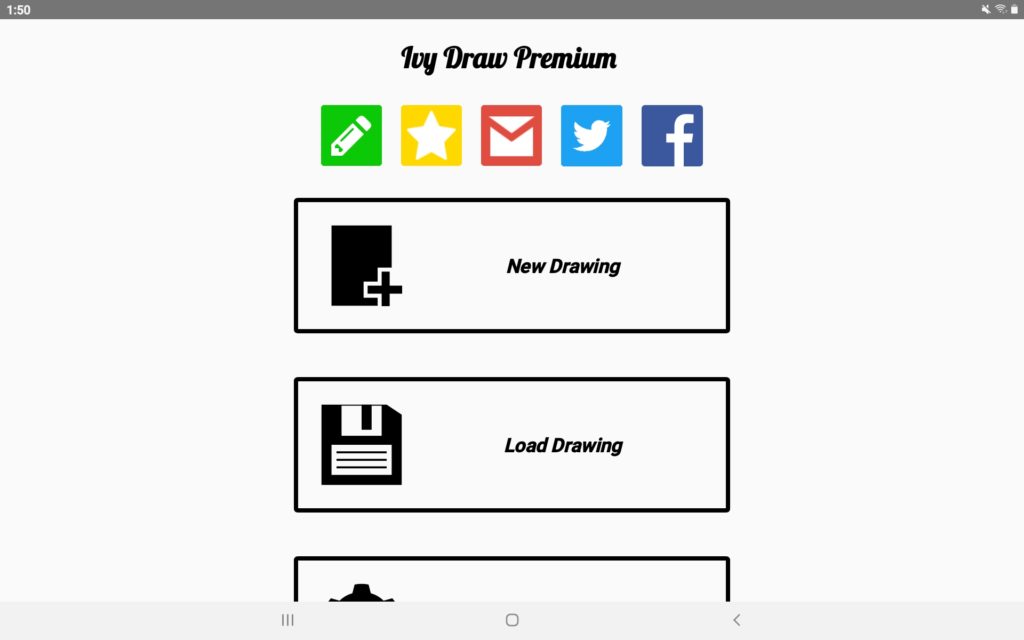
Save your drawing using the Drawing Menu (see next screenshot). To get back to the Splash / New Drawing screen, tap the “back” button on your device.
How to open a drawing
Return to the Ivy Draw opening screen by hitting the Back button on your device to find the Load Drawing option.
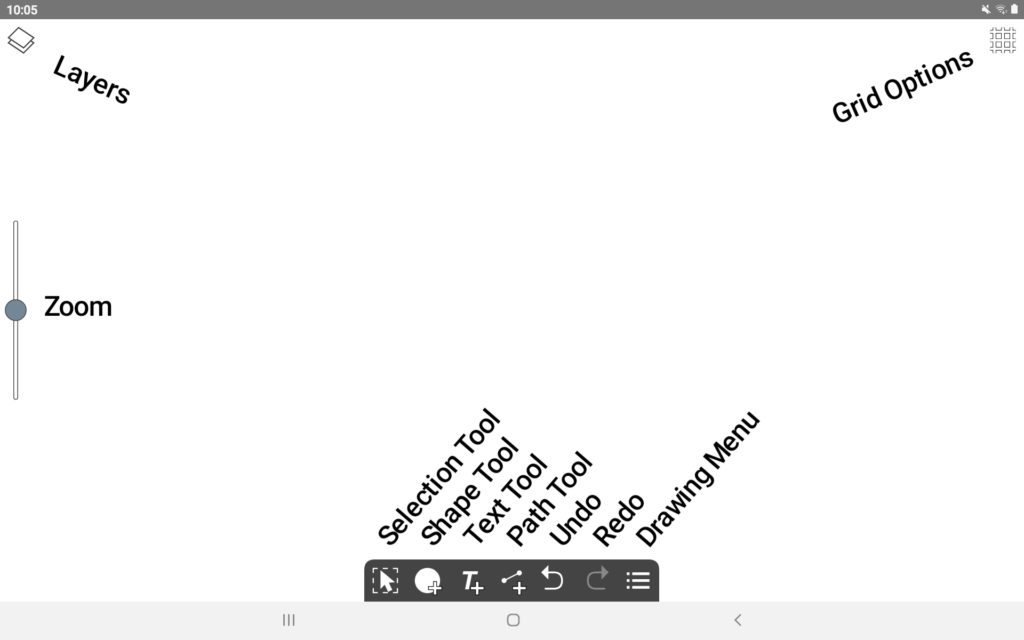
Screen Overview / Toolbox
Ivy Draw workspace with labels
Layers Panel
Layer menu
Top row: Open / close Layer Panel – Toggle Panel Transparency – New Layer – Hide All Layers – Show All Layers
Layer Transparency Slider
List of layers, with an eye for Show / Hide
Bottom row: Drag to Adjust Panel Height – Move Layer Up – Move Layer Down – Change Selected Object’s Layer – Layer Menu (Duplicate – Rename – Group All – Merge Down – Delete – Identify)
To move an object to a different layer
Select the object then tap the 4th button at bottom of the Layers panel, with two layers inside a dotted square. Then tap the layer where you would like the object to go.
The Identify option is for finding artwork. Select a layer and hit Identify and the artwork flashes to show its location even if it was hidden. Pretty cool.
** Is there a way to find out which layer an object is on? Sometimes I want to select an object that I can see, but first I would have to know and select which layer it’s on.
Grid Options Panel
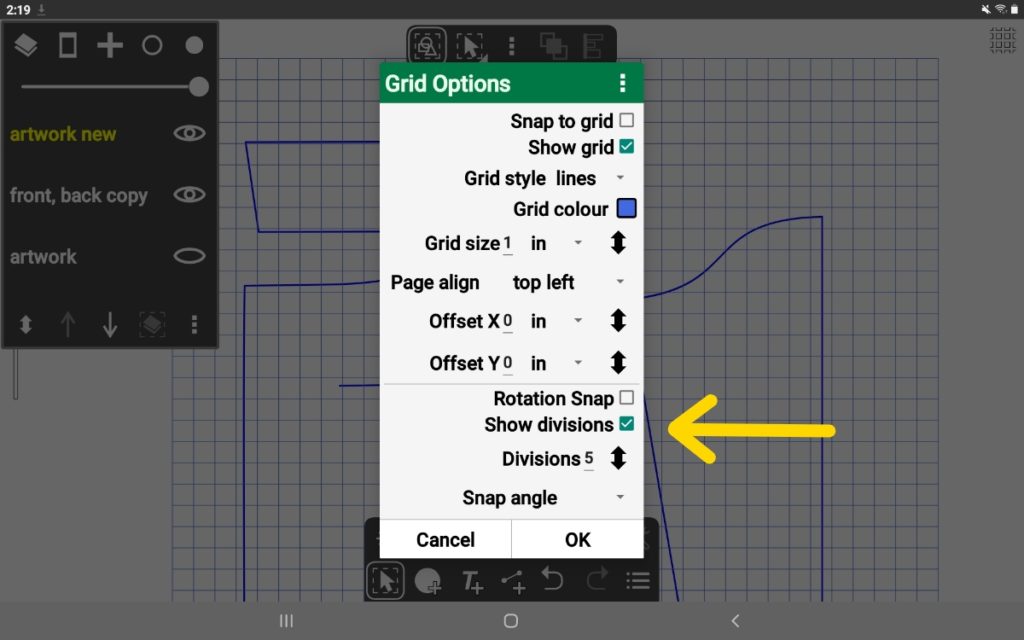
The Grid Options panel seems pretty self-explanatory.
** One thing I don’t know yet is what Show Divisions does and how to use it. Would it be like a grid between every 5th line like on printed graph paper? That would be great! I’m going to ask the developer pretty soon here along with some other questions.
Selection Tool
Overview of the Selection Tool screen.
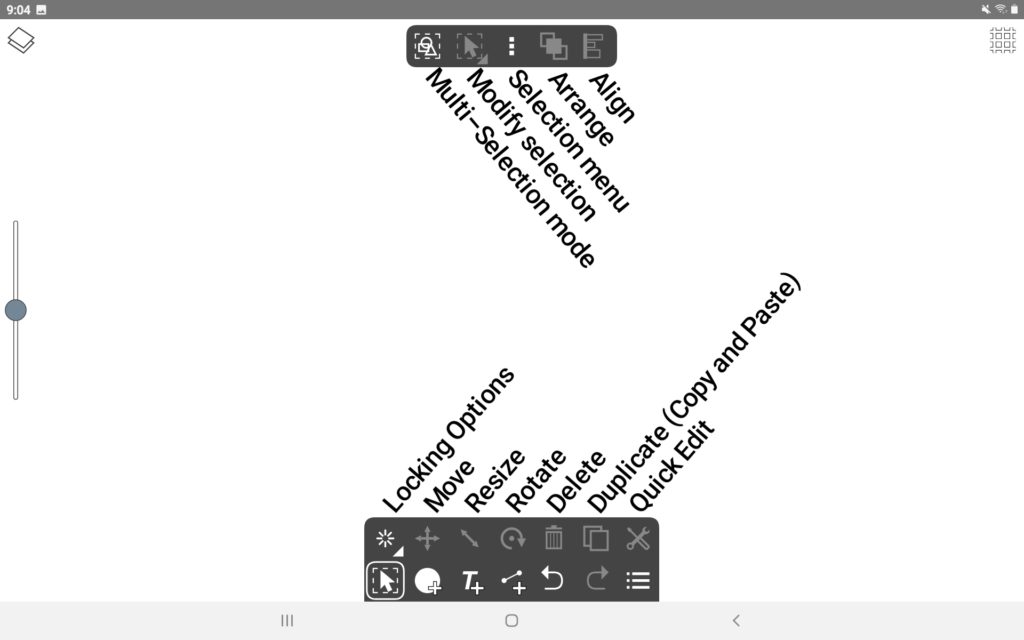
Selection Tool menu:
Locking Options – Move – Resize – Rotate – Trash – Duplicate (Copy and Paste) – Quick Edit
At the top with Selection Tool menu:
Multi-Selection Mode – Modify Selection – Selection Menu (Select All – Invert – by Fill / Stroke) – Arrange (bring to front, bring forwards, send to back, send backwards – horizontal flip – vertical flip) – Align (left, vertically, right, top, horizontally, bottom)
On the side with Selection Tool menu – Resize Mode: Grow from Centre / Center – Lock Aspect Ratio
On the side with Selection Tool menu – Rotation Tool: Drag selection box to move object – Rotation anchors
Multi-selection mode
If that box is highlighted “on” then you can pull the selection arrow around on the screen to select things, and the Modify Selection menu determines whether you can add to, take away from or replace the selection. In Ivy Draw you must drag the selection box all the way around an object, not just touch the edge of it.
Copying and Pasting, Kinda
It’s the Duplicate button. There isn’t a way, that I’m aware of, to copy something and paste it later, as if to a clipboard. But you can select an object and hit Duplicate (it looks like nothing happened, but it pasted the copy right on top) then pull the copy off to the side.
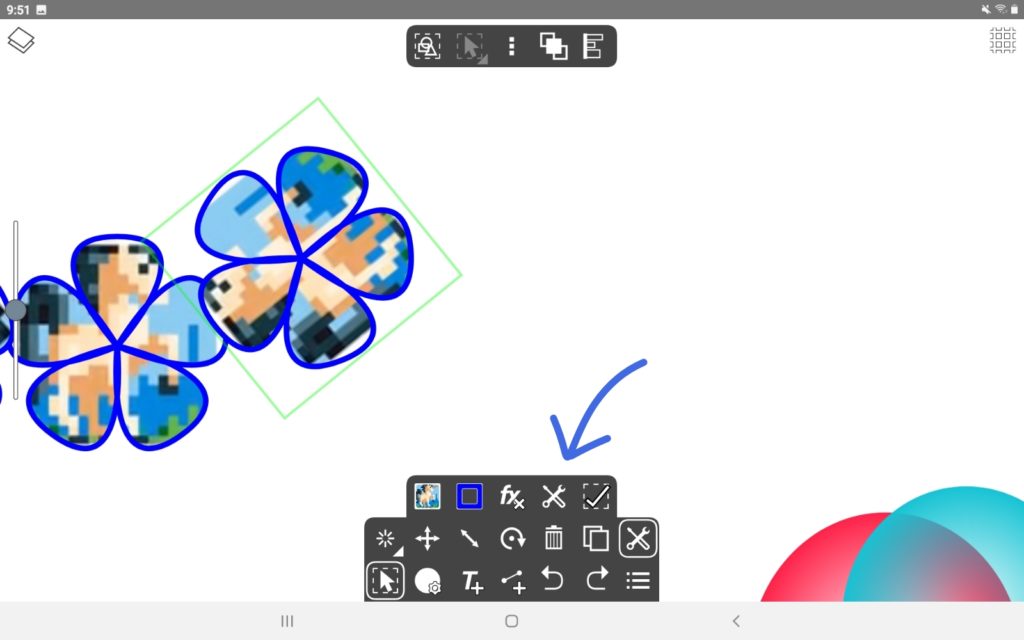
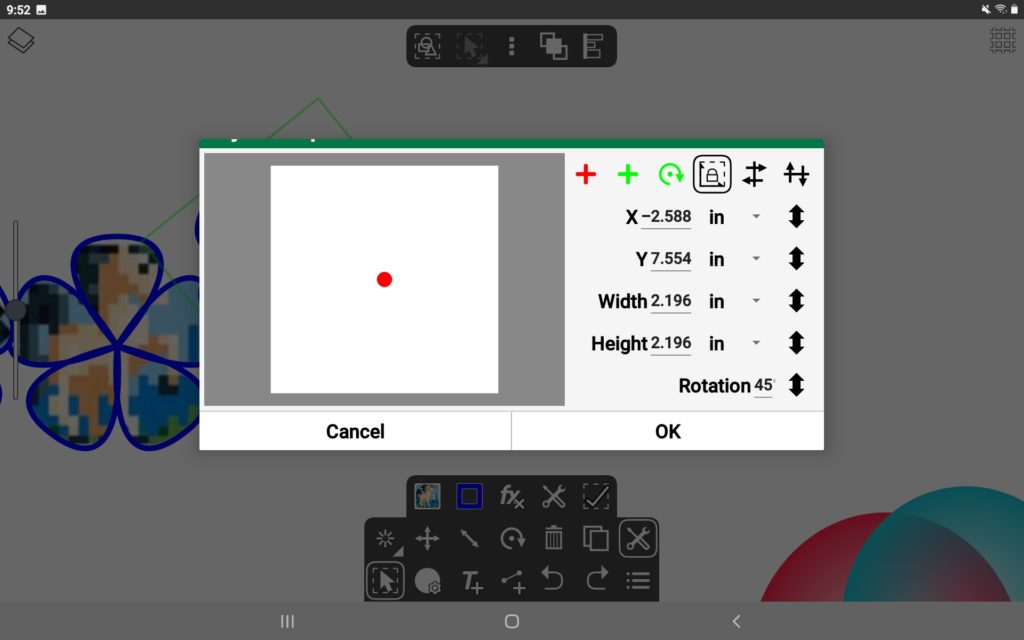
There are two ways to Rotate
One way is to click the Rotation tool and do it freehand. The other is to select the object with the Selection tool, then tap the Quick Edit Toolbar (the screwdriver and wrench) then Object Properties (same screwdriver and wrench icon on the row above) and enter a precise number into the Rotation box.
Shape Tool
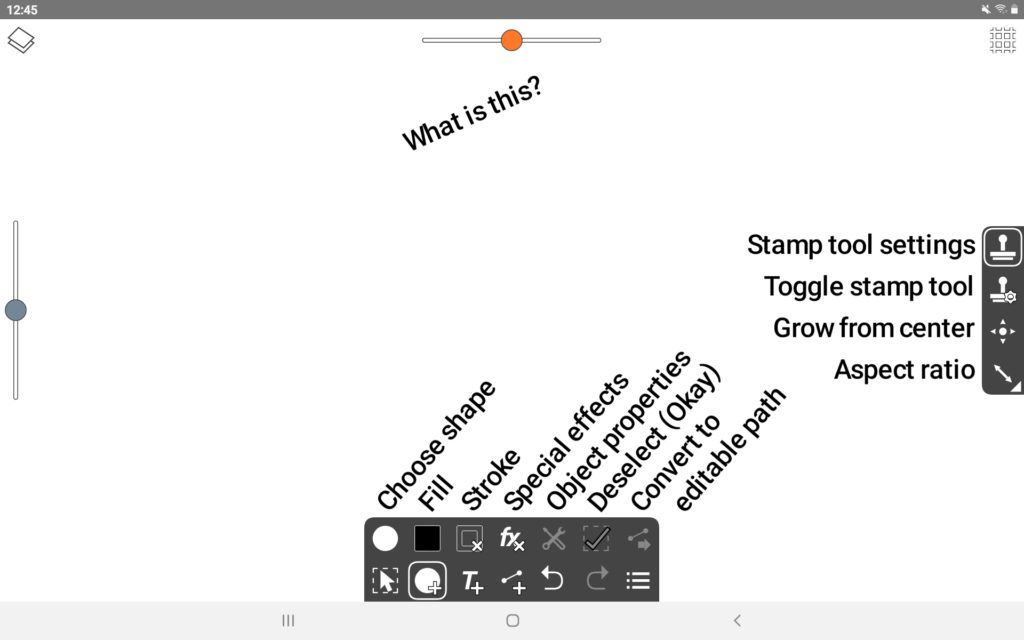
Shape Tool menu:
Choose shape – Fill – Stroke – Special Effects – Object Properties – Deselect (Enter / Okay / Confirm) – Convert to Editable Path
On the side with Shape Tool menu: Toggle Stamp Tool – Stamp Tool Settings – Grow from Centre / Center – Aspect Ratio
Stamp Tool Settings
The Stamp Tool makes confetti across the screen:
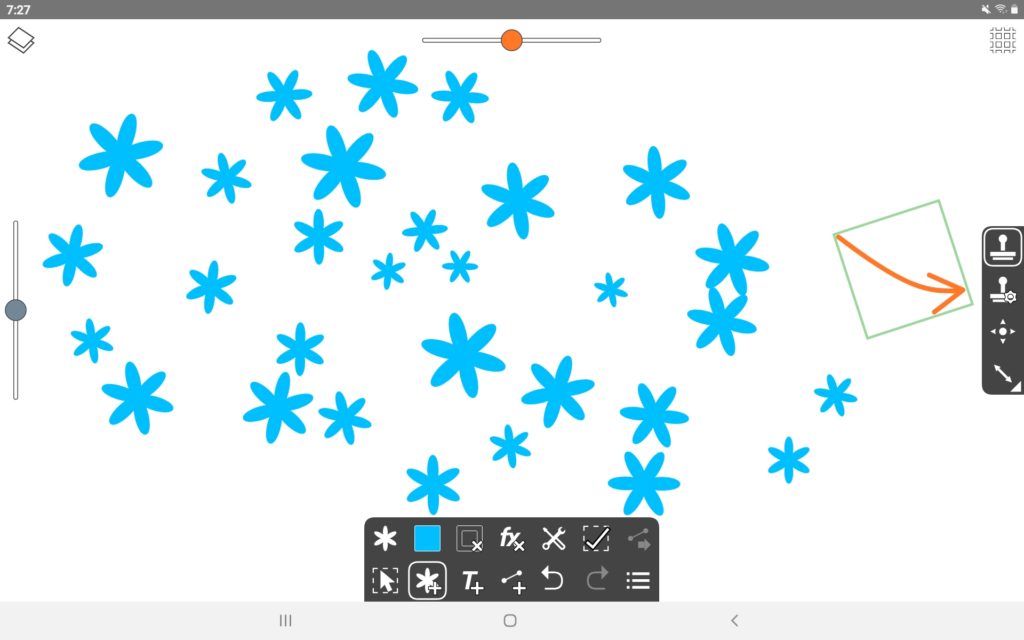
** What’s that top slider? It makes an orange box, that I don’t know what it does yet. We’ll have to figure that out.
Text Tool
Wasn’t that clever the way I did text on an angle for my screen overview? It was waaay less easy than in Illustrator, but we need to stop comparing with Illustrator right now. Illustrator doesn’t run on tablets and doesn’t cost six bucks.
I made that text using spaces, then went to Selection – Rotate and turned the whole object 45 degrees.
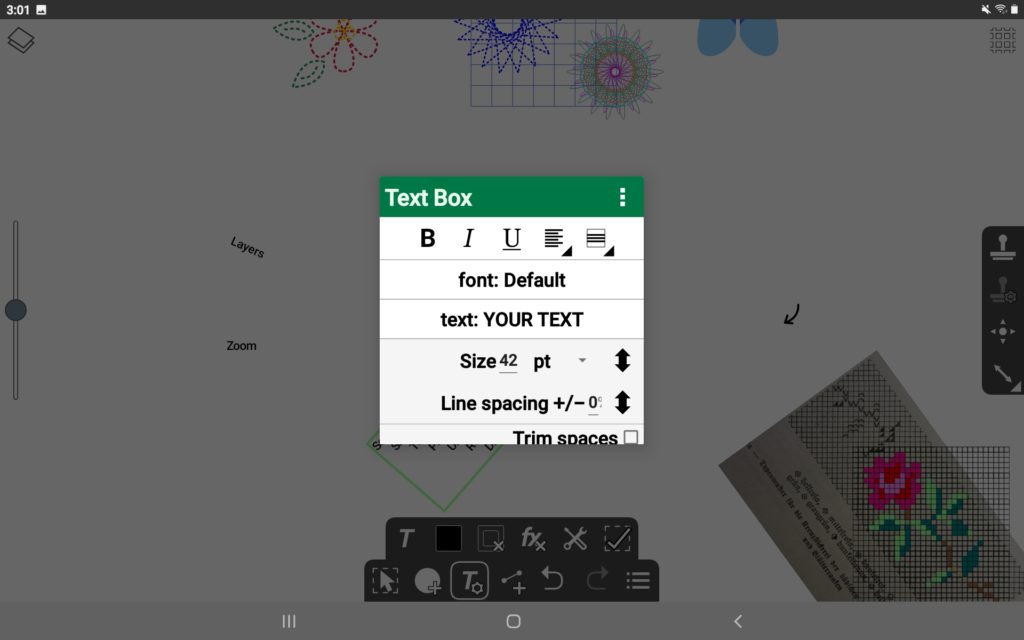
Text Tool menu:
Choose Text – Fill – Stroke – Special Effect – Object Properties – Deselect
On the side with Text Tool menu: Toggle Stamp Tool – Stamp Tool Settings – Grow from Centre / Center – Aspect Ratio
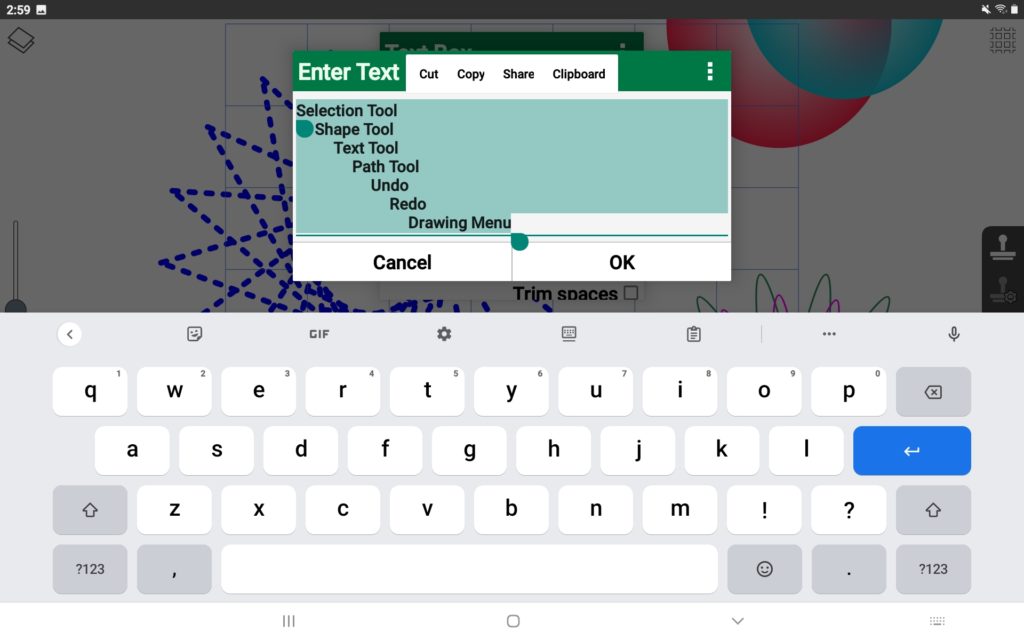
Stamp Tool
See just above, with the blue flowers– this does the same thing except makes confetti out of text!
Editing text
For a while I couldn’t figure out how to select and edit text again after it had been entered. It is possible! Start not with the Text tool, but the Selection arrow. Select the text THEN click the Text tool, then the capital T (tooltip calls it “Choose Text”).
Text can even be cut, copied and pasted from another source.
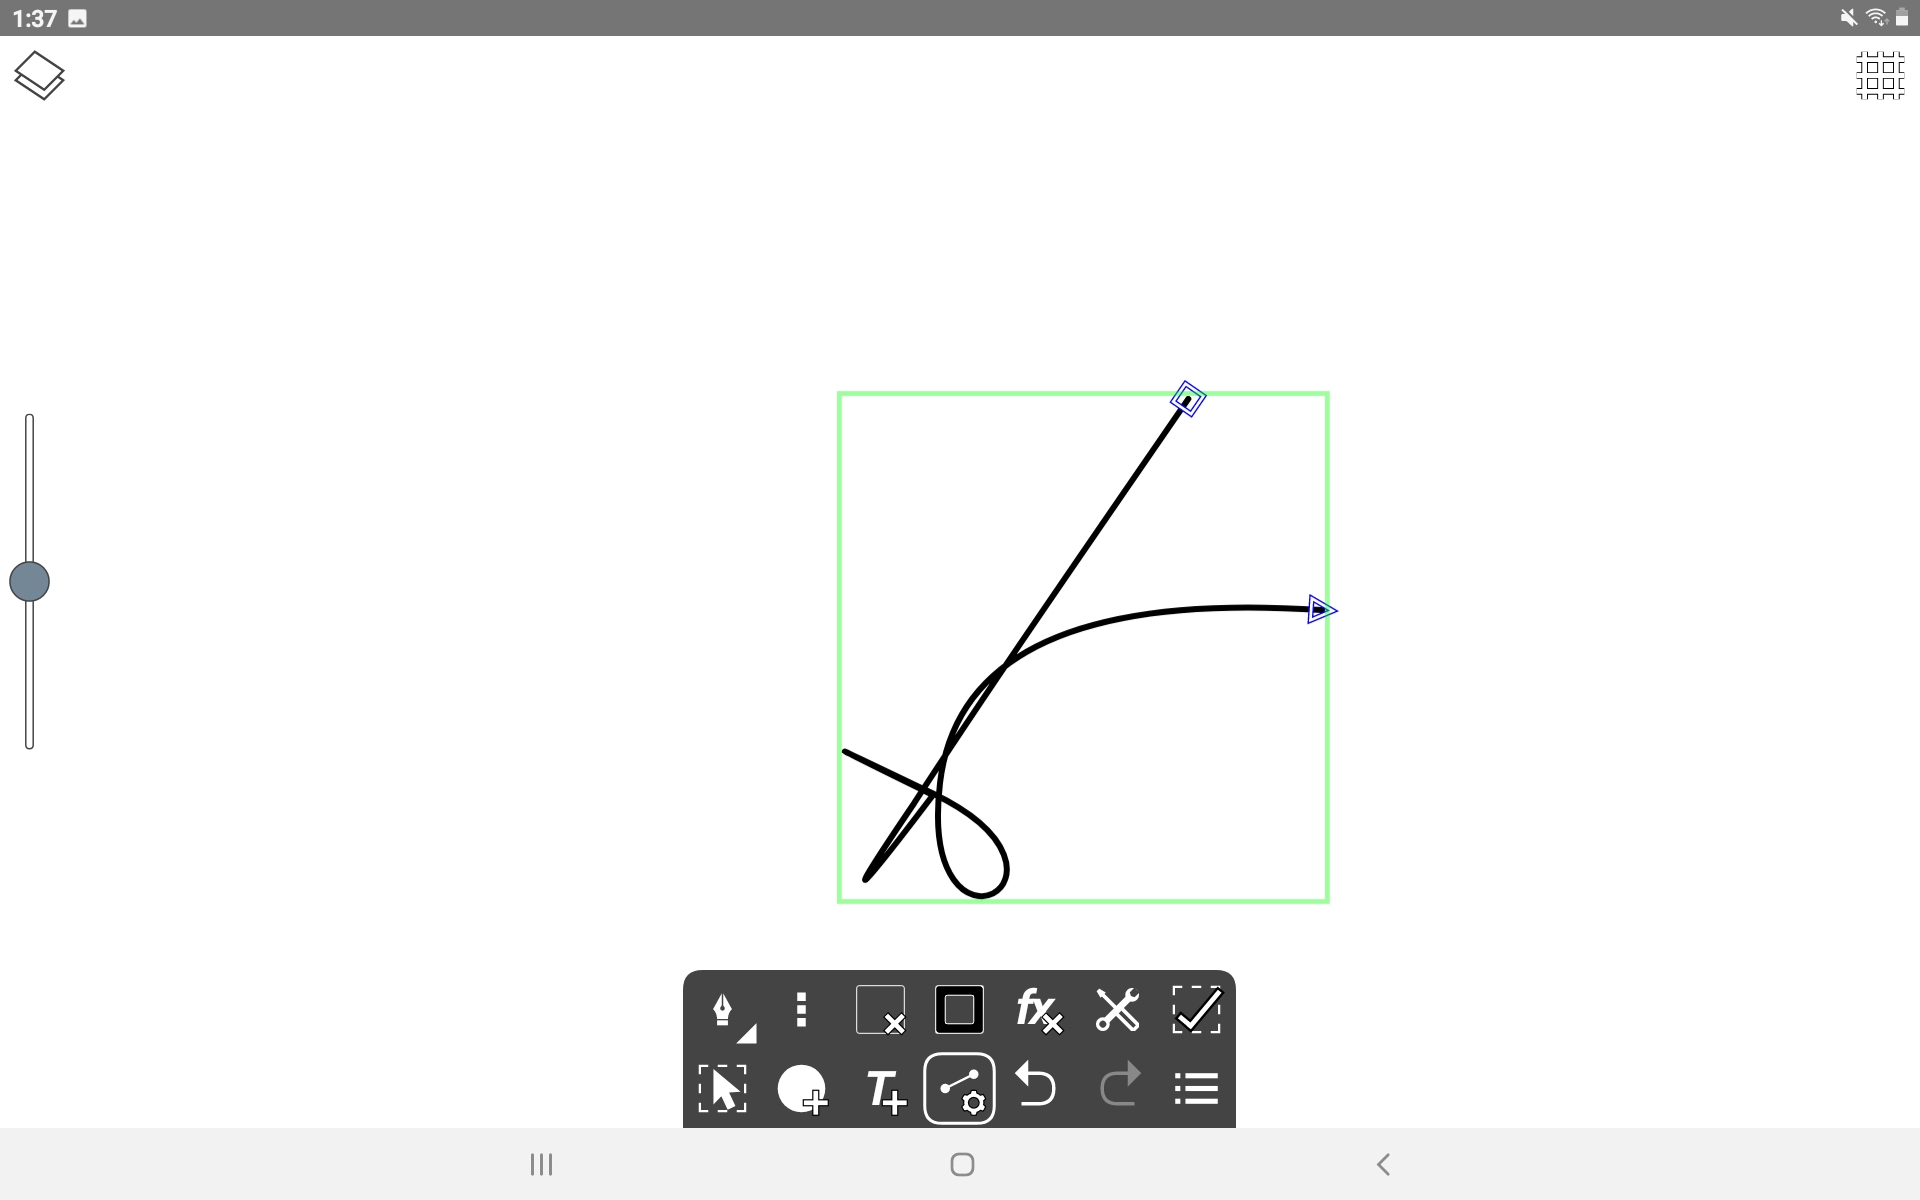
Path Tool
Here’s the Pen and Path tools, the real vector shape editing, the fun stuff!
Path Tool menu overview
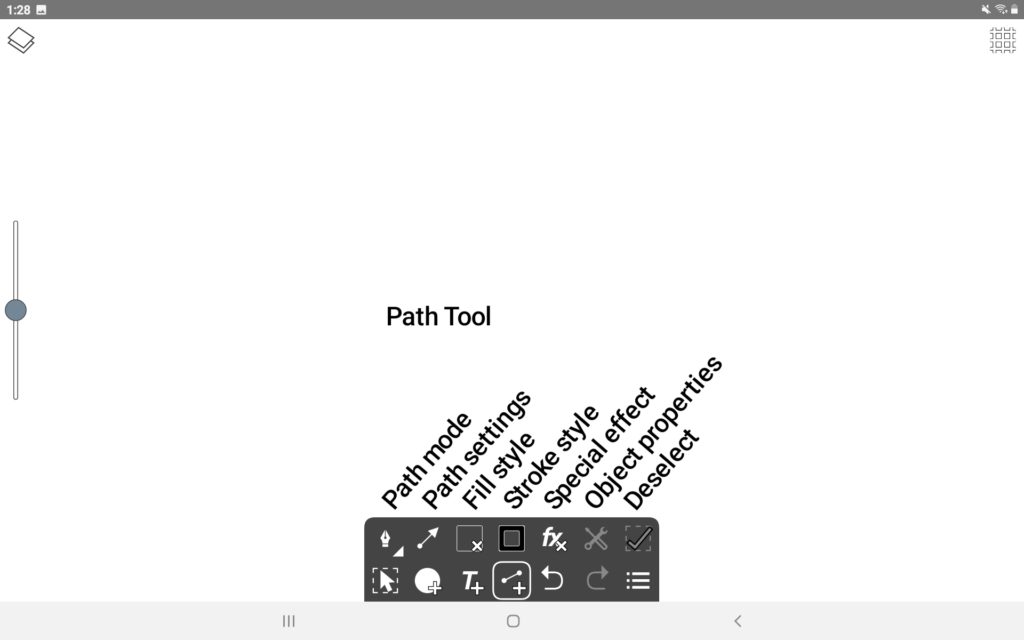
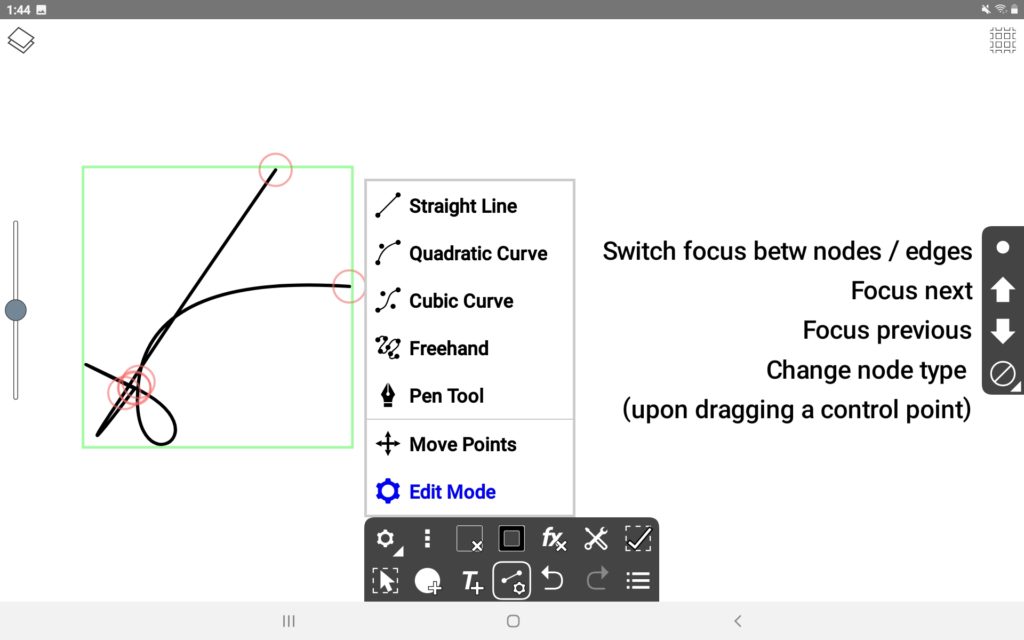
Path Tool menu:
Path mode – Path settings – Fill – Stroke – Special Effect – Object properties – Deselect (Okay, Confirm)
Path Mode submenu: Straight Line – Quadratic Curve – Cubic Curve – Freehand – Pen Tool – Move Points – Edit Mode
Path settings dialog: Dotted / dashed line
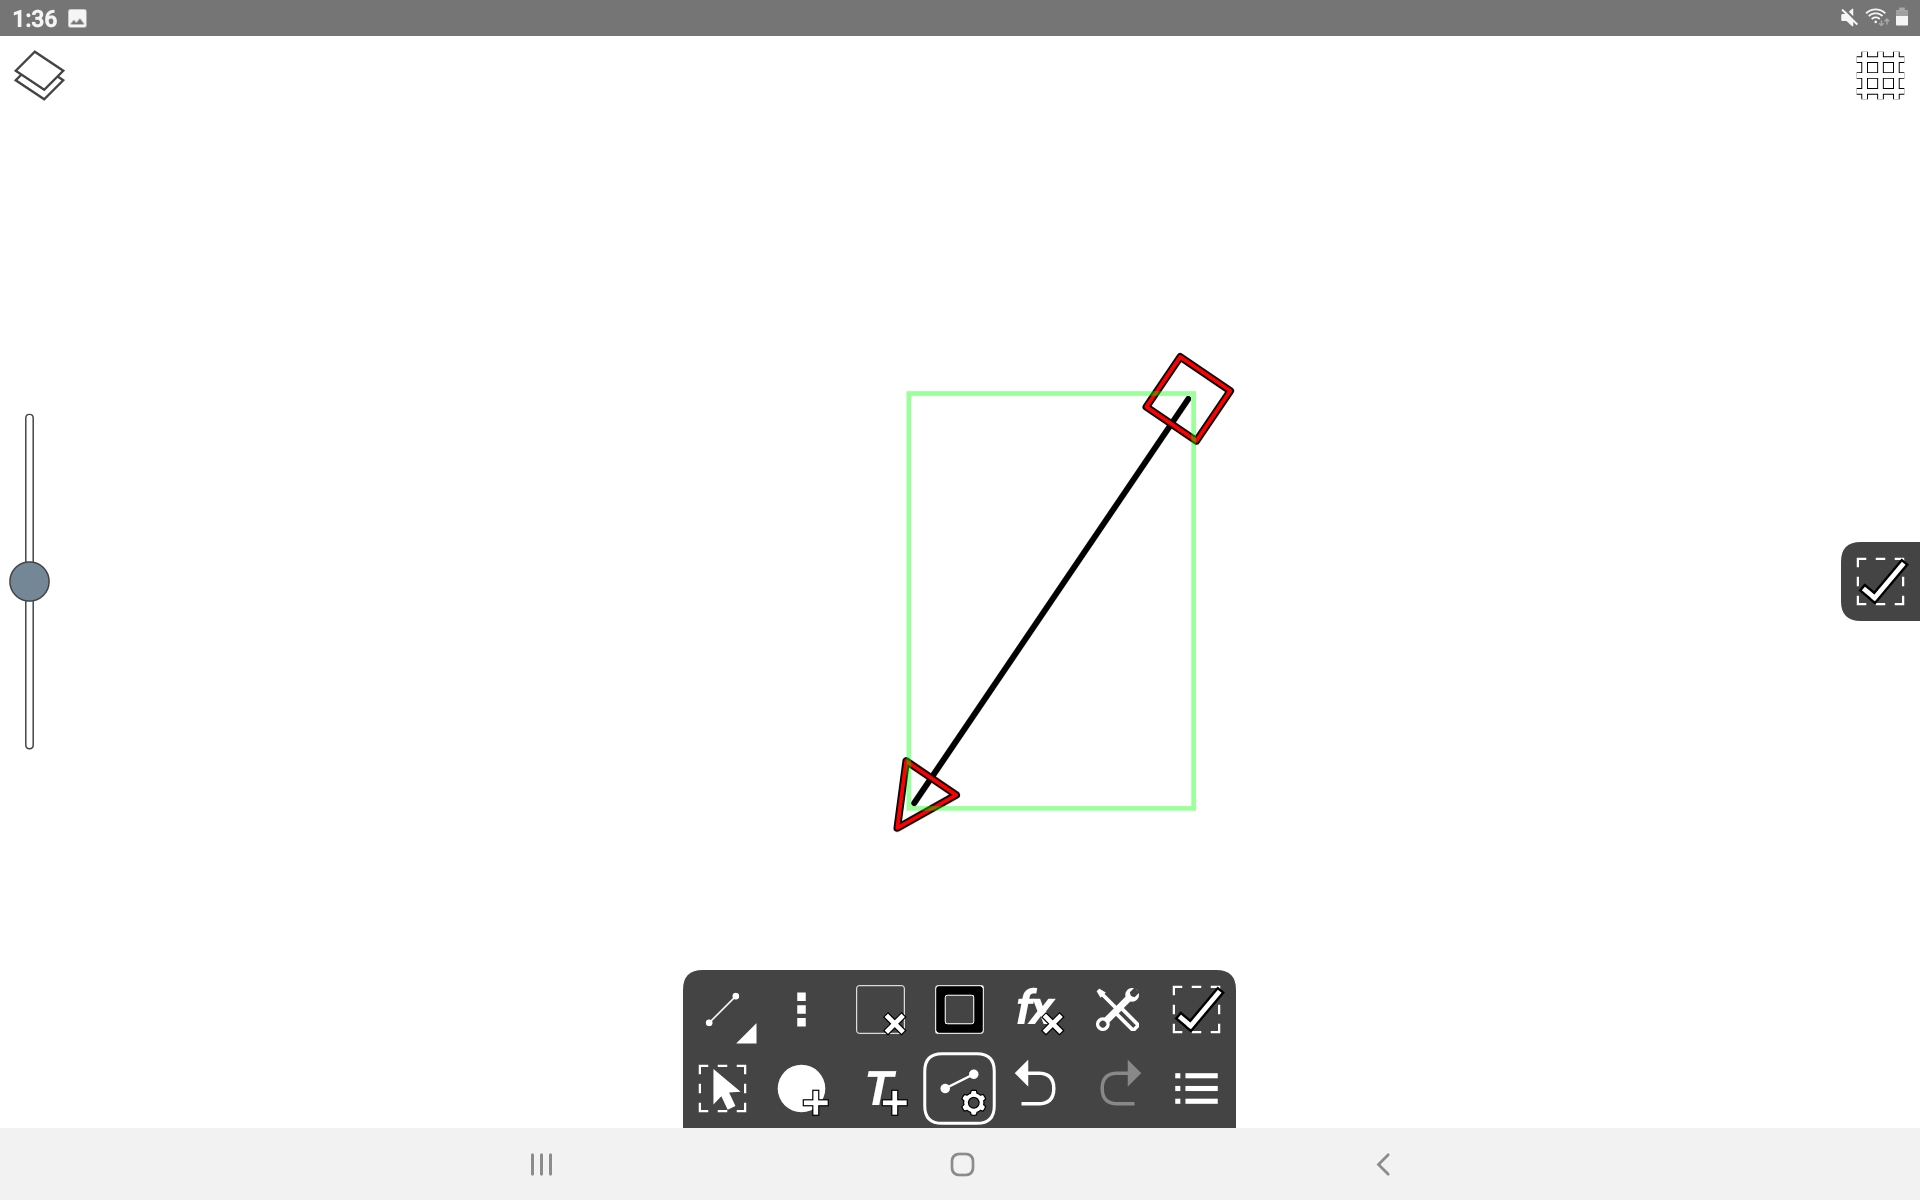
YES, Ivy Draw can join an existing line with the Pen tool
People were complaining in reviews because it can’t, and at first I thought they were right.
Make a line, then select the line, tap Path Tool, then Path Mode – Pen Tool and tap one of the large ends of the shape. It joins!
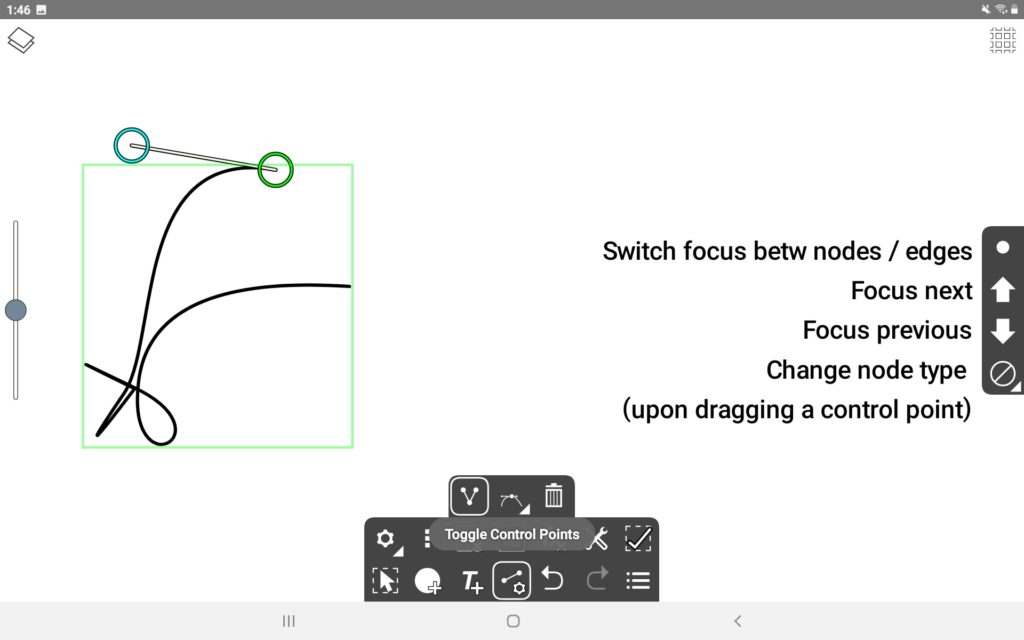
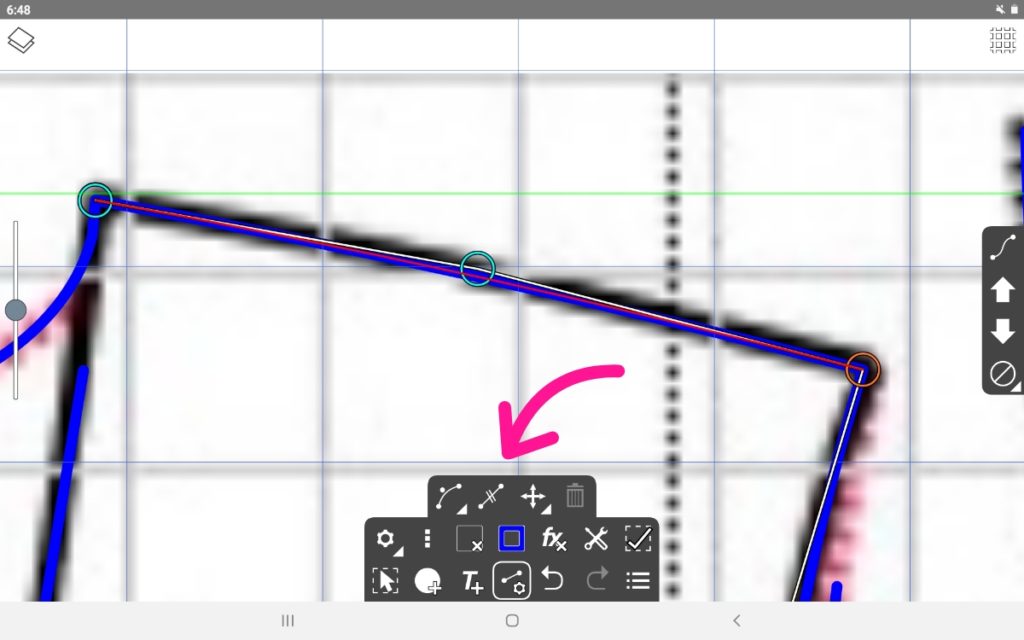
Editing nodes
In Edit Mode you get the following menu. I’ve been having a lot of fun with it.
You can run along the nodes and Toggle Control Points. Also that first small, solid round dot, Switch Focus Between Nodes and Edges, gives you the path between the nodes to play with.
Adding a node to a path
Under Path Tool – Edit Mode, use the “Switch Focus” dot on the right to focus on the line between the two points, then tap “Divide in Two”. This adds a new node in the middle of the line. I’m not sure if that’s the right way to do it, but “If it’s stupid but works, it isn’t stupid.”
Removing a node from a path
Select the node and tap the garbage can 🙂
Drawing Menu
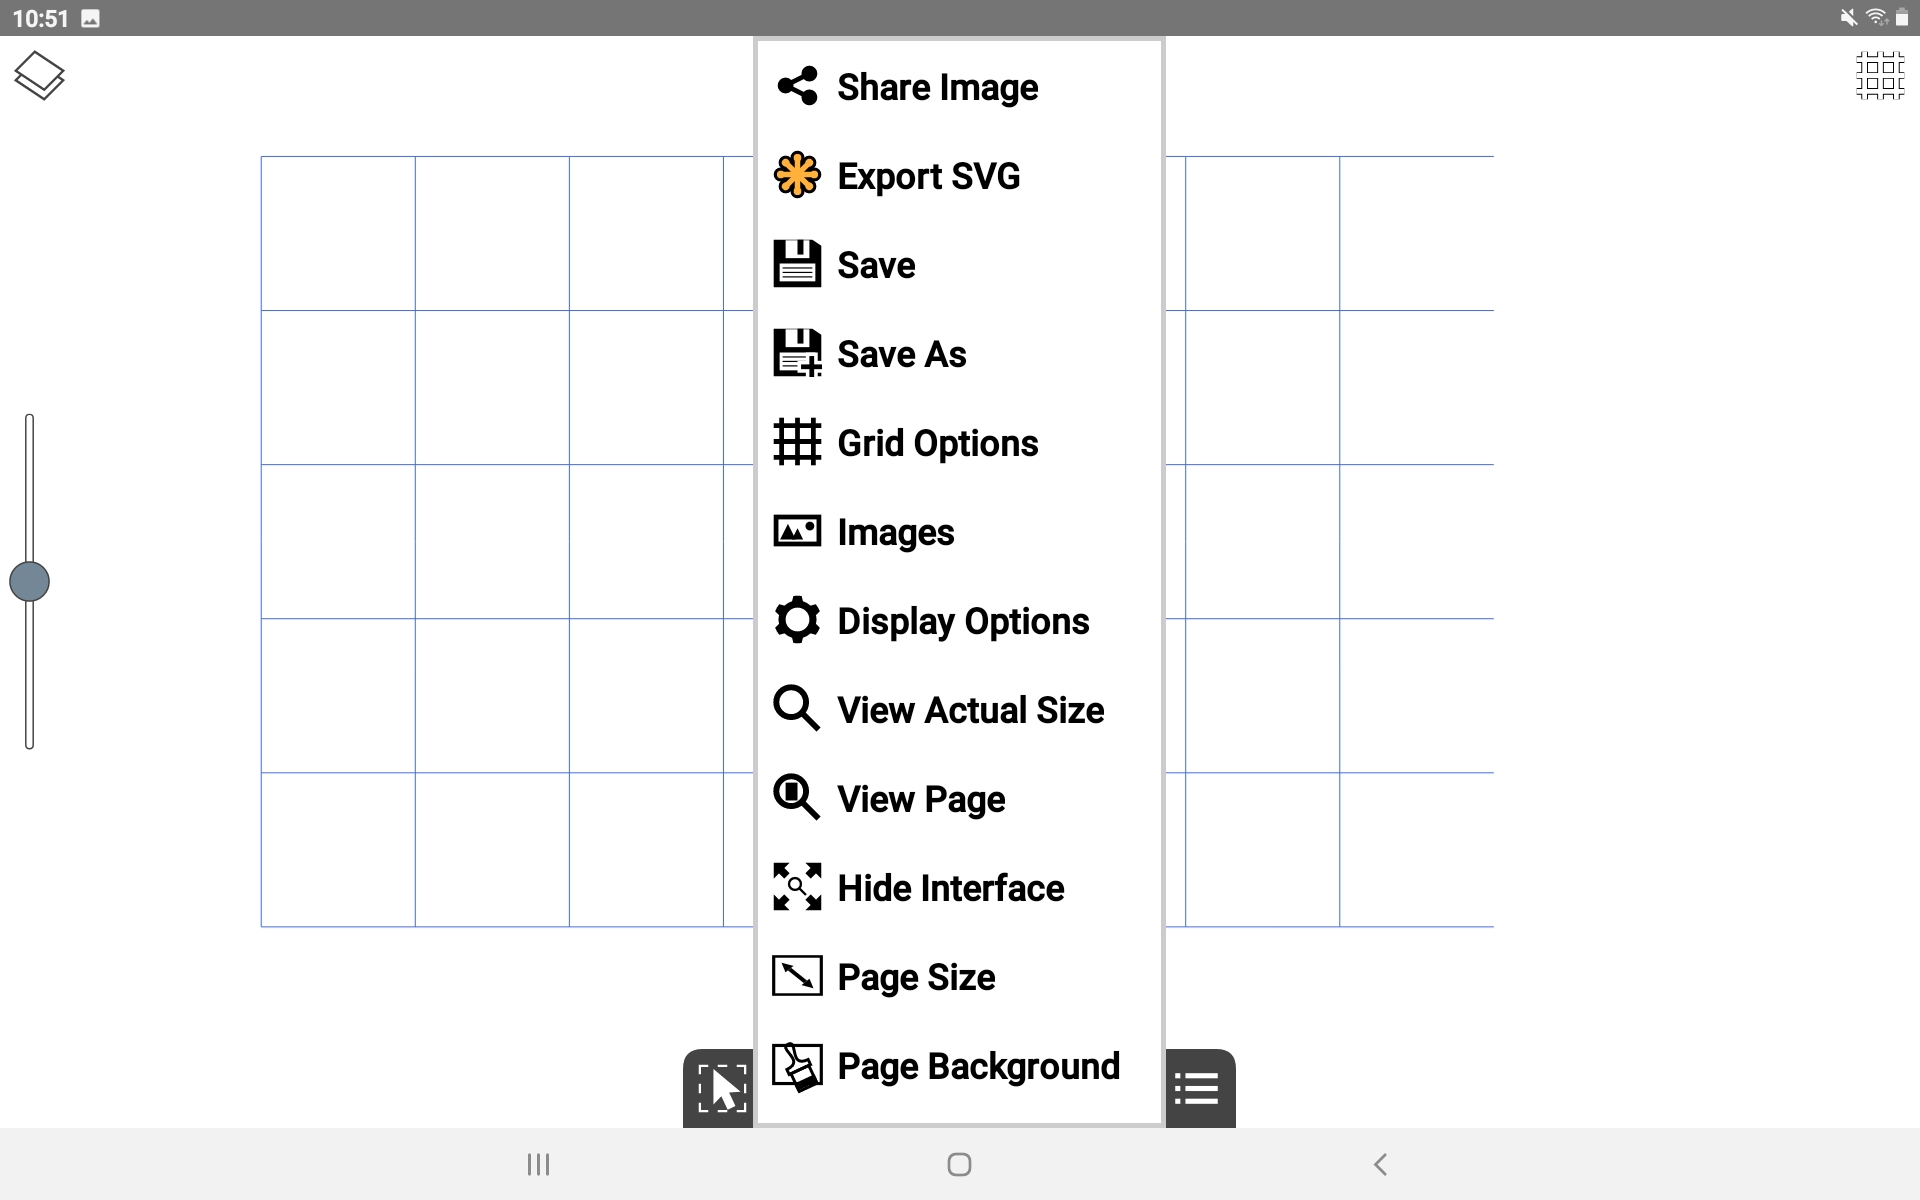
Drawing Menu:
Share Image (PNG or JPG) – Export SVG – Save – Save As – Grid Options (same as box in upper right corner) – Images (import picture into the drawing) – Display Options (background color) – View Actual Size – View Page – Hide Interface – Page Size (document layout) – Page Background
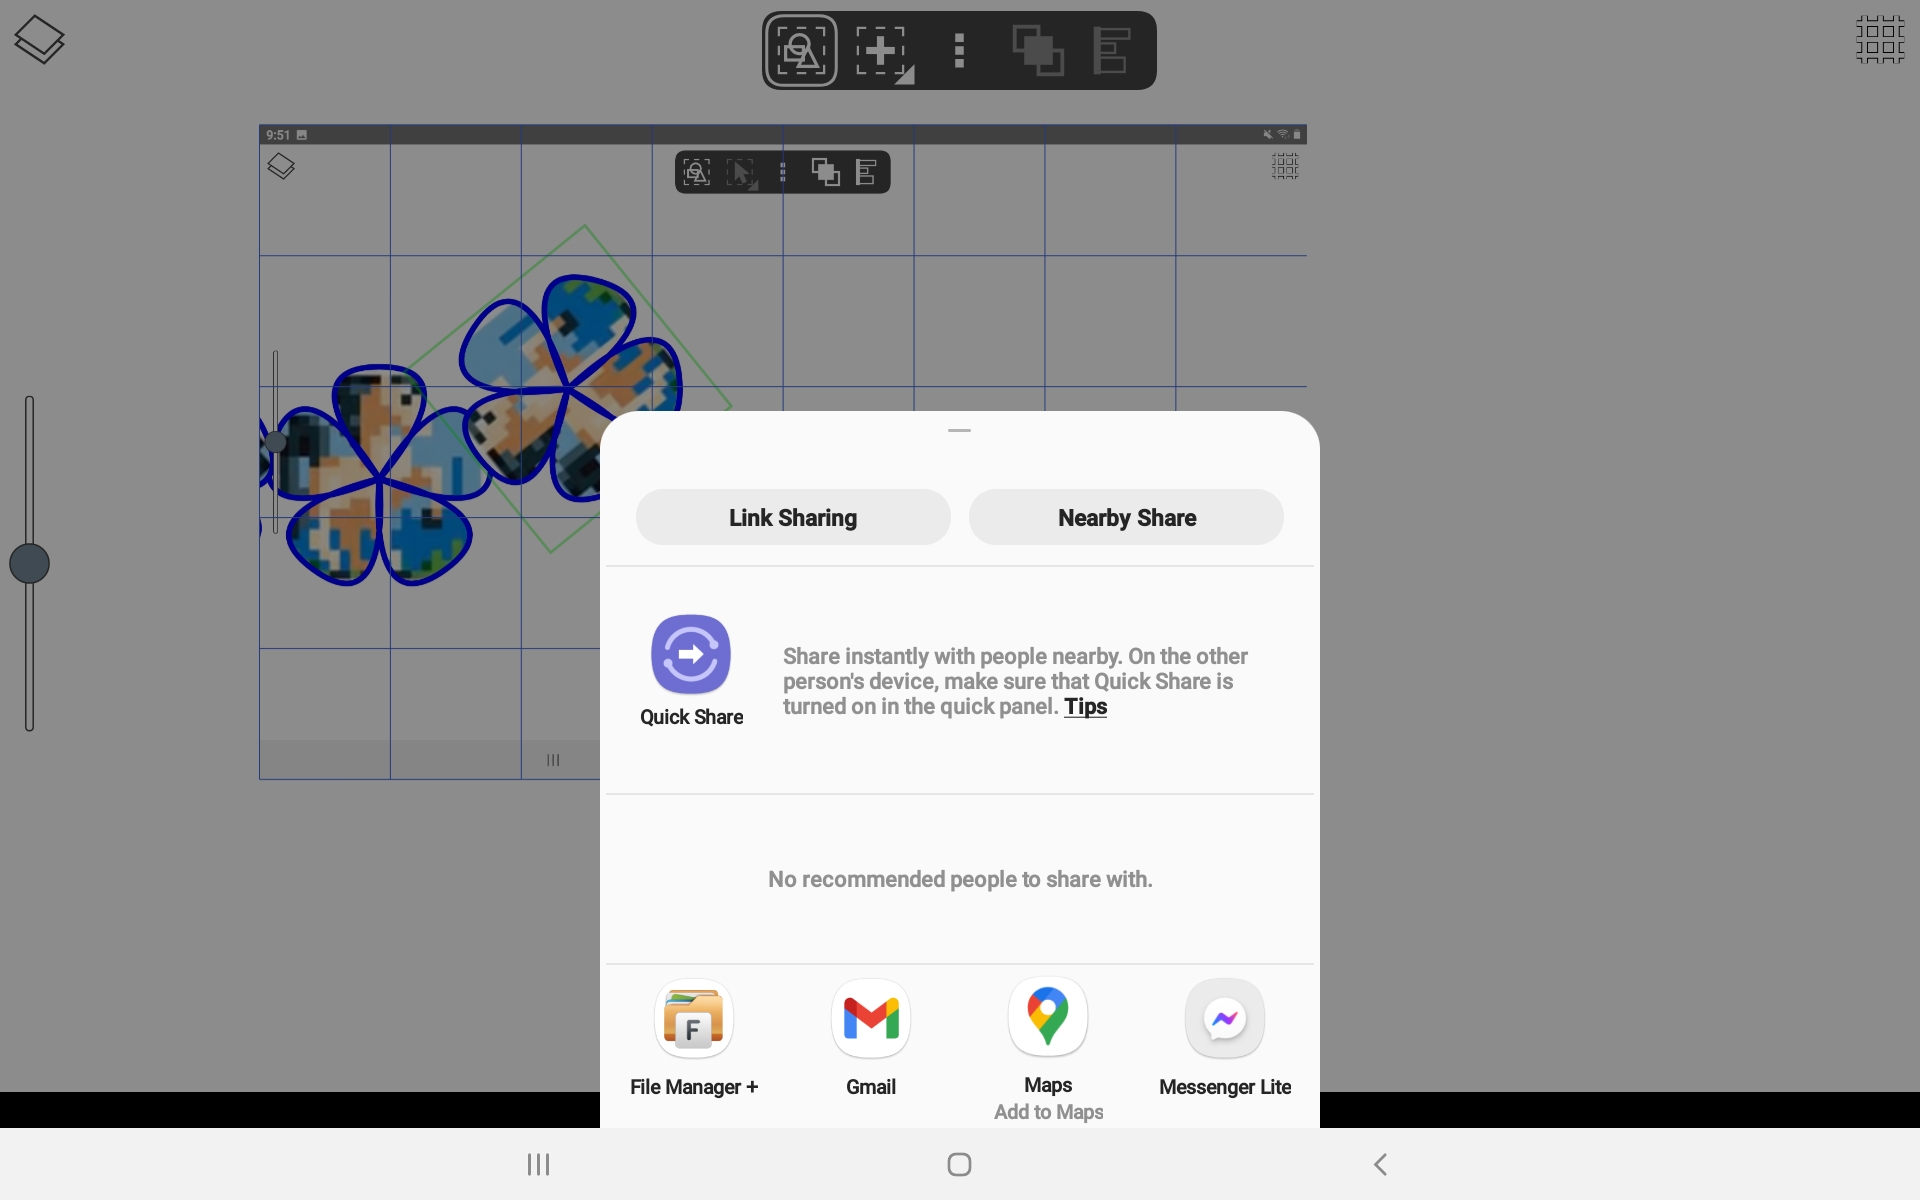
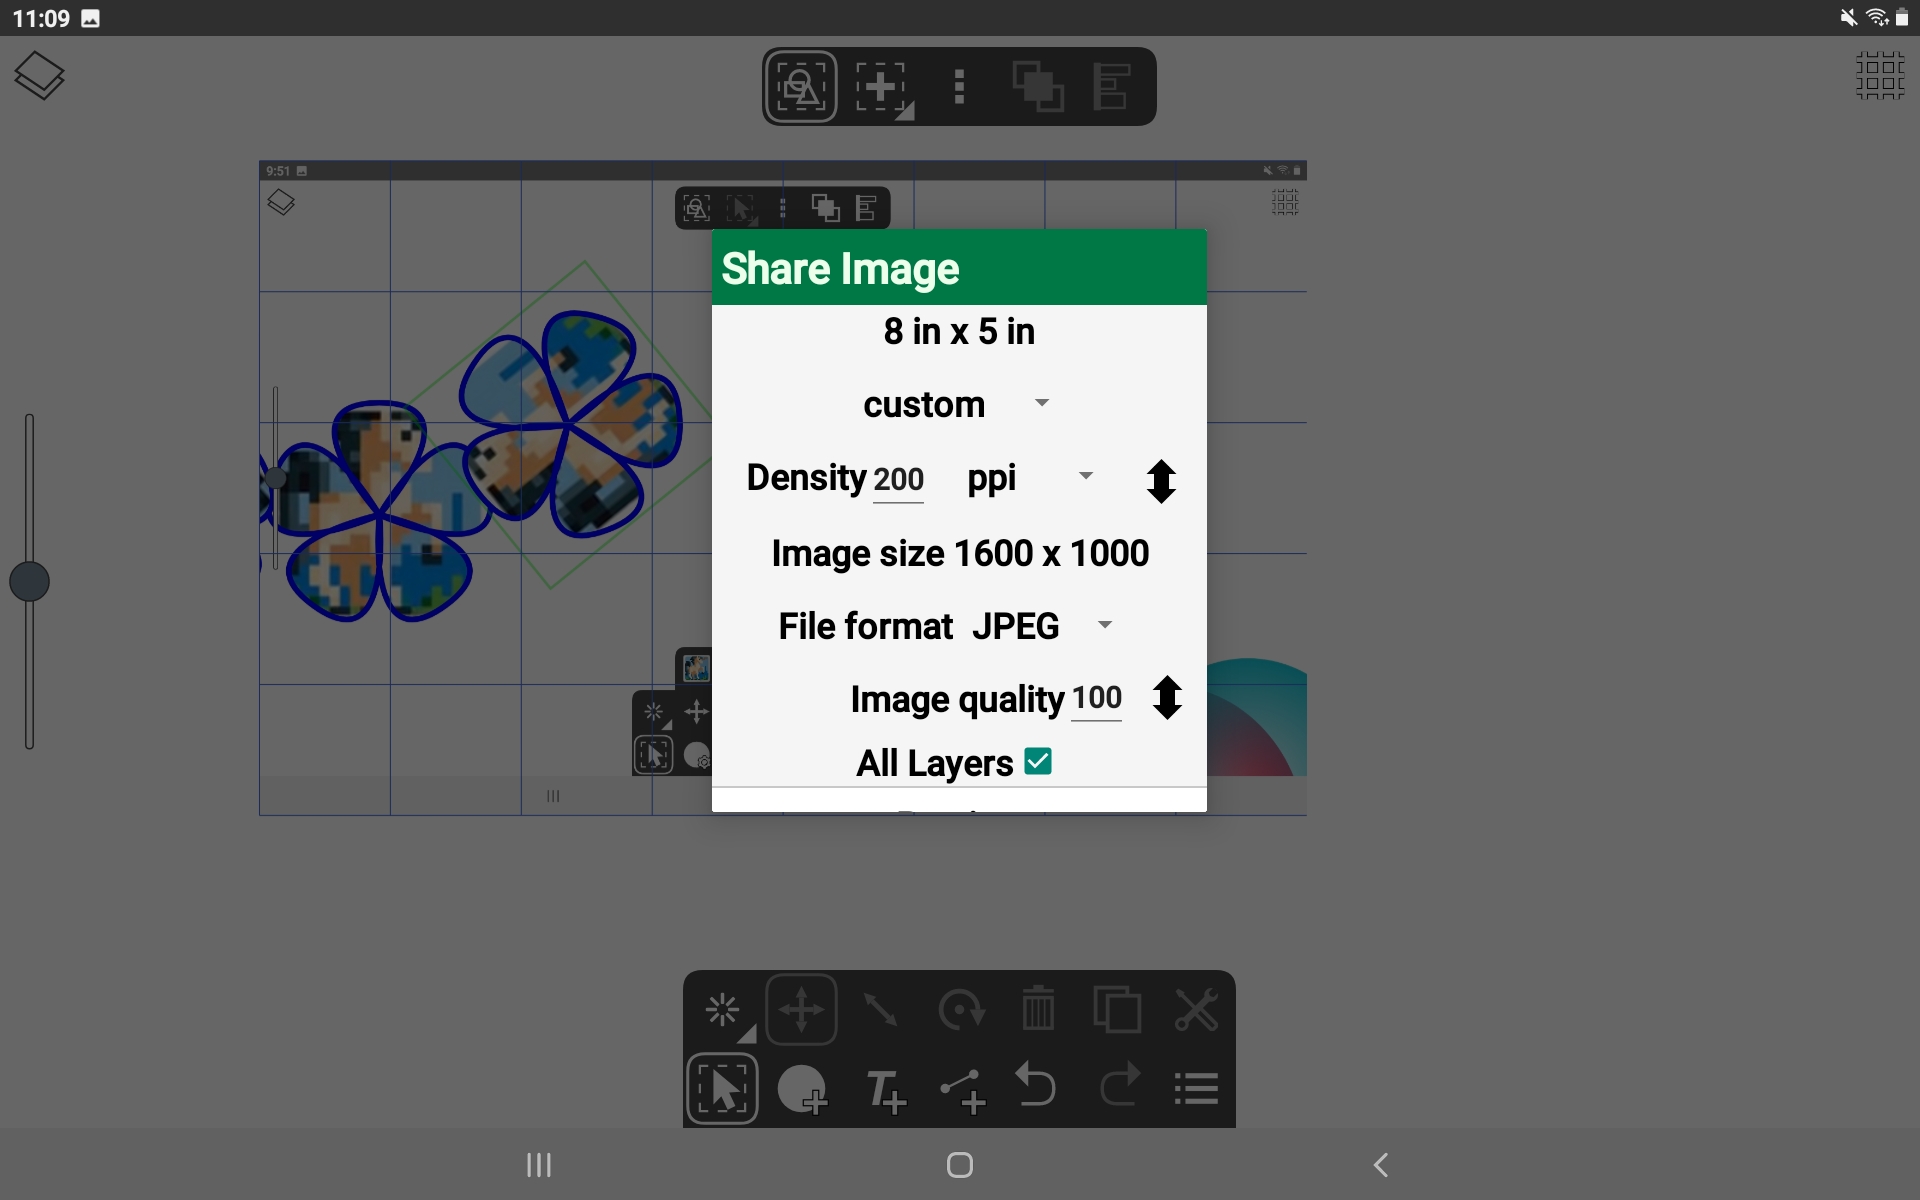
Export artwork as PNG or JPG
To export as JPG we go to the Drawing menu and choose the first option, Share. I tried various things and got various results, but exporting to a third party file manager, File Manager Plus, saved nicely as a jpg. Emailing it to yourself works too.
I’ve exported reasonably huge jpgs without any problems.
Projects / Applications
My uses are all about crafts 🙂
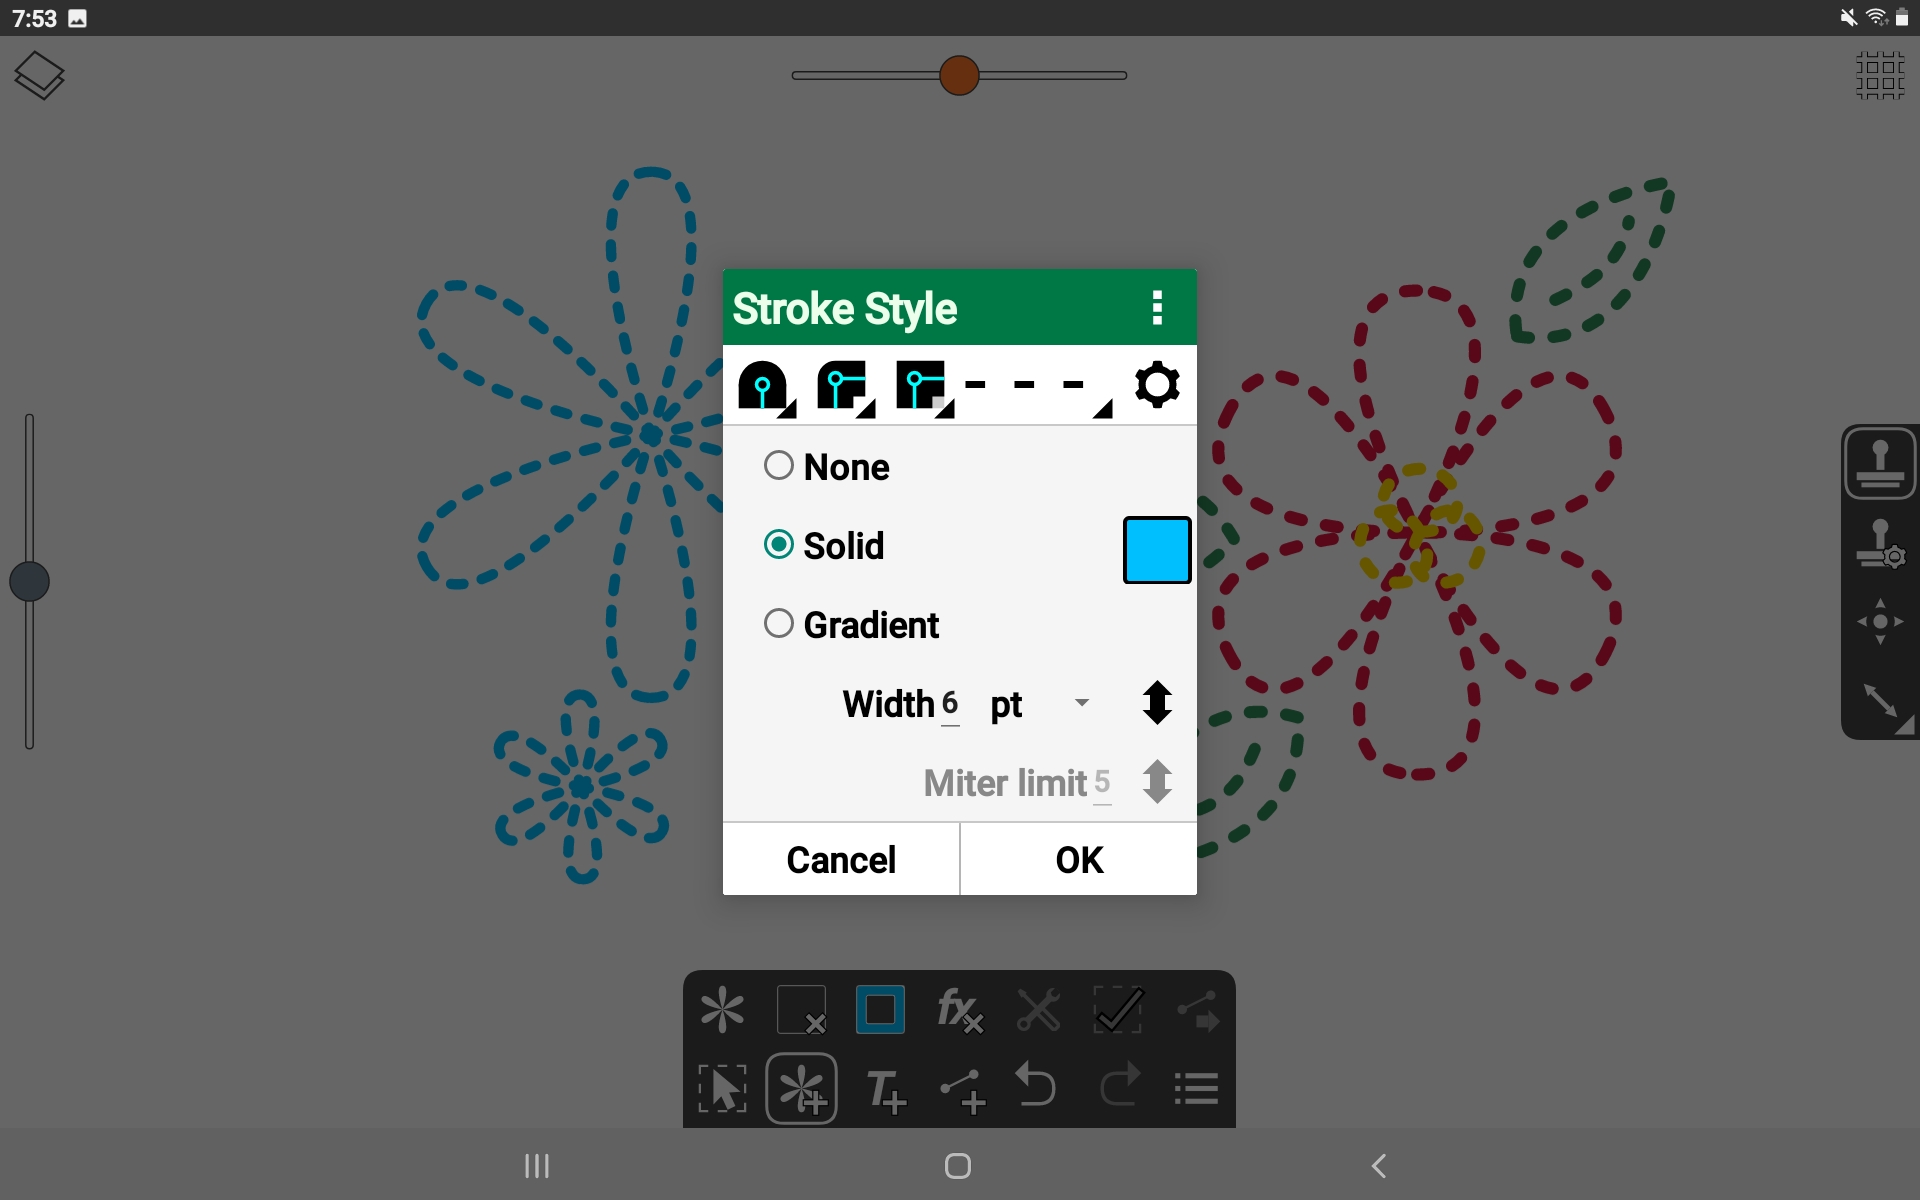
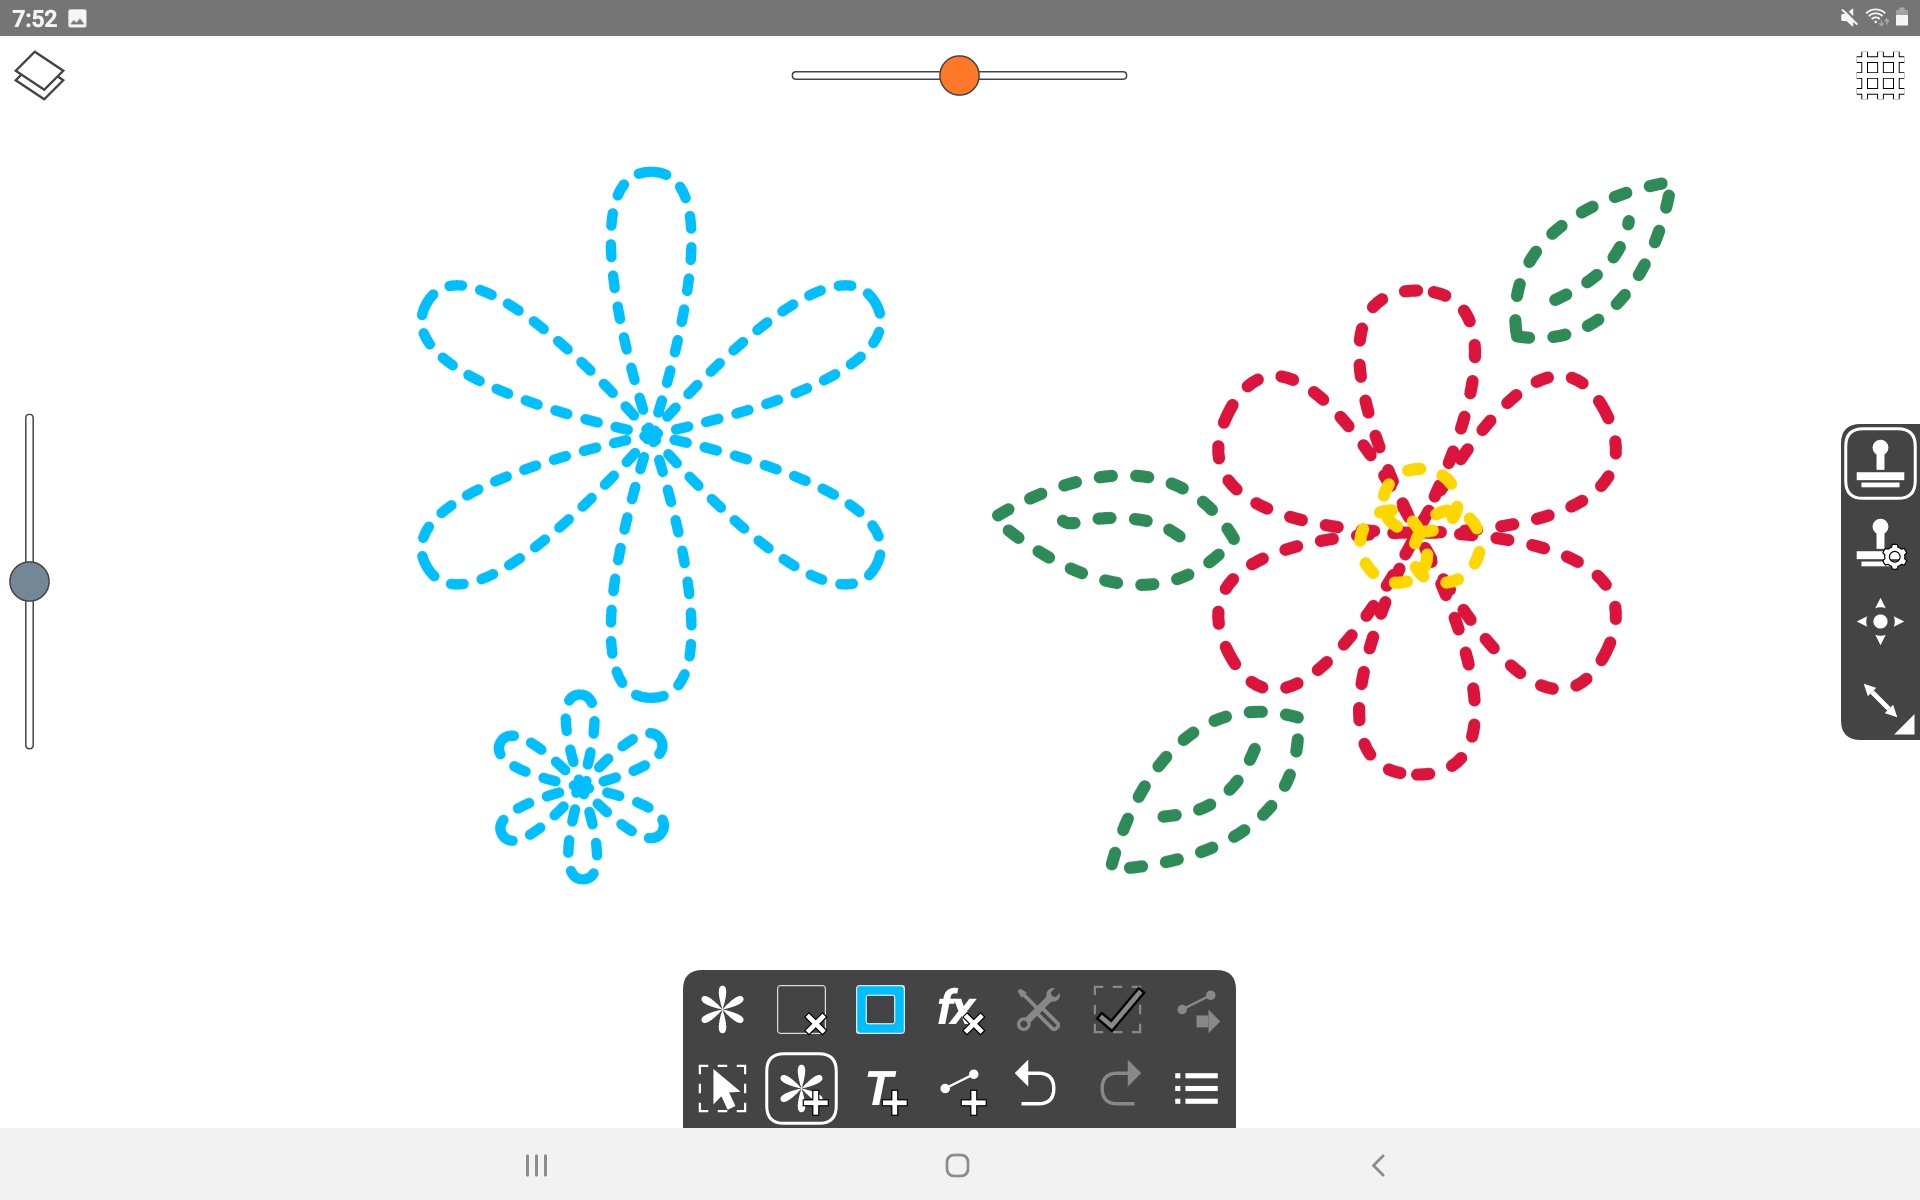
Stroke Dashes to illustrate embroidery ideas
I’m happy making some shapes with the Shape tool or the Pen tool, then change the Stroke style to dashed line. It looks enough like embroidery stitch to help me visualize my design before working it. See the Stroke Dashes dropdown box? Next to it is a gear where you’ll find more fine tuning for how the dash pattern looks.
After setting the dash pattern you can drag the object’s resize handles to make the dashes line up most pleasantly.
Here’s a way to transfer printable sewing patterns without a printer
Designing colorful cross stitch or needlepoint pattern grids
Coming next!

But can it make Spirographs?

Did you try of figure out how to do an offset of an object? I'm wondering if it can be done.
Would you clarify what you mean by offset? Maybe an example?
[…] panel, so I used the lovely Ivy Draw, cool vector editor for Android that I’ve talked about here, to make the pattern and print as a […]