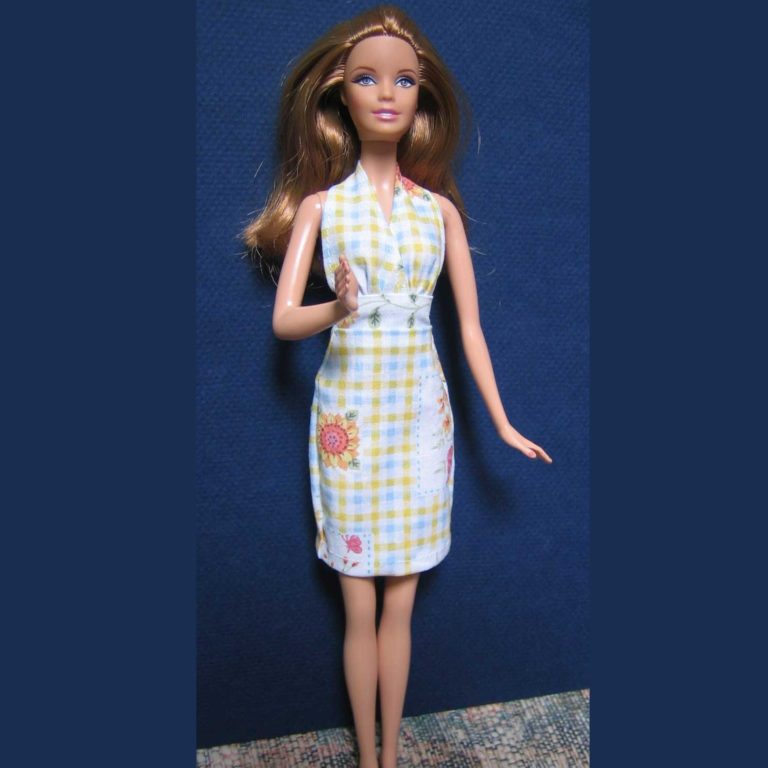
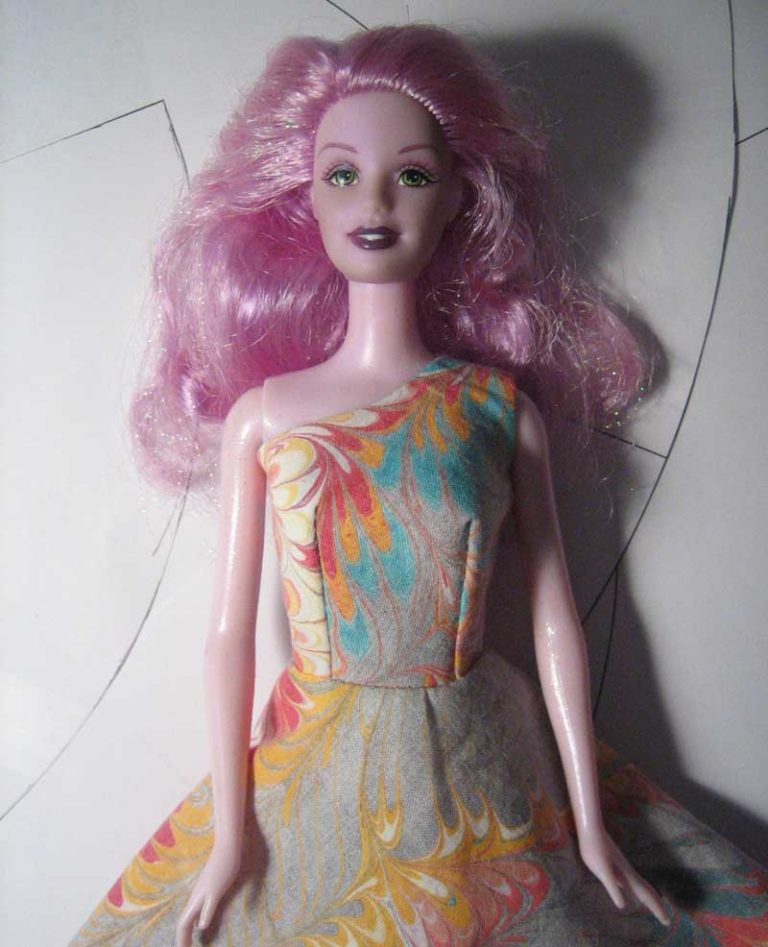
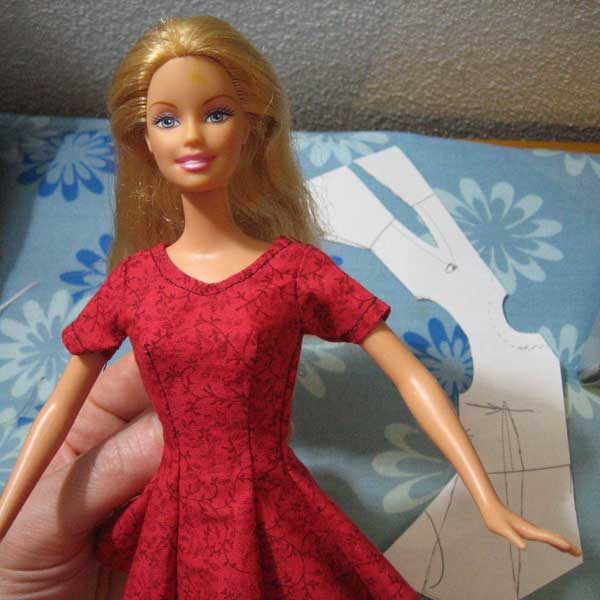
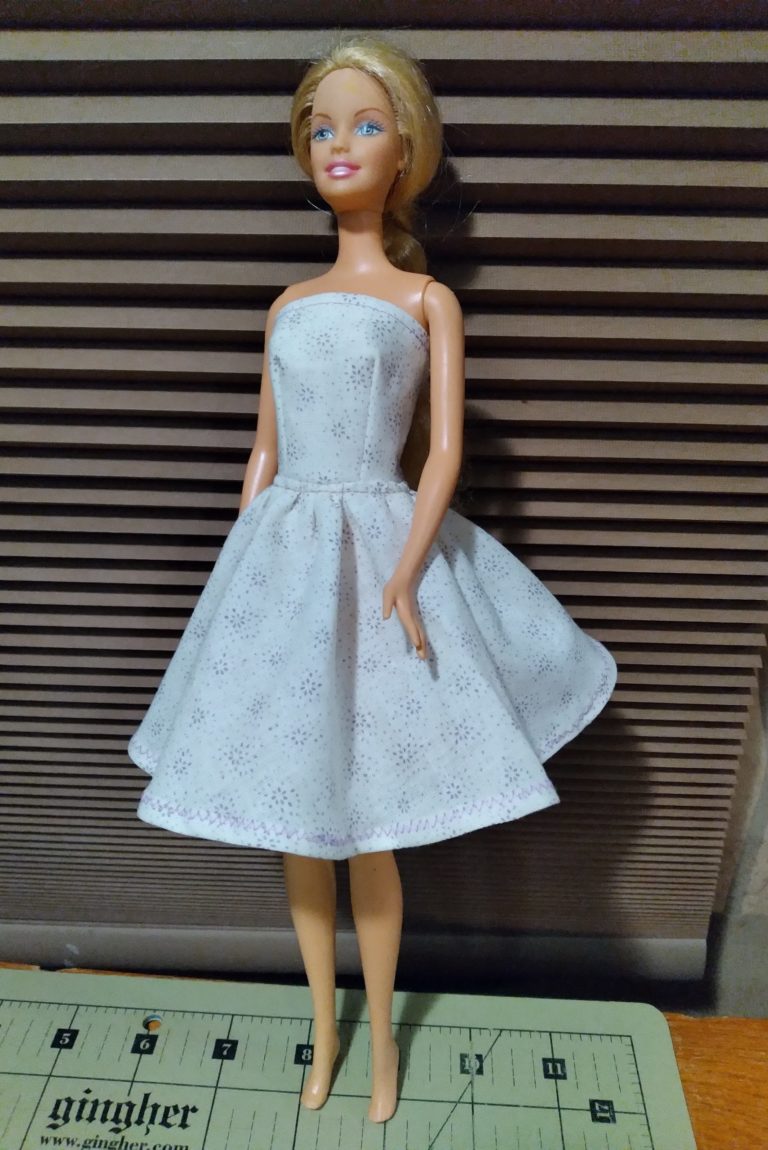
Category: 11.5 inch Barbies

  • Barbie One Size Fits All Sewing Patterns

    Barbie One Size Fits All Sewing Patterns

    I see a real need for this. It’s a simple, easy dress to fit any Barbie shape. We have a pile of naked Barbies! They need clothes quick, and they should be able to share. Let’s go.

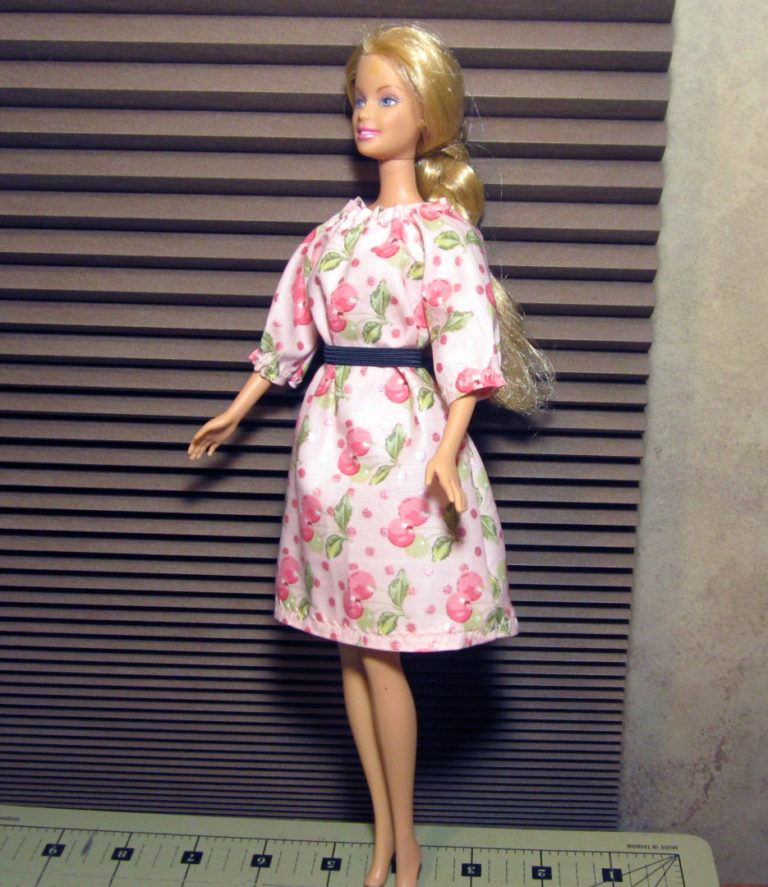
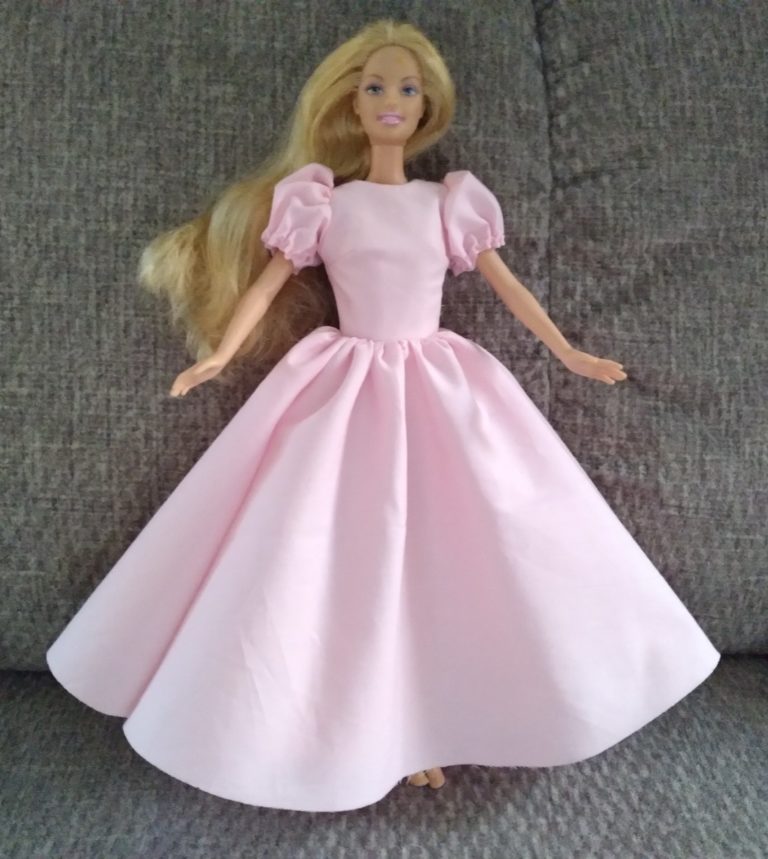
    Here’s a pull-on shift dress, about as basic as it can be. The other is a basic peasant dress with Velcro closure. Both have only one pattern piece.

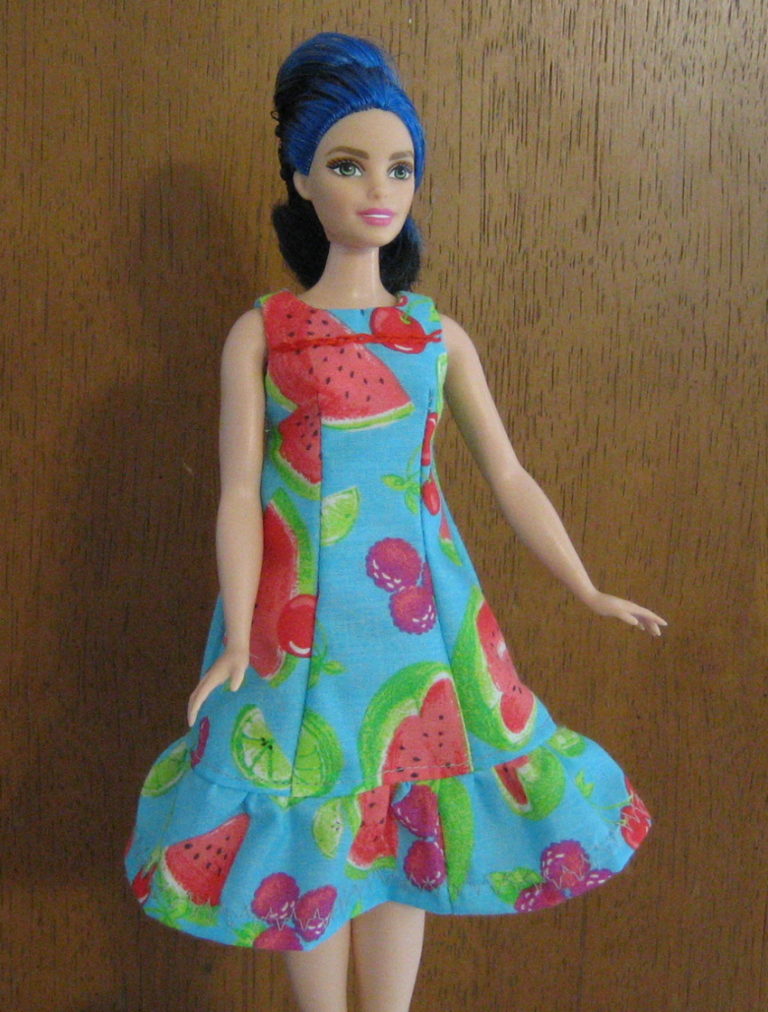
    I’ve tested with Bellybutton, Original/Vintage and Curvy. I don’t own a Disney Princesses doll to test. Curvy and Lammily are similar dimensions, and the shift pulls on over Curvy’s hips exactly right, so I bet it would fit Lammily, and the peasant dress definitely would. I’m confident it would fit Fashionistas Tall and Petite. I also have a 10″ slim fashion model doll called Zuru Glitzees Princess with a tiny 2.5″ waist. It’s a bit generous on her but fits well enough that it’s acceptable to play with, and that’s the point: sharing, and playing dress up together.

    NOTE scroll down for Swing Dress too!

    The shift dress doesn’t even need any fastener. It takes literally a few minutes to make on a sewing machine.

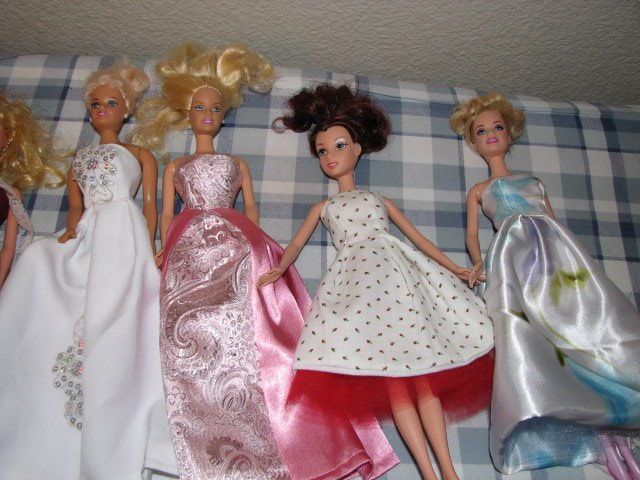
    It can be a gown if you use shiny fabric, or it can be playful in a print. It’s a blank canvas for your decoration. Try patchwork, lace, whatever.

    I’m actually excited about this.

    I mean, I understand that the 1966 Barbie shape needed an update. The 1999 Bellybutton Barbie was a good solution. There were no patterns for the new shape at first, so I made one up and shared it. Then Simplicity came out with a couple paid ones that were extremely cute. Okay, now there’s a new shape and there are patterns. I would have called that done.

    But they just couldn’t leave well enough alone, and now there’s a crazy variety of body shapes and sizes, all called Barbie, so that, like a bird watcher, you need a field guide with a flowchart to help you figure out which species any particular girl is. That’s kinda nuts.

    I’ve had some troubles that kept me busy for a while, and my also, baby girls grew up. But I’ve liked sewing for dolls since I was little. When I had a moment, I came back and looked at the internet to see if there were any spaces that needed a contribution from me. It didn’t seem so. All those new bodies have been covered (haha) with tons of patterns.

    The one thing that hasn’t been done is to sweep all that aside and offer a solution to this nonsense: ONE dress to conceal the nakedness of any approximately-Barbie.

    I don’t think adult hobbyists will be interested in this. Grown ups who sew doll clothes for art’s sake probably have money and time for beautiful, complex patterns. I enjoy admiring their masterpieces, but what I’d like to do is help out the moms and grandmas who need something simple and quick that can expected to fit their “11.5 inch fashion doll”.

    Can there really be a cute dress from just one pattern piece to fit any doll? Well, here it is. Not once but twice. So that’s my contribution and I’m happy again.

    I’m looking forward to making more models and more designs. I’d like to turn the halter dress into a OSFA too.

    But I am in such a rush right now! Life’s moving, we’re moving. We have difficult but possible challenges that we must rise to meet. I’ve gotten this project this far by thinking about it before falling asleep, then working on it in snatches of stolen time when I should be doing real life stuff.

    Let me know if you have suggestions.

    I want to do something like this for the 28″ dolls too, Barbie, Curvy, and Descendants. I already have a peasant top for 28″, it just needs a wider skirt and there we go. I haven’t made anything for 28″ Curvy Barbie yet! She’s been lying in a dresser drawer for a year. Must sew. Possibly… summer 2023? Or when I get snowed in, winter 2023 which I’m looking forward to 🙂

    The Patterns are HERE

    Free printable pattern in PDF format – Barbie OSFA shift dress for all 11.5″ tall dolls.

    And here’s the pattern for Barbie OSFA peasant dress

    Instructions for Shift Dress

    Use lightweight fabric that won’t fray much. Cut the pattern piece on fold.

    Make tiny clips at the corners where indicated

    Fold over barely 1/4” at neckline and armhole edges and topstitch. (“Barely” means “almost 1/4″ but not quite, and definitely not as wide as half your presser foot”)

    Sew side seams together, up to the clip

    Add a bottom ruffle at this point if you’re doing one.

    Sew up back seam to the clip

    Hem the bottom.

    Instructions for Peasant Dress

    Cut one pattern piece on fold of fabric.

    Make tiny clips at corners where indicated

    Fold over neckline and sleeves shy 1/4“ (almost 1/4″ but err towards the narrow side) and zigzag over a piece of cord, then pull up to the measurements given (printed on the pattern for your convenience if hand sewing while travelling) – sleeve edges 2.5 inches and neck to 5 inches.

    Sew side seams.

    Fold over back edges to finish, then add velcro.

    Narrow hem or a ruffle – in the picture I used a piece 2” x 16”

    2024 – Swing dress fits ALL

    It’s a lil bit wider around the armpits, more graceful around the sleeves and shoulders, and absolutely FITS (definition of fits – easily goes on) 13″ First Barbie, 12″ Darci / Jem, 11.5″ all Barbies incl Curvy.

    The shift dress doesn’t fit First and Jem, but the swing dress does.

    Here’s the whole range:

    MGA Ella (Bellybutton body) in swing dress, 2006 11″ short Barbie in shift dress, 13″ First Barbie in swing dress
    Jem (Darci) in swing dress, Curvy Barbie in shift dress
    Glitzees in shift dress, MGA Ella in swing dress. That’s a hairband for a belt.
    First Barbie in swing dress, Jem (Darci) in shift dress (but it was hard to get on her), Glitzees in swing dress.

    Pattern for 2024 Swing Dress

    Swing dress, 2024, for 13″ First Barbie, 12″ Darci/Jem, 11.5″ everybody

    Just the pattern piece PDF file, make sure to print 100%, not “fit to page”

    Fold over and stitch neck and arms, then side seams, fold over back edges and use velcro

    Story to make a point

    When I was maybe nine or ten years old, a girl came to stay at the place across the road and we compared Barbie collections. Mine was fabulous compared to hers – I had busy parents, and a brother and sister 16 and 19 years older than I was who both had jobs – she had only a mother. What she had that I didn’t was a grandma. So, my collection consisted of Mattel everything, bought new. But she had one particular dress that was handmade by a grandma, from an interesting-textured Hawaiian print. It was basically a tube with a ruffle, but it was HANDSTITCHED by a GRANDMA. Envy so possessed rich little me that I was ready to give “anything” / everything necessary to swap for that, and I eventually got it, in exchange for a huge pile of store-bought gowns and accessories.

    Years later, I realized what I had done, and if there had been any way to find that girl and give that grandma-made dress back, I would have.

    The point is, that’s the value of a handstitched Barbie dress to little girls. Tailoring and “looking right” to the eyes of adults is a different thing.

    Slow Stitching

    Slow stitching is a newish, cool idea, rather to sewing what zentangle is to drawing, when the activity isn’t a need any more, only a way to soothe yourself. Basically take scraps of fabric, lace, buttons, and stitch them together with no particular purpose but joy and beauty.

    I love the relaxing quality of handling textiles, but I don’t think I can relax to the point of COMPLETELY wasting time. Stitching with NO results in mind doesn’t attract me.

    In old times, women always had their workbasket nearby, so at any slow moment they could make a little progress. When boring people are talking? Stitch. When riding in any conveyance that you’re not the actual driver / pilot? Stitch. Movies that are more about the company than the movie? Stitching away here. Or while enjoying audiobooks.

    They sell beautiful kits with coordinating pieces, or we can carve fabrics and trimmings out of all kinds of things.

    Here are a couple random images I could find with sharing allowed. If you search for “slow stitching” you’ll find the really pretty stuff.

    Crazy Quilt (ca. 1940) Edith” by National Gallery of Art/ CC0 1.0

    Crazy quilts were slow stitching projects for rich Victorian wives.

    https://www.flickr.com/photos/lovefibre/2258569576

    Anyhoo. I have a vision for slow stitching and Barbie clothes. Once this pattern is at the place where I trust it, I find it VERY relaxing to stitch the whole thing by hand. It’s actually easier by hand, and works out faster in that more models tend to get done sooner than if you’re waiting for time to sit down in front of the sewing machine.

    There were a few blissful days this summer when I needed to stand by to help Darling with his construction project. There’s me stitching in the shade on a hot day, and a dress I’m pretty sure would not have been gottn around to being made otherwise. Good times.

    Just ONE pattern piece is great for portable sewing. No little pieces to lose!

    (Crochet has always been the same thing. Only imagine if they made a crochet machine, but sometimes we choose not to use it.)

  • Princess Dress Pattern for Curvy Barbie

    Princess Dress Pattern for Curvy Barbie

    I love Miss Blue’s beautiful space princess hair.

    Of course my first dress for her had to be a princess seams sundress. Princess seams are not a very easy design to create. I set out to do a strapless at first, but it didn’t happen and this did.

    Might be because I can identify with this lady, and this is the style that looks best on me.

    Just last week I couldn’t resist buying Fashionistas #63 too. She’s so very platinum that it almost looks grey, and I can imagine she’s just a very young-looking granny.

    Here she is in one of the test models of this pattern.

    And here is the pdf file to print Barbie Curvy Princess Pattern <– CLICK HERE TO DOWNLOAD

    INSTRUCTIONS


    Pattern includes 1/4” seams except at the neckline and armhole, there’s only 1/8” seams there.

    NOTE that your presser foot is probably wider than 1/4″. Don’t line up the fabric with the edge of the presser foot or the dress will come out too small. I drew a black mark on my machine so I know where a quarter inch really is.

    Place pattern on fold, cut one large shape for the dress and a shorter one for the facing. Cut through the fold in the back.

    Lay the facing and dress right sides together, stitch armholes and necklines with narrow seams. You have to be very careful and precise about this step. Flip over to be sure the seams are even.

    Then clip the curves.

    The next part is tricky but doable. To pull the back through the shoulders you’ll need a long tweezer or forceps.

    Reach through the shoulder, get the bottom corner of the back and pull through. Keep the bulk smooth. If it bunches up and you pull hard, it’ll rip those tiny seams.

    After the back section is through, gently ease the facing through.

    Stitch up the darts on the dress and facing. (That could have been done as the first step but it’s easier to have the whole thing lying flat while dealing with the shoulders.)

    After the darts, put facings right side to right side and sew down sides of facing, then continue, with the dress pieces rights side together, sew down the side seams as well.

    Tack the facing to the dress at the side seams.

    Fold the backs over, once as narrowly as possible then a little wider. Doesn’t hurt to try it on the doll at this point.

    That’s a cute length for a mini-dress and looks flattering on this body type.

    Unfortunately I’m allergic to curved hems, so I added a 13 x 3″ ruffle.

    And velcro. All done!

    A line of Velcro makes it easy for a young child to dress, or you can stitch the skirt up to the point marked on the pattern.

  • Barbie Body Types to 2008

    Barbie Body Types to 2008

    Summary of all the different Barbie body types up to 2008 (when I made this page). It was after that when they came out with the Fashionistas tall, petite, curvy etc.

    Classic / Vintage / Original / Traditional shape – 1966

    Has a barrel chest, tiny waist and 1966 stamped on her back. It’s really not that her boobs are so large, it’s her whole rib cage that’s out of proportion, then that tiny waist and sudden hips.

    Bellybutton – 1999

    This now seems to be the default body except for Fashionista. There are commercial patterns out for it now, including Simplicity, which says it in code: “for Barbie’s new shapely curves”. That’s not really fair to people who don’t happen to know the code and don’t know the difference. They should just say it in English, “Fits 1999 Barbie, does not fit 1966 Barbie”. Is that so hard?

    The Shorter Barbie – 2006

    She is only 11 inches tall instead of 11.5 inch. She wasn’t popular and wasn’t made for very long. I’ve heard that some people don’t like her, but I think she’s cute. I like the way her legs are attached smoothly, without the painful-looking cutouts in the thighs.

    ModelMuse

    The newest body mold, found in the Barbie Basics line. Even skinnier than the others. Mine are stamped 2003/2008.

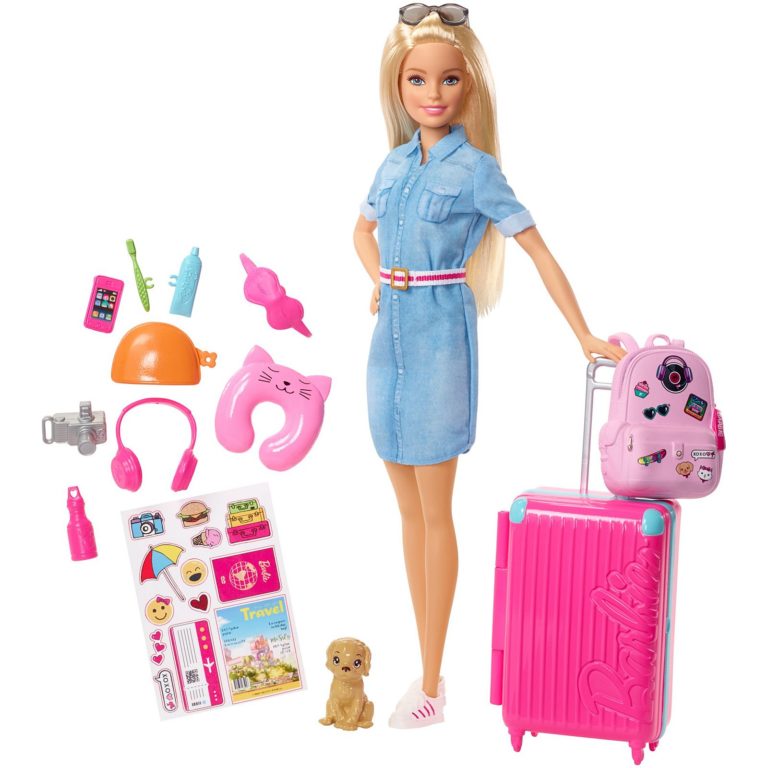
    I don’t want to use nudity for the featured image so I just snagged the most classic Barbieish-looking young lady that Mattel popped up. In case you wonder, she’s the Barbie Travel doll. I have no idea by looking at the picture what shape she is!

  • Mailbag

    Mailbag

    Photos of finished projects that people sent in to the old version of this site. I’m uploading them again here because they’re all so artistic!


    Hi Janel, I have to tell you I LOVE the strapless bodice and especially the halter top. They have become my new best friends!
    I found the halter top so useful! It has become a bathing suit top, a sundress, pajama top and more. I cut 4 pcs and sew them together – I found it was easier for me to turn them inside out than try to make tiny rolled hems.
    Thanks for your great creative ideas and patterns!

    Here you go! I just realized that this round of Barbie’s wardrobe has all your tops! The little blouse fits so well without any alterations. For the Christmas gown, I made the sleeves a bit bigger because I wanted a little more puff to them. The cape is my design. I have not done any kind of designing for a very long time! The last time I made a Barbie wardrobe was about 18 years ago for my nieces. This time it is for my husband’s granddaughters…I had forgotten what fun it is! I think this time I’ll keep a Barbie for me! LOL
    Keep up the great designs! It is really tough to find nice ones like yours. Most of the ones I’ve seen on the internet look very amateurish, and commercial patterns cost so much any more!
    Thanks!

    Lou Ann


    I wanted to let you know that I have used your bodice pattern to make my granddaughter several barbie doll dresses and have found that pattern to be so easy to use, so versatile and wanted to thank you for taking the time to make it and share it. I’ve attached a pic.
    Your pattern is designed so well that any dress I’ve made with it ends up looking very professional – I love that!
    :O) Sue

    Hi! Just dropping a note from far far away Brazil to tell you that I used your Barbie pattern and it worked very well!
    This was my second try with a doll clothing, I have no experience with adults clothing either, but, with your easy instructions, I could do a very good work (IMHO). Please see attached. At first, I thought it wouldn’t work, because there are 6 different Barbie bodies – this is a very cheap Barbie – but it worked so well!
    Hugs and thanks a ton, I’ll keep an eye at your site, if you publish more Barbie patterns, I’ll definitely get them! Heloisa

    “Thank you for the free patterns. At the store yesterday I could not bring myself to pay $8.00 for a Barbie dress pattern! I added straps, as you can see and it all turned out great. Thank you.” Laura

    Hi! I have used your pattern to make my daughter some barbie dresses. Worked great and I am a beginner, trying to wing it. Here is one and will send you a pic of the others. Now if I can learn to do sleeves… thanks so much for the free pattern. I have tried to find basic Barbie patterns on line and I cant find anything quality but your site.

    Summer

    Hi there!
    A few weeks ago I was searching around the ‘web to find a simple pattern for a Barbie dress, and I came across your website! Needless to say I printed one of the dress patterns that was provided and made a dress that I’m quite proud of!
    I saw those Mannequin jewelry holders at Hallmark, and instead of paying an outrageous price for them, I decided that with an old Barbie of mine who’s head fell off and can’t be replaced, I could sew a dress (out of scraps that were cut off of my own grad dress) for this doll.
    While I haven’t gotten around to making a base for her yet, or added the part that will hold all the necklaces and such, I have just finished the dress portion! I just wanted to send along the pictures of the dress I made, and thank you for such a help your website has been! It really encouraged me to tackle this project!
    Unfortunately, the back didn’t match up too well, but I am fairly happy with it, as I am not an experienced seamstress in the least!!
    Well, I hope that you enjoy the pictures, and I thank you again for making these things free and available to everyone! 🙂
    Thanks!
    Jocelyn Boorman


    The Barbie dress pattern works like a dream! No more fiddly little side seams that don’t match up! No more nasty little hems that fray! Actually, I have begun using my Wilcox & Gibbs chain stitch machine for hems. Thanks again, and for the entertaining blog. Julia (Apr 2011)


    Thank you so much for the Barbie dress pattern. I tried it out yesterday and it fit modern Barbie like a dream. It went together great. My little girl wanted it to be a prom dress, so I cut the skirt 12” x 7 ¾”. She was very pleased. This is just the pattern I have been looking for, simple enough for a novice like me. Thanks again!
    –Allyson (Apr 2011)


    Hi – just to let you know that I used your pattern for the Barbie dress for my gal this morning. The darts were perfect!! The pattern printed the right size straight away, and as you can see from the pics it fits a dream. Thanks for sharing the pattern.
    Beccy


    I just wanted to thank you for the bodice pattern for the Barbie doll clothes. I made my first dress for my 6 yr old and she loved it!! And I am NOT a sewer. In fact it turned out so well the little girl next door wants me to make her one. It was so fun to do I hers is almost done! Thanks again!

    Brigit


    I tried your pattern for the doll dress! It was incredibly easy and fits barbie perfectly! The pattern printed in the correct size which was awesome! I made my daughter 4 dresses! She absolutely loves them! I think I love them more than she does…although she is 4. lol Thankyou for sharing!

    Nicole


    Hi, Janel! I just wanted to tell you “Thank You!” for sharing your Barbie, Brenda, and Gene patterns. They are just great! I just purchased a Sydney doll, and she came in only a swimsuit, so I am looking forward to making her a pretty dress. Thank you again so much!
    Best Wishes, Lisa 🙂


    Thanks so much for your bodice Barbie pattern. It is the right size to print. Made dress last night, bodice is perfect. Skirt is made with about 1” ½ less material. Red marks on bodice are guides for darts. Had a little trouble with gather of skirt, but all up very impressed with first try.

    Thank again

    Joanne

    (June 2010)


    Hello,
    Thank you for the pictures and pattern on how to make an easy doll dress. My daughter is turning 6 this weekend and is having a party where she wants to “craft sew” for the activity. She has been bugging me to teach her to sew, and especially to make doll clothing, so I’m going to give it a try. While preparing a “lesson plan” on how best to teach this without getting a group of six-year olds overwhelmed, I created this 8 x10 printout tutorial, all from your website. I made it into a 7-step process and they will be sewing by hand (yikes!). I plan to pre-cut pattern pieces and may do the finishes (velcro closure) for them and let them eat cake….we’ll see.
    Since it is for my own personal use, I didn’t cite your website, except for the email within your pattern. But I thought you would like it anyway and post it for others to print out and have a one-page reference including your pattern? Either way, thanks for the pattern and instructions!
    Many Thanks,
    Carmen (and her daughter Nina and her best friend Gwen)

    The actual process took 2 hours, 15 minutes (all by hand, including hemming and and sewing 4 separate dart lines). That also includes printing out the pattern and cutting it out, pinning, and cutting fabric. My daughter did very little sewing though, so I may have to switch projects! Here’s the finished product (my daughter wanted a full-length gown). -Carmen

    Thanks, I used your free pattern! Made a dress for Skipper. [Samantha]

    Back Camera

    Thanks for the GREAT pattern. I am not much of a seamstress but this was so easy and such a BIG hit with my daughter. [Kristi]

    Hi, Just wanted to says thanks for the best free Barbie pattern Google search could lead me to. (Pattern for new bellybutton Barbie) I was surprised to learn a good, free, simple bodice pattern for a fashion doll is a rare find. Less surprised to find several that thought/wished/pretended they were. (Sharon)


    Hi there,
    I made your Barbie strapless top and dress pattern, and was very happy with the results! It printed out quick and easy, didn’t even have to mess with paper margins, and I had it together and on the doll in minutes. I have VERY minimal sewing skills, but I had no problem following your directions at all. I found your pictures very helpful, especially the one that showed how to pin the top and skirt together, as I was cluless as to how to do that correctly.
    Here is the picture of my end result. The only problem I had was with the darts, my machine kept wanting to chew on the fabric, so I ended up hand sewing those and was not thrilled with the way they turned out.
    I’m looking forward to trying more of your patterns! Thank you for putting out there!
    Sincerely, Heidi

    Thank you for making the Barbie dress pattern available. It did print fine, and it fits. I also made the little top with the pointed front, but it isn’t finished. I’ve attached a picture with the dress on my old Barbie, (who is looking the worse for wear), and I hope you can open it. I make dolls’ clothes for my sister’s two granddaughters, and I get great fun out of doing it. Thank you. Joanna

    I just had to tell you that I really enjoyed your site!!! Thanks for the free patterns for my dollies and I totally LOVED the spiral pattern (adult) with all those instructions and photos!! Thank you so much! Luanne in NY


    merci pour vos patrons, ils me seront tras utiles pour ma fille de dix ans . (Nathalie)


    December 27, 2009
    Thank you for putting the rough draft Barbie
    pattern on the internet.
    I made about 5 dresses last night.
    It fits loosely (but that is fine) because I use
    velcro to secure it in the back.
    Keep the patterns comin.
    Sincerely,
    CaptEpic

    Thank you so much for the barbie pattern. It fits perfectly. I’m sending you a couple of photos. The skirt is rather short because the piece of fabric was narrow.
    Mariela

    Janel,
    Just a quick note to say thank you so much for the Barbie patterns. My daughter is mad about the Disney Princesses and dressing up, so using your patterns I have made her a Belle, an Aurora and a Cinderella dress for her Barbie doll, so she can join in with the dressing up too! She’ll get them for her birthday this coming weekend, and I think they’ll make her day. So thanks for putting up the patterns and instructions – I wouldn’t have been able to make them without your help.
    Alison from Switzerland

    (Note – that center dress looks like my Gene pattern – Alison must have reduced it before printing, for it to fit a Barbie doll.)

    Photos from Kristi B:

    Photo from Katerina:

  • Sewing Pattern for Barbie Basics (ModelMuse) body – Halter Top Dress

    Sewing Pattern for Barbie Basics (ModelMuse) body – Halter Top Dress

    Free printable sewing pattern for a cute halter top dress.

    Instructions:

    Fold over sides of both top pieces and topstitch
    Lay one top piece over the other to the place where the arrow points, pin them together then gather the lower edges of both

    Pull gathering threads until the top pieces fit between the two arrows marked on the midriff pattern piece
    Stitch top pieces inside doubled layers of midriff, leaving an opening where the top pieces are, through which you’re going to turn the midriff. Clip corners and turn.

    Sew skirt side seams, then stitch skirt to midriff, leaving back edges of skirt a little wider than midriff
    Then fold those over and stitch center backs and hemline
    Sew on velcro or snaps for closure

    Click here for the pdf pattern. NOTE this is for Barbie Basics and will not fit the other shapes. Barbie Basics are these girls. They’re skinny even for Barbie.

  • Sewing Pattern for 1999 Bellybutton Barbie One-Shoulder Dress

    Sewing Pattern for 1999 Bellybutton Barbie One-Shoulder Dress

    Free Printable Pattern.

    Someone requested an off-the-shoulder dress. I only glanced at the email and suddenly had a great idea how to do that, and in a flash of creativity, produced this.

    No, no, she had said “off the shoulder”. Oops. Well, I guess it was time for me to make Barbie a one shoulder dress.

    By the way, it’s easy to make an off the shoulder look using the strapless bodice pattern by gathering a bit of lace and tacking it over the top.

    Here’s the printable pattern in pdf format <– CLICK HERE TO DOWNLOAD

    That’s only the top part of the pattern. Use a gathered rectangle for the skirt or the skirt from the Barbie strapless dress. And it is in ROUGH DRAFT state. I’m going to do some more work on it and add some comments and instructions, eventually.

    This doll is one of my favorites. I found her in the free box outside the front door of the local thrift shop. Did nobody want to buy her just because she’s purple and sparkly? That makes me love her. She’s different and flawed, yet uniquely beautiful.

    Her wings are missing. Poor wounded fairy. The least I can do is make her a pretty dress.

    My picture make her look pink, but she’s really very purple. I took her to several different locations indoors and outdoors but my poor little cam couldn’t get the color right. THIS is how purple she is.

  • Bellybutton Barbie V-neck Dress Sewing Pattern

    Bellybutton Barbie V-neck Dress Sewing Pattern

    Here’s a free pattern in pdf format to print.

    This one can be a bodice to add a skirt to, or lengthen the lines to make a flattering princess seams dress. I appreciate a pattern that doesn’t involve shoulder seams. Every fiddly step eliminated makes it that much easier.

    It has a simple, modest neckline and short sleeves.

    This is for the 1999 Bellybutton Barbie mold or “Barbie’s shapely new curves” as the commercial pattern companies call it.

    Stitch neck facing to bodice, right sides together. At this point you can determine a more round or V-shape neckline, or larger neckline or more modest neckline, by the stitching line. If you want a really low neckline you might need to cut the facing larger or longer than the facing pattern piece I provided. Clip, turn, press and top stitch the neckline

    Turn up sleeve edges, press and topstitch. Then pin sleeves into armholes and stitch. I found that hand stitching works best for that part. The sleeve fits into the opening without gathering, and it’s easier to just sew it by hand than try to pin two contrary curves together.

    Sew front and back darts. It’s a good idea to mark the top of the dart and start sewing at the top to make sure both darts are even, because a slight variation is so obvious.

    This picture is after sewing the front darts, I’ll do the back darts next.

    Then sew up the side seams and underarm seams all at once.

    The skirt is up to you. Decide how much fabric to gather based on how thick it is, and style the Barbie gown of your little princess’ dreams.

    Try the bodice and skirt together before sewing everything up– if you use a gathered skirt with a lot of bulk, you might have to make the back darts a bit less to allow extra room.

    And then the back snaps or velcro and it’s done!

    Or use the extensions to make a princess lines dress. The skirt is limited to knee-length but you can always add a ruffle.

    Download the pattern as a pdf file

  • Barbie Strapless Dress Free Pattern

    Barbie Strapless Dress Free Pattern

    Printable sewing pattern to download in pdf form.

    There’s one for the old 1966 vintage Mattel shape, one for 1999 Bellybutton shape (which I think is most common nowadays), one for skinny Barbie Basics and one for the 2006 shorter body which is only 11″ tall.

    Barbie strapless bodice pattern for 1966 / original

    Barbie strapless bodice pattern for 1999 / Bellybutton

    Barbie Basics (ModelMuse) and 2006 shorter body

    Help figuring out which shape Barbie you have is here

    It’s just one pattern piece with 1/4 inch seam allowance. Remember that 1/4″ is smaller than half the average presser foot. If in doubt, make the seams smaller.

    Use a gathered rectangle for the skirt, or here’s a new pattern piece to add this A-line skirt.

    Instructions

    Cut two pieces, put them right sides together. Stitch 1/4″ from the top and sides, clip the corners and turn, then stitch the darts.

    (Or, for a smoother interior, stitch the darts on both pieces first, then sew the two pieces together.)

    A rectangle for the skirt, leaving a bit on each side to fold over and hem. Then add velcro on the back.

    This is the sewing machine that used to make these. It’s a Singer made in Mexico in the eighties. The foot was pressing so hard that it was impossible to sew, and it wasn’t adjustable, so I took the spring completely off and wrapped rubber bands around there instead. It presses just enough!

    I also later removed everything electric and strapped the hand wheel to a treadle base. At first I hated that machine– the first one I ever bought and a poor choice– but after doing that much modification to it I’m quite affectionate about it!

  • Dress Pattern for Bellybutton Barbie

    Dress Pattern for Bellybutton Barbie

    This was the first Barbie dress I designed from scratch, many longs ago. It was by necessity and was jumping into unknown waters for me. Up until then I had been using commercial patterns to make outfits for my daughters’ dolls, but at some point four of their nine Barbies were the new bellybutton kind and couldn’t fit into the clothes of the others. The only premade clothes they sold in stores for 1999 Barbie were jeans and short skirts, and we wanted princess dresses! There were no commercial patterns for the new shape yet.

    Something had to be done.

    Then I shared it on the internet, in case there was anyone else out there in the same fix. And I guess there was 🙂

    Those were made with the older pattern. I’ve updated this for 2023. It’s basically the same, except the dart was modified just slightly and the shoulder seam eliminated. It’s all just so much easier without shoulder seams. (Or if your scrap of fabric is too small, you can add one back in.)

    Scant 1/4″ seams are allowed. By scant I mean if there’s any doubt, to make the seams smaller than 1/4″, not larger.

    I used a Sharpie to mark on my presser foot where 1/4″ actually falls, then I stitch with the edge of the fabric on the near side of that black line, not the far side.

    Updated in 2023.

    Someone motivated me by asking for a Princess Peach gown pattern.

    First I made one the way I thought it should be, with just the original pattern in pink, to which I planned to add darker pink swags on the hips like Cinderella’s gown, a jewelry finding tacked on the bosom and a darker pink border.

    Then I found out the decorative inset in front is that important for Peach, and that her hip “overskirt” actually goes all the way around, not like Cinderella’s two little panniers. My brain melted but I will, eventually, probably, finish this.

    Got as far as a bodice inset, and that’s on the new pattern.

    Both long and short sleeves are included.

    That’s how the bodice pieces work.

    There’s a skirt shape, too. It doesn’t have to be this long and you don’t have to make it that full.

    Download in pdf to print:

    That pdf won’t open on my phone so I’m going on faith. Here’s a DOCX file just in case:

    There are simple instructions on the pattern.

    I’m also PLANNING to get some good picture instructions up here again! That’s on my list. If you could see how I’m living right now! Oh, in the very best way, in my very own place, enough said 🙂

    But I don’t have electricity or a computer, and I have cell signal on rare occasions. Just Ivy Draw and Google docs to compose my masterpieces… proving this really is my creative life, right here. If you want something badly enough, you’ll find a way.