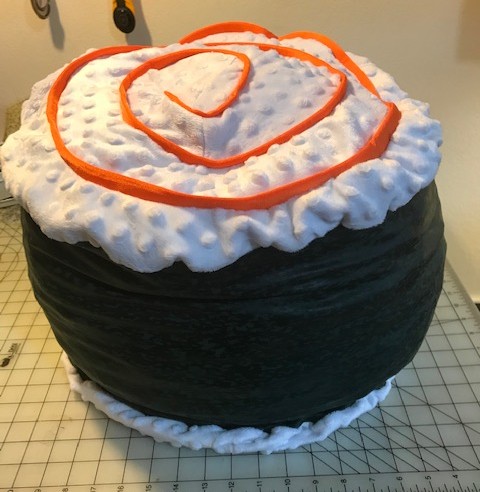
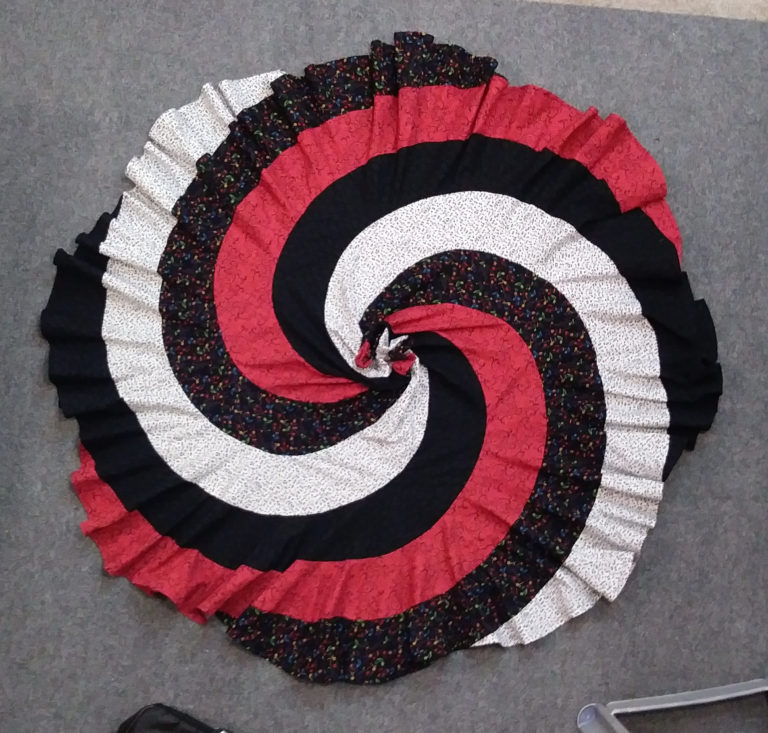
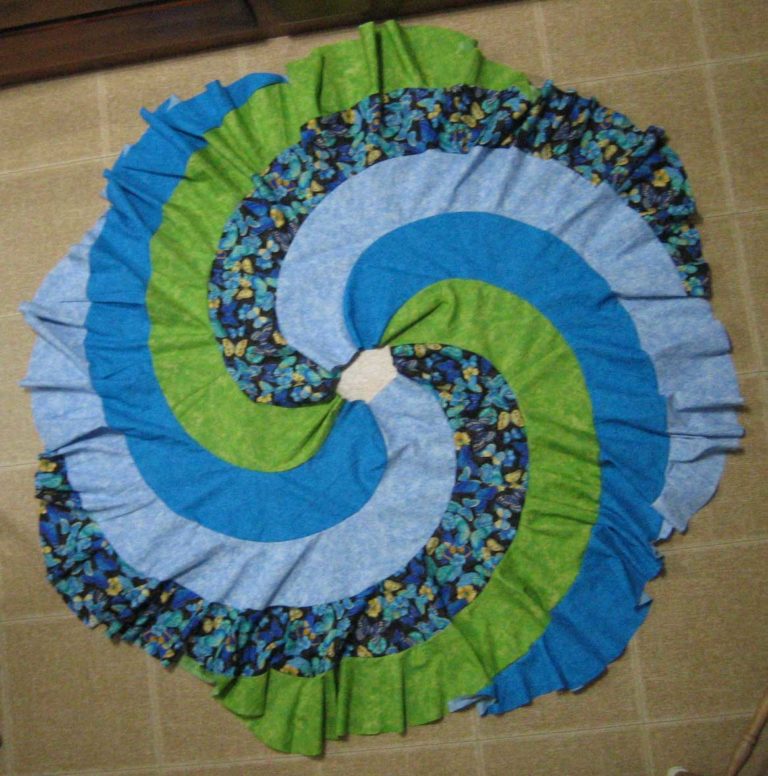
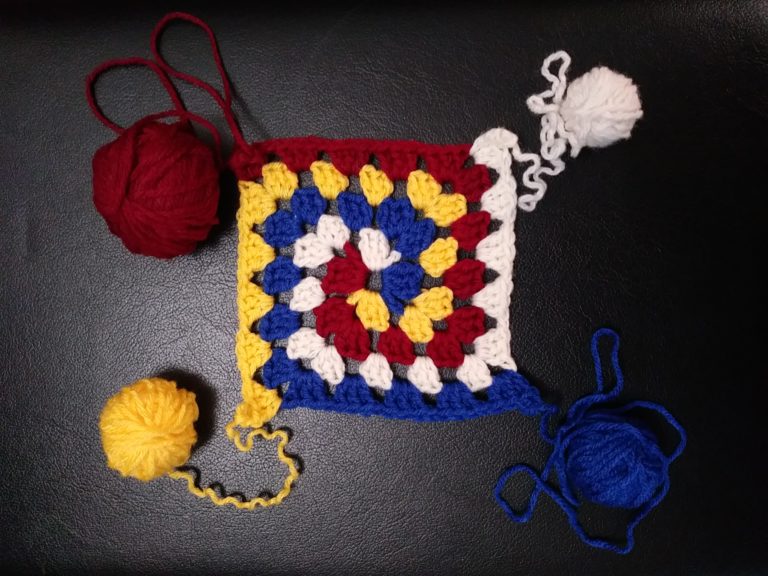
Therapy crochet while I listened to a message at home. I started messing with dishcloth cotton because I need some more dishrags, kinda reinvented the wheel (this basic sc lace doily idea’s been around since early times) but then added another petal in between to make twelve instead of six, and AFAIK that’s new. I’m pretty happy with how this came out.
It’s a nice easy to remember formula, so I’ll be making more. It seems like it could go bigger and gain more points without losing shape. I might try it sometime.
Multicolor pinwheel cotton dishcloth or matBit rough, do forgive. I’ll polish it more after a while.
My idea of a crochet pattern is just the stitches, not how to join them. So the instructions are short.
Ch6, join to form a round In one loop of each chain, (2sc, 1ch) six times around (1sc in each sc, 1sc in chain, 2ch) six times around After that, skip the first sc, sc in ea sc, 2sc in the chain, then half as many chain as sc, generous [Meaning, if there are 5sc, use 3ch] Continue like that to the end of the round with 7sc The next round, (4sc, 4ch, 4sc, 4ch) six times around Then (5sc, 3sc) twelve times around Etc
I went up to 8sc x 12 and that was 9″, a nice size for a dishcloth. I was using size H crochet hook.
Here’s a great project from a reader named Susan. She wanted to sew a sushi pillow as a gift for her grandson, and happened across my spirals page while looking for ideas.
I had no idea “sushi pillow” was a thing, but when I googled for it, it looks like many people have made one. This version is a bit different from all the others, so its worth sharing, too.
It’s a different idea from my other spirals. This one’s a simple circle with a circular stripe inside, drawn freehand on a piece of paper like this:
And then cut out all of those black lines. That produces two spiral shapes without seam allowances. So the “rice” is cut from the thicker stripe and the “salmon” from the thinner, adding seam allowance while cutting. There will need to be plenty of marking to be sure the seams line up correctly for sewing.
I haven’t tried this myself. I imagine it might be quite tricky, although Susan made it look easy! I have another idea for embedded spirals like this that I’ll probably try in the future.
Here’s a full length spiral dress for a grown-up woman! …with wolves on it.
Long ago, I found a spiral dress at a second hand shop. It was too small for me, but I was so fascinated with those seams going round and round that I bought it anyway. Eventually I decided it was silly to own something I couldn’t wear, and donated it again.
Later I wished I had kept it to cut apart and use for a pattern. That’s what got me going on spirals. The skirts were just a compromise because the top part was too intimidating.
In the early years I merged a color blocked peasant top with spiral skirt sections, as you may have seen on the spirals page.
But what I really wanted was the real deal, barber pole, candy cane, diagonal spirals top to bottom.
For about ten years I kicked around ideas for another way to make a spiral dress for myself. I would fall asleep thinking about it, but didn’t have enough of a clear idea to start cutting.
Eventually got up my courage and set to work. First I tried shifting the darts, the way all the pattern instruction books told me to. For your entertainment, here are some of the fails:
I found some ideas on the internet that had been drafted with CAD but not actually made into a dress, much less a dress for me. That made me feel my lack of skillz and didn’t help.
Someone told me you can submit design ideas to Simplicity and they’ll make the idea into a pattern. Perfect! But although the chances of Simplicity making my design into a real thing might be small, I wasted a year thinking that one of these days I might download the sketching tool and actually draw it up and present it to them… ummm just nope, the chances of ever getting that done are not gonna happen.
Then one fine day the solution occurred! And of course it’s very simple. What I needed was to start with a basic bodice pattern without darts, join the side seams so it’s a smooth tube, draw diagonal evenly-spaced lines on it with Illustrator, then measure how much the darts should indent in the front and back, and scoot the lower edge of those diagonal lines in that much. Voila!
After printing and cutting the pieces apart I just wrote ADD SEAMS on both sides of each of the diagonal pieces because that was easier.
Then there was a prototype that fit, and I was so excited I forgot to take a picture.
The next difficulty was to choose four fabrics with enough contrast but some kind of harmony. I spent a while moving pieces of fabric around, then came across that fat quarter of running wolves I’d picked up somewhere and was dying to find a use for, and the whole thing just fell together. I had a variety of green and foresty scraps, and I think the bears went along with the wolf theme just enough to make it all look intentional.
Looking intentional is important to me. I want there to be no doubt that I did this on purpose.
Results EXACTLY what I’ve been dreaming of all these years.
Grin and bear it!
Okay. I’ll do my best to write this from memory. I’m now in my offgrid camping paradise, so make allowances.
So. How to do this.
Look for a top or dress pattern that the shoulders and armholes fit you okay, either with two darts going straight down (not into the armholes) or a “baby doll” style dress without darts. If it has darts, ignore them for right now. Basically we just want the top shape with the shoulders and armholes the right size.
Trace the front and back pieces flat out on large paper (the back of heavy gift wrap paper works well).
Right in the middle, bosom height or thereabout, divide the width into fourths, like in this image.
Your pattern probably already has seam allowances, so mark inwards a bit from the side edges to compensate for those.
Use whatever means at your disposal to make diagonal lines evenly at the same angle from those center three markings and from the mark directly on the side seam (under the armhole).
Mark the pieces so they don’t get mixed up. I used F1, F2, F3, F4, B1, B2, B3, B4
Now you need to add darts. If the pattern had darts it’s easy, measure the darts. Or, figure out how much your waist measurement is smaller than breast level measurement, and take away that much by trimming the bodice pieces that end about in the middle front and back. Front darts are of course bigger than back darts.
Look at this picture again– (except that this picture actually shows me cleverly cutting two of the pieces together to ELIMINATE one of the seams so that my bear print stayed as intact as possible, sorry, that’s the only one I have until I make another of these) —
Cut the pattern apart on one of the middle lines, then tape the side seams together, overlapping enough to remove the seam allowances. Then cut apart all the lines so you now have eight bodice pieces.
Mark ADD SEAMS all down those diagonal lines that you drew.
Those are the bodice pieces.
For the skirt, go to my Spiral Skirts page and pick a curved C-shaped spiral pattern piece that is comfortably larger than any of your bodice pieces. For the first segment, trim away the BACK (the larger side) to fit with your bodice piece. Like this–
NOTE that it’s VERY IMPORTANT to add plenty of fabric rather suddenly, to swirl out for the hips, or you’ll end up with too column-like a dress. The bodice pieces should be quite short, almost empire-height, so that the skirt starts high enough to flare out enough. This pink and blue one was my second try and it didn’t come out (and it was 98% done by the time that became apparent) because I made the bodice pieces too long didn’t make it flare enough at the hips. It looks okay but there’s really not enough room. I’m thinking on a future test I might even try gathering the skirt gores to the bottom of the bodice pieces.
Then proceed like making a spiral skirt, sewing the seams from top to bottom with a narrow seam allowance.
I found lots of ideas that were cool and artistic, but they seem to be more complex, more work and less “granny”. The beauty of the granny square is its utter simplicity. I wanted that same classic shape, only in four colors.
Only the first round needs to be modified, to attach and spin the four colors. After that, it’s pretty much the standard granny pattern.
Chain 5, join to form a ring. Chain 5, then 3dc in the ring.
Make several chain stitches to hold things in place while you drop that color and pick up the next one, then you’ll pull those out when you work with that color again.
Pick up the next color, attach to the ring, make 5 chain, then 3dc. (Then add several chain stitches that you’ll pull out later)
Repeat with the 3rd and 4th colors. Now there are four colors in the ring.
Ch 1, and in the next color’s 5 sc loop, put 3dc, ch2, 3dc.
Do that same thing in the next three colors’ ch5 loops.
After that it’s standard granny. In the ch2 corners do (3dc, ch2, 3dc) and in the ch1 sides do (ch1, 3dc).
Is that clear? Suggestions / mistakes let me know plz 🙂
Carry on the color you’re working with until you get to the end of the color below it, pick up the color below and work on that round for a while.
Like this– .
To keep the yarn from ending up in a mess, have a container for whatever color ball you’re working with and the other three can be loose.
There’s another sample.
Spiral granny crochet square – sample 2
More to come. It went like all my projects – I “solved the puzzle” then forgot about it for a couple years. I just picked it up again, 2408.
If you make something cool with this, I’d love to see it!
Ruffles! A huge, swirly overload of fluttering spiral. How to do this? We need volume of fabric.
As usual, I started moderate before going more extreme. The first attempt with a 4″ curved gore produced a conservative A-line skirt shape.
Simple. Just add more stripes. The big difference was gathering the gores in order to fit more of them.
The teddy bear was a gift from a kind friend at a time when I was lonely. Mr. Bear is also very useful for a model, in lieu of baby girls.
I made up this test model then remembered a family at church who have such a vast number of granddaughters that I don’t even need to worry about size. Just give it to them, it’ll fit somebody.
And it did! So I made them another one.
The bodice needed more coverage so I made the armholes smaller and the neckline higher, and added a button at the back of the neck.
Here is the free child’s basic sleeveless bodice pattern as a pdf for printing at home. Be sure to print at 100% rather than “fit to page”.
You’ll need to sew three of these C-shaped pieces together for each gore for smaller sizes, or four for larger sizes. It takes 14 – 16 gores for smaller sizes or 18 or more for larger sizes. The number can be flexible, you can add more gores depending on how many different colors you want to combine.
Here’s a size 8 version of this with four pieces per gore, and a very cool back-and-forth pattern that was accidental. I discovered I’d sewn two of the gores backwards from what they should be (the blue and pink positions reversed) at about the same time I realized I hadn’t added enough gores to compensate for the larger size. So instead of picking it out, we added the red stripe in between, and I think the red stripe is what really makes this one so stunning.
Here’s the recipient in full twirl.
Instructions
Apr 2023. Oh, dear. People are asking for instructions and I’m thinking “What’s wrong with the instructions?” Maybe the fact that there aren’t any. Okay. Sorry about that.
But now, it’s already happened, I’ve left civilization for the dark side of the moon! Okay, a place without internet. I suppose that’s not so unusual (and maybe you wouldn’t believe it, but I am old enough to remember back when there wasn’t an internet) but without it, and without Illustrator on my desktop or my printer, I can’t do much.
Just noticed the PDF has a dumb mistake, and I can’t correct it from here. You don’t cut both front and back on the fold, of course, or how would you sew it?
Sew the backs to the fronts at shoulder seams, both fabric and lining. Lay them on top of each other “pretty sides together” (as the old 90’s Barbie Fashion Designer program put it) and stitch around the armholes and neckline, then turn inside out. On the newer version, which is more modest like a dress rather than a jumper, the neckline won’t be large enough to pull over a child’s head, so you’ll need an opening at the back with a closure like a button or something. Or cut the neckline larger like the early test and wear a top beneath.
How to choose a size. Honestly, just print the pattern and lay it on top of a dress that fits the child. Allow for seams and then make it even bigger to be on the safe side. Comparing patterns put out by companies, the differences are startling. I went by an industry measurement chart I found somewhere. Remember, too BIG is easier to fix 🙂
Now for the number of gores for the skirt. Measure how large the waist seam will be and do math to see how many gores you can cram in there. With a 4″ gore you’ll get 3.5″ (or less) per gore. Add plenty of gores, ideally too many, per my dad: “If some’s good, a lot’s better, and too much is just right.” We’re going for ruffles here. You probably want an even number or a multiple of three to make a repeating pattern. You can always sew half your gores together and then compare with the bodice to see if it’s going to be as ruffly as you want, then, if necessary, add another color on each side before attaching, like I did with the red stripe.
Good luck, guys. Let me know how it goes. I can get my email, I’m not really on the dark side of the moon, and I love getting notes about sewing. Ask away and I can answer you if I stand up on the top of the hill in a certain spot.
All patterns are Adobe pdf for free download and printing. They print out onto sheets of 8.5 x 11 printer paper which you tape together then cut out. Be sure they print out at 100% size not “scale to fit” the paper.
The skirts can be made any size you need by using whatever number of gores it takes to get the waistband the size you want. A gore that’s 6″ across the top will come out about 5.5″ (it’s easier to use narrow seams when you’re matching two contrary curves) so if you need the top of the skirt before gathering to be 44″ you’d use eight gores. If you use elastic, allow enough width to pull up over the hips.
(A “gore” is one of the lengthwise strips of a skirt. An eight-gore skirt has eight vertical pieces with seam lines from waist to hem.)
Most of this material is from 2009. The more recent skirts and dresses are new posts.
Ruffled swirly skirts have always been my thing. When I was little I always wanted my dresses to have big skirts to twirl.
I found a couple excellent tutorials (links now defunct) on how to draft your own spiral skirt pattern piece, but only to produce an A line result. I wanted something closer to full circle, like the Redondo Farbenmix but without layers. Something simple and mathematically circular, like a barber pole or candy cane, except flaring.
My first attempt was complicated.
Then, instead of using a grid to enlarge, I thought of using Adobe Illustrator. It’s a great improvement over pencil and string! The instructions said to use string to make sure both sides are the same length. I don’t need to, Illustrator can tell me if the two line segments are the same length!
Then I can tile the pages, print a few lines on a bunch of sheets of typing paper, a moment to put the puzzle together and there we are.
This is SO FUN. My delight level is right off the chart.
I had decided on a 6″ top for each skirt panel. Allowing 1/2 inch for the seams (1/4″ from both sides), that comes out 5″ each panel. I want a pull-on elastic waist, so I basically use the hip measurement for the top width of the skirt. By the time it gets down to the hips, it will be wider. Hence:
7 panels x 5″ = 35″ top tier 8 panels x 5″ = 40″ top tier Etc.
I had gotten as far as taping the pages together to make the pattern when I realized 1) this is going to waste huge amounts of fabric and 2) it’s more of a gentle curve like the major brand commercial patterns, which are nice but also not what I had in mind.
I might as well share that pattern piece I made in case someone else wants it. Maybe it’s just what you had in mind. Here it is and if you use it, I’d love to see a picture —
Here’s the test dress I made with it. One photo it’s inside out and I’ve highlighted the seams, otherwise they’re too hard to see.
I was absolutely in the Library of Congress for one of those pictures, not my regular sewing room with my junk behind me like the other two.
Fabric requirement for this dress would be 4 and 2/3 yards– in theory according to Illustrator! See how I figure it out in IL? I fit the pieces into a 44″ wide box and see how long the box needs to be! It says it’s 163 inches. For a two-color arrangement it would be 89″ for the color that the sleeves are made of, and 73″ of the second color.
Spiral Skirt 2
Trying for more RUFFLES. I attempted a single hand-drawn shape from top to tip, then “Illustrated” it.
Now we’re getting warmer.
The pink skirt was made with the first draft wobbly hand-drawn pattern piece. The red one was the same shape but perfect lines made in AI. The red one’s inside-out so you can see the seams.
It comes out quite short and very twirly, only 20-22″ long (uneven hemline) including the waistline casing. So that would work for little girls. Each gore is cut in one piece and requires a 25″ x 23″ piece of fabric.
I went back and took another look at the second link’s way. The lady on Craftster (link doesn’t work any more) provided an image of her pattern piece, but I thought I’d try it more nicely Illustratorily rounded, so I took some circles and made this:
This is for a girl size and the finished length is 25″ long. My daughter loved it!
I received a serger as a gift. I had never had one or even seen one in use, so there was a certain fear factor about threading it. Twenty minutes of studying the book (do you know you have to thread these things with long tweezers??) and there we go.
What did I ever do without it? Fear turns to glee and the spiral has a hem.
Here are photos sent in by reader Julie, who says, “I added a 6″ strip at the top to make it longer, and lined it. Looks great! I used scraps of rayon, georgette, and one of those big challis scarves that was popular in the 80s. Thanks so very much for posting the patterns; I’ve been wanting one of these for many years!!”
Thank you to Julie for sending pictures of her project!
Spiral Skirt 4 / Dress
Skirt shape from basic segments of a circle, with lots of sections to string together before sewing the gores up.
I tried using four sections and one tip per gore. Adding more sections makes it longer but due to the spiral design, the extra fabric gets absorbed into ruffliness and doesn’t add as much to the length as you might expect.
Long ago I came across a spiral dress, like princess seams but given a spin. I was fascinated with that diagonal effect. “How to make one of those?” became something to think about before falling asleep.
To make one like this you need to print both files. I’d call it size medium. I’m 38-30-42 and you can see how it fits on me. Skirt comes out an uneven 27″ long, using three top sections and one point per skirt gore.
To sew, start by stitching the six sections to make the front and back bodice and the sleeves together at the top, then gather them and attach to the yoke like any sensible raglan top.
Once the top part is finished, then join a skirt gore to each section at the waistline. It hangs down very long at that point! Then sew the gores together down to the hem.
Combi – Skirt 3 and 4
The beautiful blue and green skirt from above needed to be salvaged.
At 24″ long, it’s simply too short for me. If only someone’s little daughter needed a ruffle skirt. If only all those seams would unpick themselves! After some thought, I realized I have a secret weapon. The little buddy would be glad to do it for five bucks.
child labor – little guy picking out half a mile of seams
Once I had the gores apart, I added a panel each from skirt 3, which is a gentler curve. Then put it all together again and it was perfect. I’m glad I did because I really like these colors!
SUMMARY of how to make this exact skirt– each gore is put together using ONE section from skirt 3, then FIVE sections from skirt 4 with the 6″ wide option, finished with the tip.
Remember you can cut out some of the sections together if you have plenty of fabric.