
Here’s a full length spiral dress for a grown-up woman! …with wolves on it.
Long ago, I found a spiral dress at a second hand shop. It was too small for me, but I was so fascinated with those seams going round and round that I bought it anyway. Eventually I decided it was silly to own something I couldn’t wear, and donated it again.
Later I wished I had kept it to cut apart and use for a pattern. That’s what got me going on spirals. The skirts were just a compromise because the top part was too intimidating.
In the early years I merged a color blocked peasant top with spiral skirt sections, as you may have seen on the spirals page.
But what I really wanted was the real deal, barber pole, candy cane, diagonal spirals top to bottom.
For about ten years I kicked around ideas for another way to make a spiral dress for myself. I would fall asleep thinking about it, but didn’t have enough of a clear idea to start cutting.
Eventually got up my courage and set to work. First I tried shifting the darts, the way all the pattern instruction books told me to. For your entertainment, here are some of the fails:

I found some ideas on the internet that had been drafted with CAD but not actually made into a dress, much less a dress for me. That made me feel my lack of skillz and didn’t help.
Someone told me you can submit design ideas to Simplicity and they’ll make the idea into a pattern. Perfect! But although the chances of Simplicity making my design into a real thing might be small, I wasted a year thinking that one of these days I might download the sketching tool and actually draw it up and present it to them… ummm just nope, the chances of ever getting that done are not gonna happen.
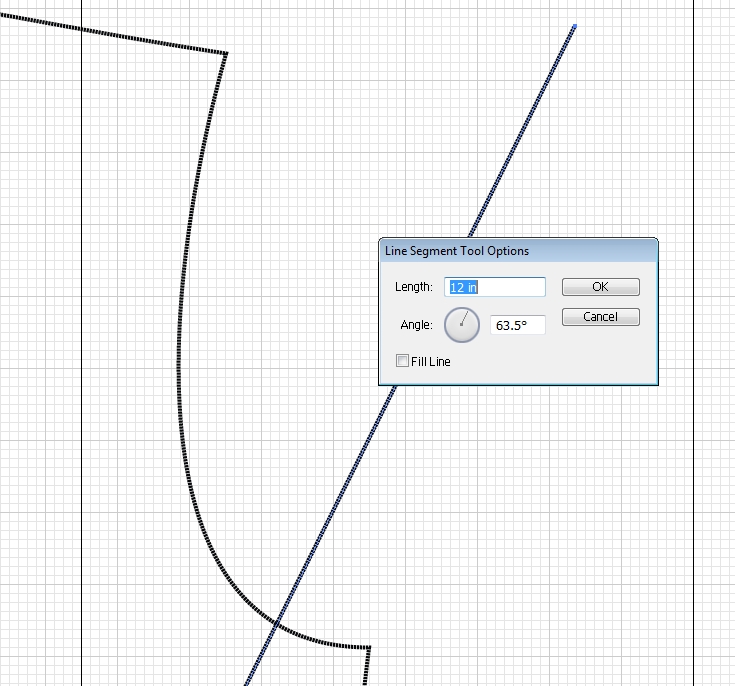
Then one fine day the solution occurred! And of course it’s very simple. What I needed was to start with a basic bodice pattern without darts, join the side seams so it’s a smooth tube, draw diagonal evenly-spaced lines on it with Illustrator, then measure how much the darts should indent in the front and back, and scoot the lower edge of those diagonal lines in that much. Voila!
After printing and cutting the pieces apart I just wrote ADD SEAMS on both sides of each of the diagonal pieces because that was easier.
Then there was a prototype that fit, and I was so excited I forgot to take a picture.
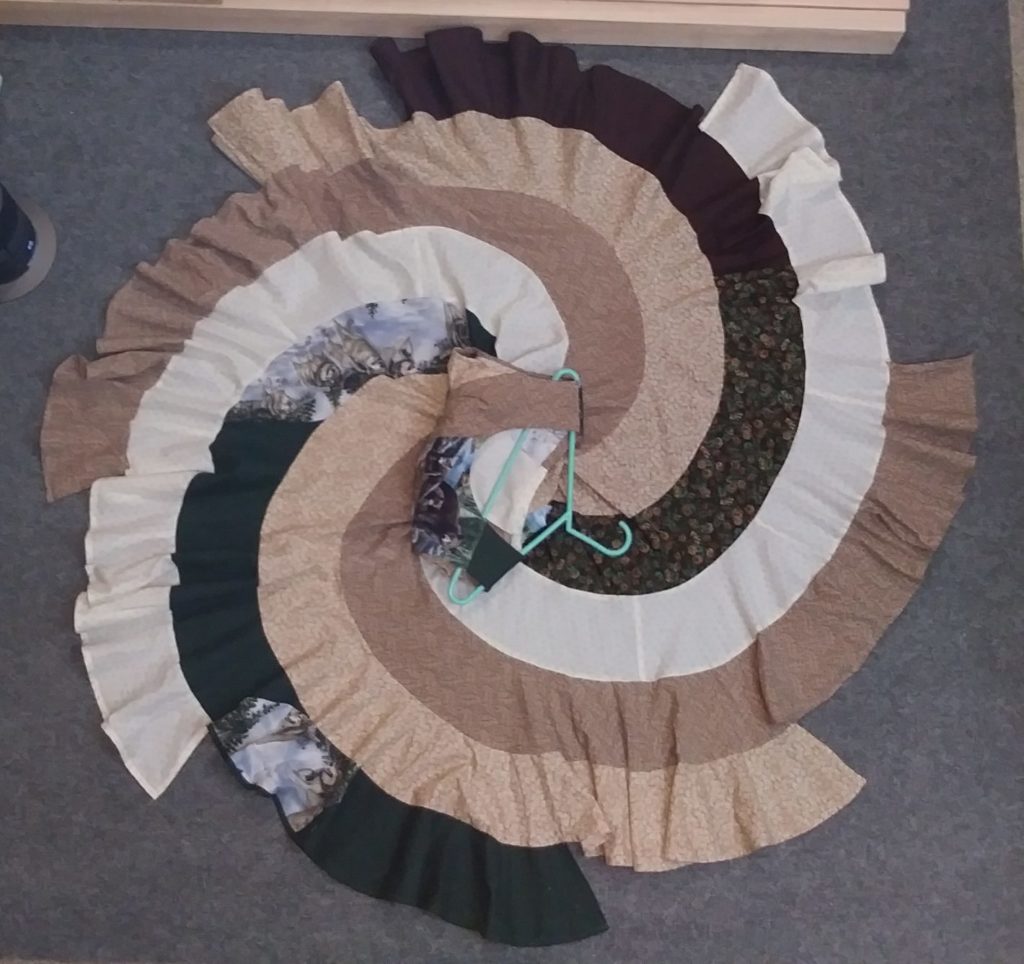
The next difficulty was to choose four fabrics with enough contrast but some kind of harmony. I spent a while moving pieces of fabric around, then came across that fat quarter of running wolves I’d picked up somewhere and was dying to find a use for, and the whole thing just fell together. I had a variety of green and foresty scraps, and I think the bears went along with the wolf theme just enough to make it all look intentional.
Looking intentional is important to me. I want there to be no doubt that I did this on purpose.


Results EXACTLY what I’ve been dreaming of all these years.
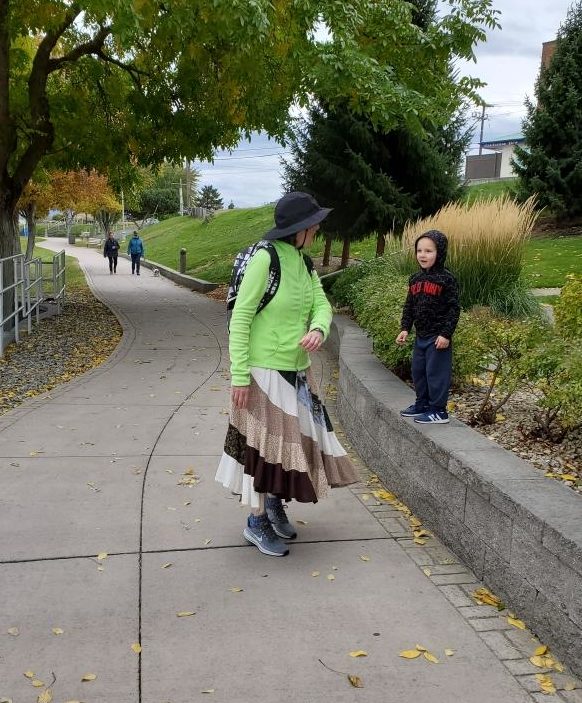


Grin and bear it!
Okay. I’ll do my best to write this from memory. I’m now in my offgrid camping paradise, so make allowances.
So. How to do this.
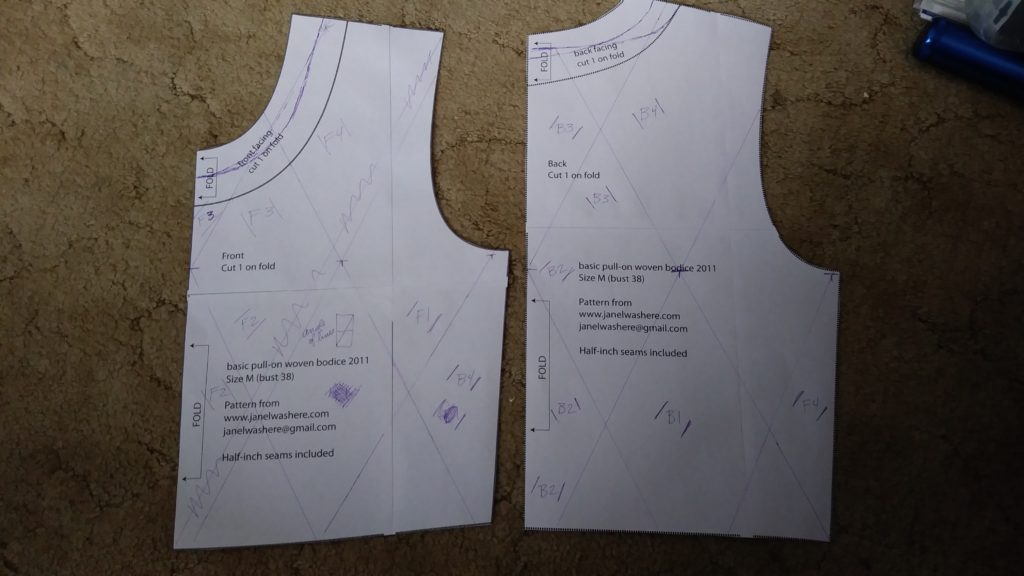
Look for a top or dress pattern that the shoulders and armholes fit you okay, either with two darts going straight down (not into the armholes) or a “baby doll” style dress without darts. If it has darts, ignore them for right now. Basically we just want the top shape with the shoulders and armholes the right size.
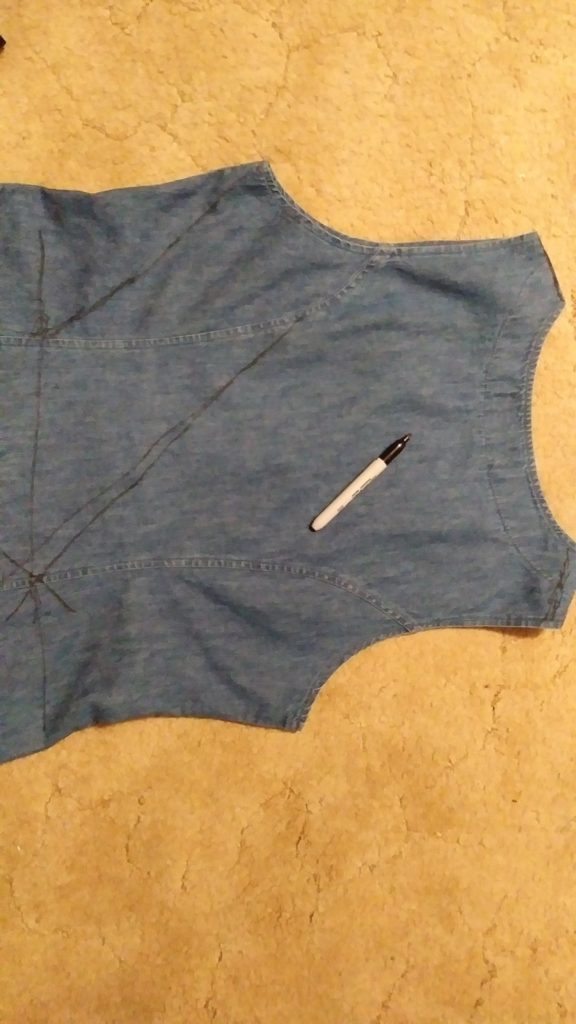
Trace the front and back pieces flat out on large paper (the back of heavy gift wrap paper works well).
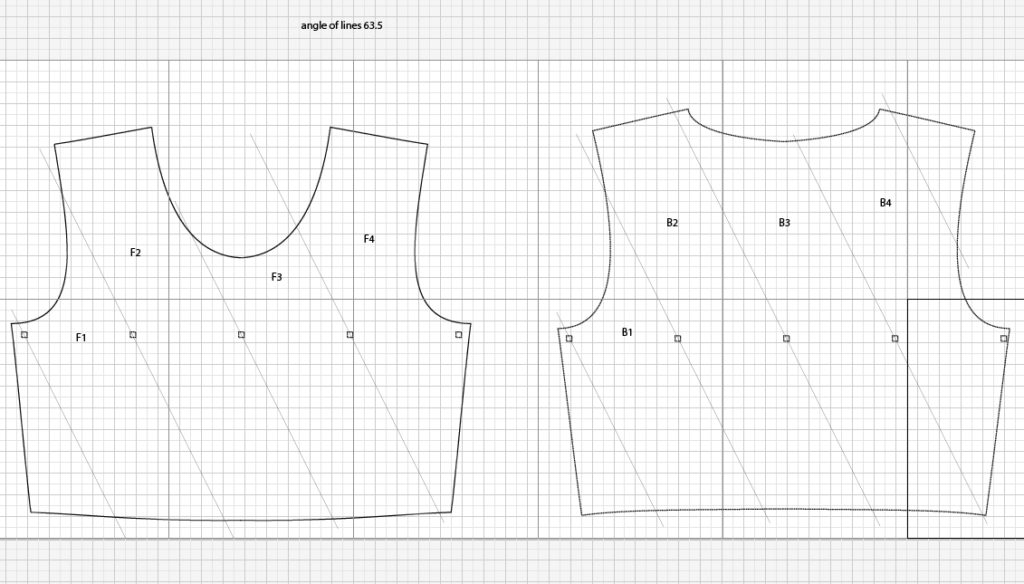
Right in the middle, bosom height or thereabout, divide the width into fourths, like in this image.
Your pattern probably already has seam allowances, so mark inwards a bit from the side edges to compensate for those.
Use whatever means at your disposal to make diagonal lines evenly at the same angle from those center three markings and from the mark directly on the side seam (under the armhole).
Mark the pieces so they don’t get mixed up. I used F1, F2, F3, F4, B1, B2, B3, B4
Now you need to add darts. If the pattern had darts it’s easy, measure the darts. Or, figure out how much your waist measurement is smaller than breast level measurement, and take away that much by trimming the bodice pieces that end about in the middle front and back. Front darts are of course bigger than back darts.
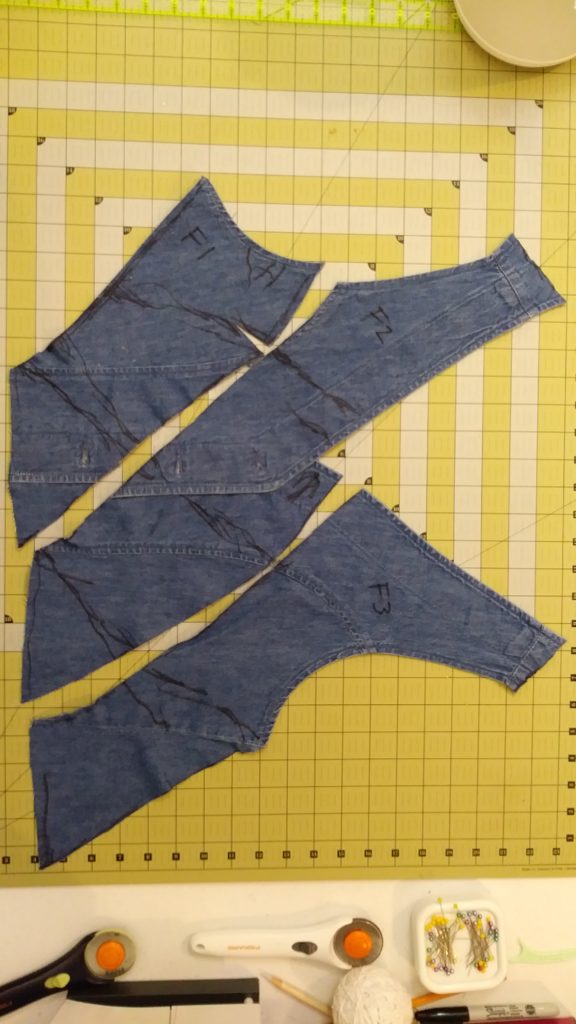
Look at this picture again–
(except that this picture actually shows me cleverly cutting two of the pieces together to ELIMINATE one of the seams so that my bear print stayed as intact as possible, sorry, that’s the only one I have until I make another of these) —
Cut the pattern apart on one of the middle lines, then tape the side seams together, overlapping enough to remove the seam allowances. Then cut apart all the lines so you now have eight bodice pieces.
Mark ADD SEAMS all down those diagonal lines that you drew.
Those are the bodice pieces.
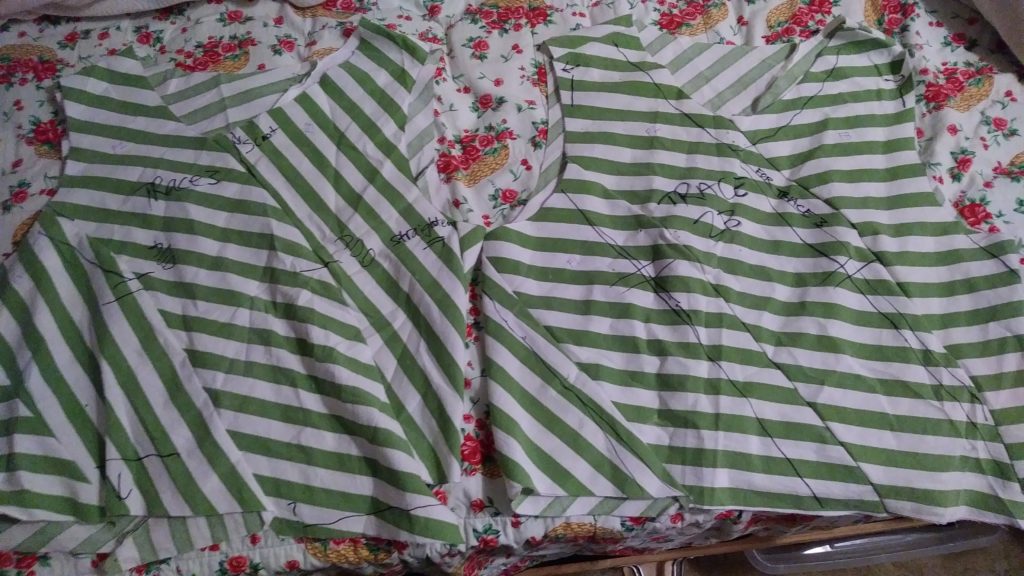
For the skirt, go to my Spiral Skirts page and pick a curved C-shaped spiral pattern piece that is comfortably larger than any of your bodice pieces. For the first segment, trim away the BACK (the larger side) to fit with your bodice piece. Like this–
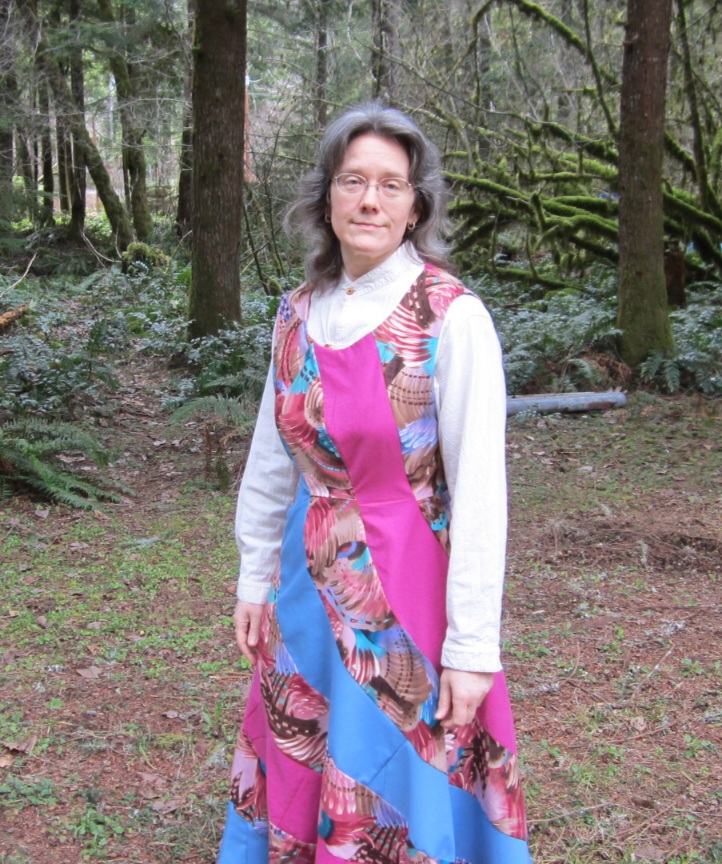
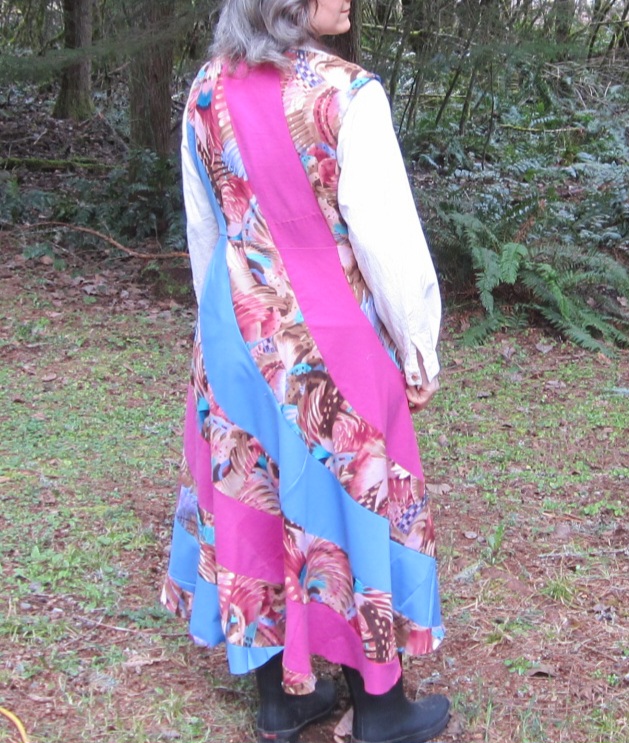
NOTE that it’s VERY IMPORTANT to add plenty of fabric rather suddenly, to swirl out for the hips, or you’ll end up with too column-like a dress. The bodice pieces should be quite short, almost empire-height, so that the skirt starts high enough to flare out enough. This pink and blue one was my second try and it didn’t come out (and it was 98% done by the time that became apparent) because I made the bodice pieces too long didn’t make it flare enough at the hips. It looks okay but there’s really not enough room. I’m thinking on a future test I might even try gathering the skirt gores to the bottom of the bodice pieces.
Then proceed like making a spiral skirt, sewing the seams from top to bottom with a narrow seam allowance.
wow that is stunning , i would absolutely love a pattern like that,well done it is gorgeous.