
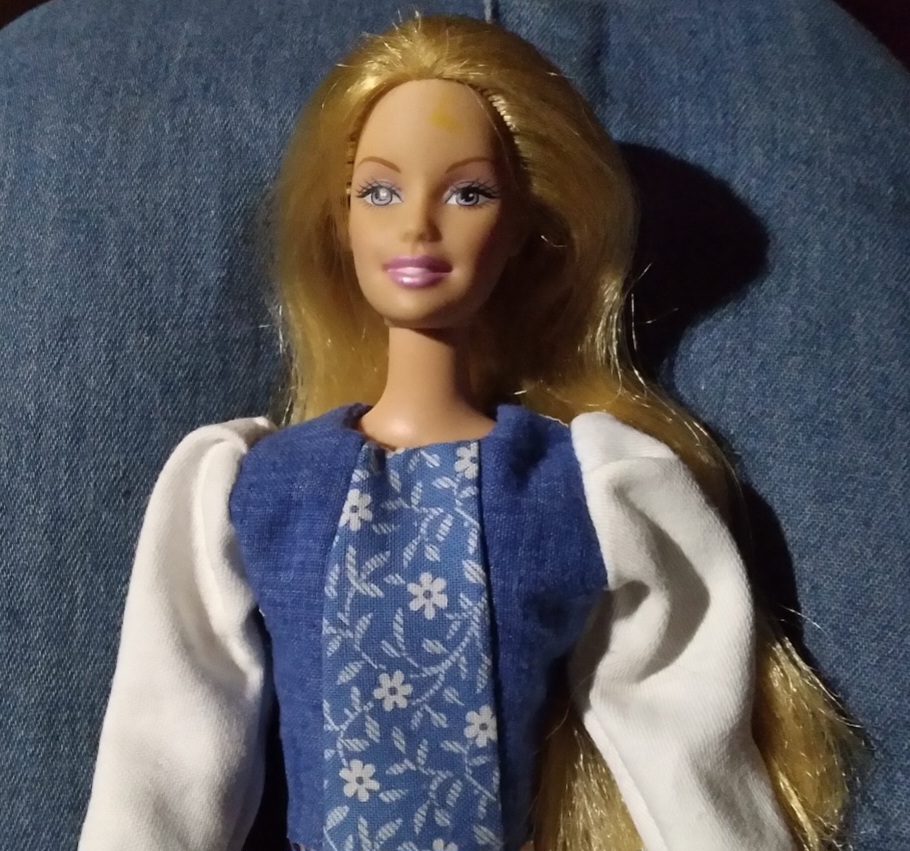
This was the first Barbie dress I designed from scratch, many longs ago. It was by necessity and was jumping into unknown waters for me, as up until then I had been using commercial patterns to make outfits for my daughters’ dolls. At some point four of their nine Barbies were the new bellybutton kind and couldn’t fit into the clothes of the others. The only premade clothes they sold in stores for 1999 Barbie were jeans and short skirts, and we wanted princess dresses! There were no commercial patterns for the new shape yet.
Something had to be done.
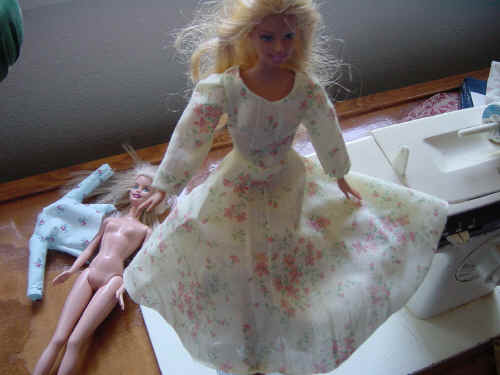
Then I shared it on the internet, in case there was anyone else out there in the same fix. And I guess there was 🙂
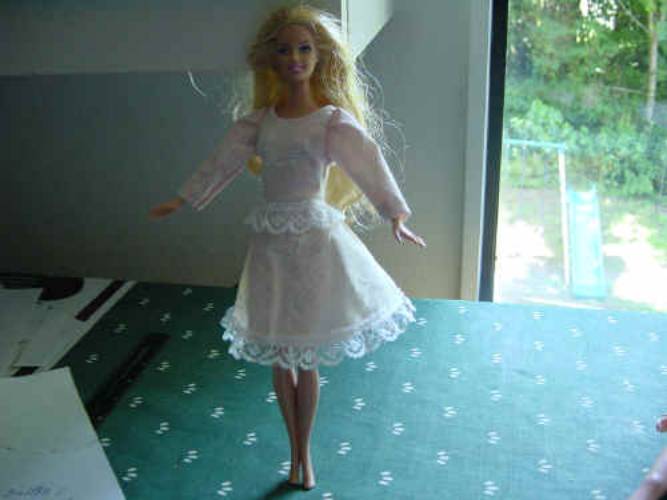
Those were made with the older pattern. I’ve updated this for 2023. It’s basically the same, except the dart was modified just slightly and the shoulder seam eliminated. It’s all so much easier without shoulder seams. (If your scrap a fabric is too small you can always add one back in.)
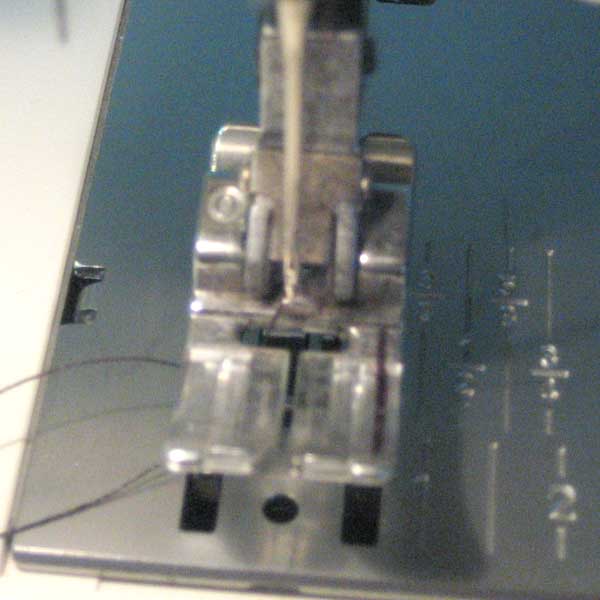
Scant 1/4″ seams are allowed. By scant I mean if there’s any doubt, to make the seams smaller than 1/4″, not larger. The presser foot is usually larger than 1/4 in.
I used a Sharpie to mark on my presser foot where 1/4″ actually falls, then I stitch with the edge of the fabric on the near side of that black line, not the far side.
Updated in 2023.
Someone motivated me by asking for a Princess Peach gown pattern.
First I made one the way I thought it should be, with just the original pattern in pink, to which I planned to add darker pink swags on the hips like Cinderella’s gown, a jewelry finding tacked on the bosom and a darker pink border.
Then I found out the decorative inset in front is that important for Peach, and that her hip “overskirt” actually goes all the way around, not like Cinderella’s two little panniers. Whoops, maybe someday I’ll change that, although usually, once the initial burst of enthusiasm is over…
Got as far as a bodice inset and that’s on the new pattern.
Both long and short sleeves are included.
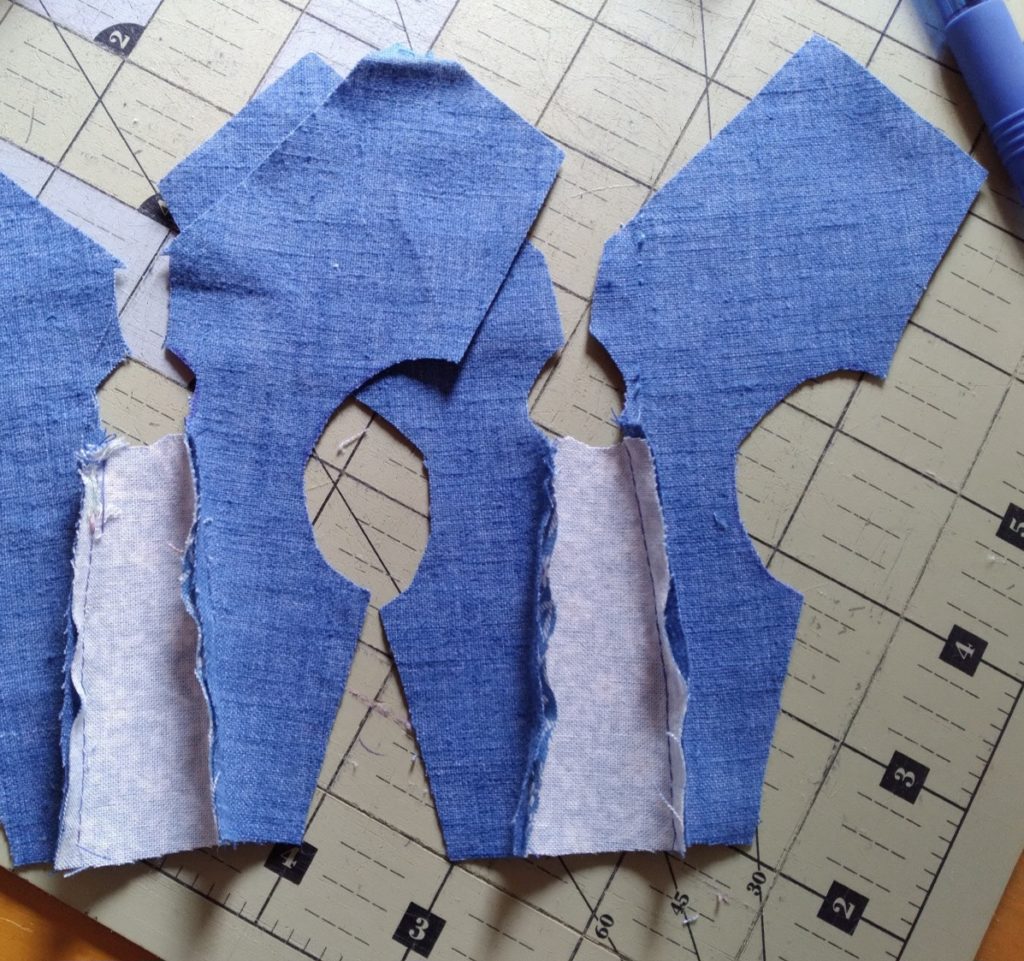
That’s how the bodice pieces work.
There’s a skirt shape, too. It doesn’t have to be this long and you don’t have to make it that full.
Download in pdf to print:
That pdf won’t open on my phone so I’m going on faith. Here’s a DOCX file just in case:
There are simple instructions on the pattern.
I’m also PLANNING to get some good picture instructions up here again! That’s on my list. If you could see how I’m living right now! Oh, in the very best way, in my very own place, enough said 🙂
But I don’t have electricity or a computer, and I have cell signal on rare occasions. Just Ivy Draw and Google docs to compose my masterpieces… proving this really is my creative life, right here. If you want something badly enough, you’ll find a way.
Janel,
I’m new to your website and I love what you show so far. I am in a huge dilemma. My 7 year old granddaughter is wanting a “Princess Peach” Barbie dress to be made by, you guessed it, her Nana. I have struggled for over a month now trying to figure out how to piece-meal a pattern. I figured out how to make a princess full length skirt. You cut a 18″ diameter circle with a 3″ diameter whole opening in the middle to be gathered for the fullness of the skirt. You can make the hole larger for more puff but you will need to lengthen the skirt by making it a 20″ diameter circle. Then you make about a 3″ seam opening just off the center opened circle to get the skirt on and off (or sew 1/8″ elastic all the way around and the child can slip the skirt on an off. I did the slip this way. Here’s my problem, I need a high neck fitted bodice with short puff sleeves. There is a insert in the front bodice part, but I can always just make it on the fold and sew the “almond” shape insert on top of the fabric. I tried the wrapping the Barbie with plastic wrap and then masking tape to draw on the darts, waist, bust points and cross line, neck, sleeve opening etc. and it just doesn’t work for me (I guess I’m not very talented). Can you help with a bodice front and back that can be attached to a long full length skirt with princess bellows around (like a Cinderella dress)? Thank you in advance, Debra Black
Oooh Princess Peach, that sounds like great fun and should come out really pretty! You need a fitted bodice, then the first question is, which Barbie body?
Hello,
I would like to make this dress (short sleeve) but there is not scale in the pattern. Could you update it please?
You are right. I still had only the old pattern up. Thanks for the reminder, I’ll do it right now.
Should the skirt pattern be cut on the fold?
You’re going to cut three of that shape for the full skirt. Either cut three pieces and sew together, or cut one or two of them on folds.
Sorry about the delay in answering. I had to look at the pattern to remember, and I have power and computer access occasionally these days.
The Skirt pattern is missing a piece
Bellybutton-Barbie-orig-23-JanelWasHere-1
I know. Limitations of the technology I was using at that point trimmed the corner off the skirt piece. That’s on my to do list but nowhere near the top. For now just tape another little piece of paper and sketch in the corner so that the side is 7 in long.
Dear Janel !
Your patterns are so great! YOU are so great to do them so beautiful and easily to understand, even when someone is German, like me, (living in Switzerland) and is not so much accustomed to the inch-measurement. Thank you soooooooooooooooooooooooo much for sharing! And for helping to differentiate all the Barbie types -this is really very confusing and therefore not so easy to make Barbie clothes for gifts. Now you have helped a lot of Barbie dress makers and their children, grandchildren and all friends of these dolls whether they are already grown-up or not 🙂
I send you my compliments, lovely greetings, Eva Chillante
That is so very kind of you, thanks!
It makes me remember right away the several things I’ve been meaning to improve… and move them closer to the top of the list. As I would like to be MORE reliably useful in my little contribution to Western Civilization (by helping to cover naked fashion dolls).
thx jane for the patrons amazing you are great
greetings astrid from holland (the netherlands)