
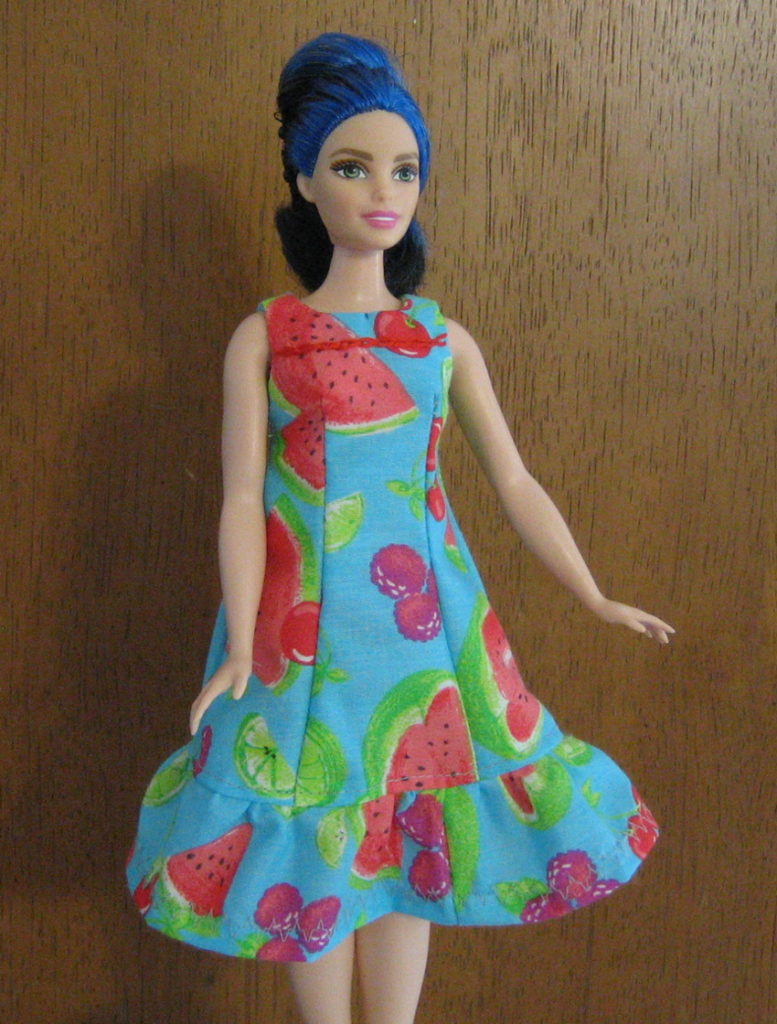
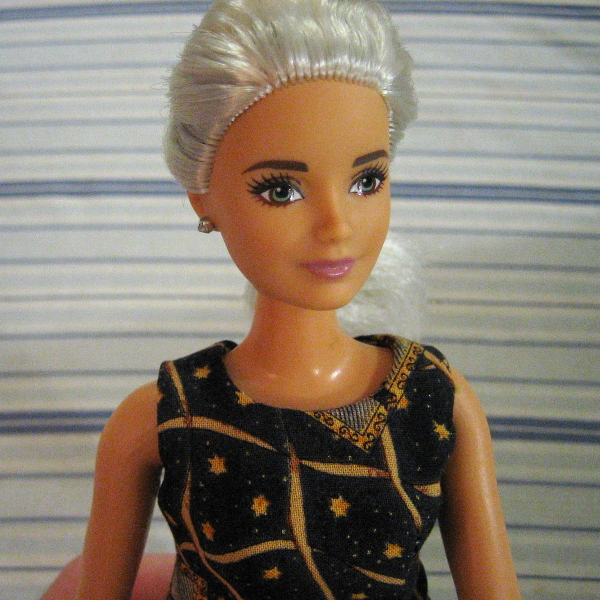
I love Miss Blue’s beautiful space princess hair.


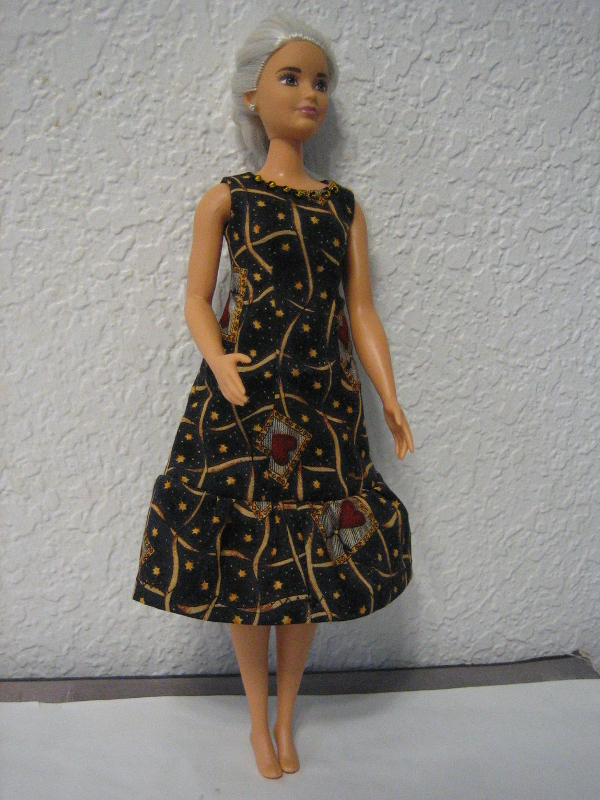
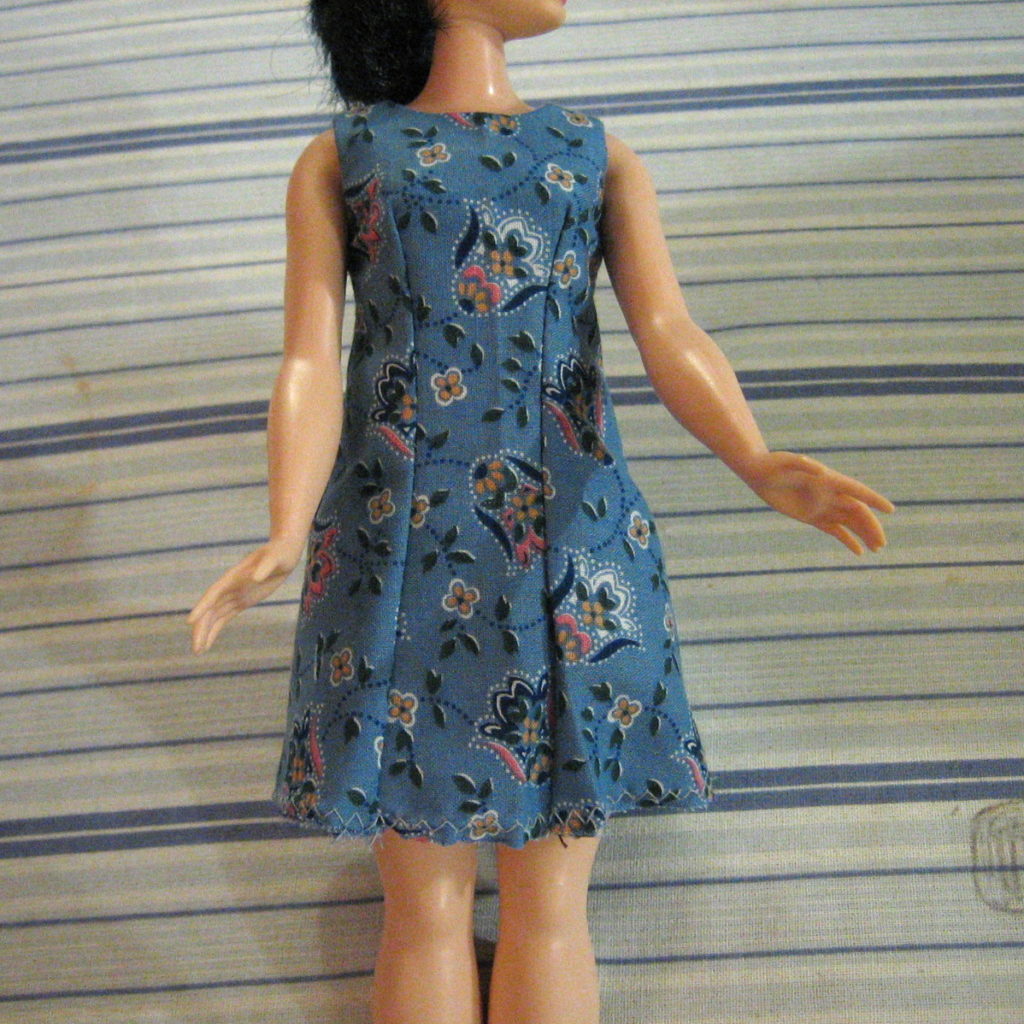
Of course my first dress for her had to be a princess seams sundress. Princess seams are not a very easy design to create. I set out to do a strapless at first, but it didn’t happen and this did.
Might be because I can identify with this lady, and this is the style that looks best on me.
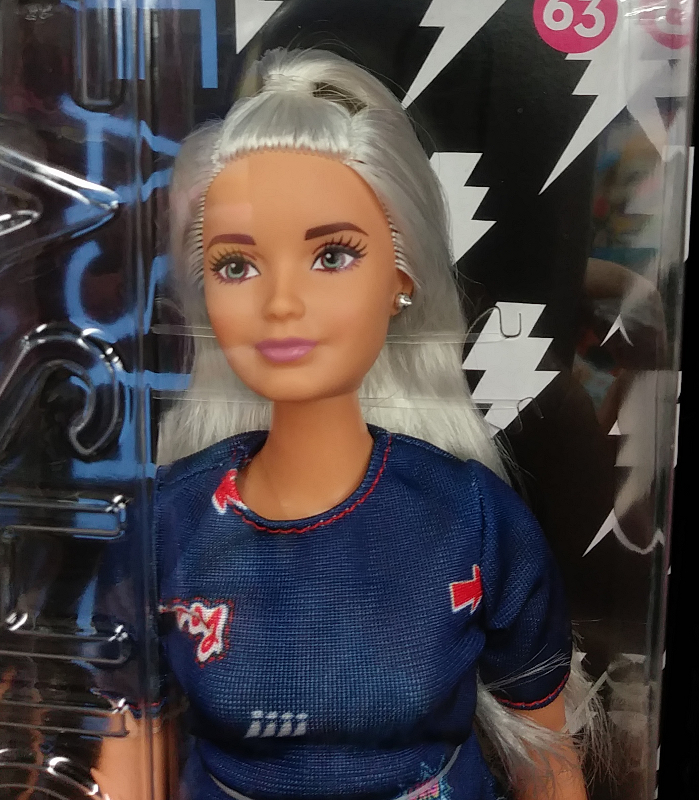
Just last week I couldn’t resist buying Fashionistas #63 too. She’s so very platinum that it almost looks grey, and I can imagine she’s just a very young-looking granny.
Here she is in one of the test models of this pattern.
And here is the pdf file to print Barbie Curvy Princess Pattern <– CLICK HERE TO DOWNLOAD
INSTRUCTIONS
Pattern includes 1/4” seams except at the neckline and armhole, there’s only 1/8” seams there.
NOTE that your presser foot is probably wider than 1/4″. Don’t line up the fabric with the edge of the presser foot or the dress will come out too small. I drew a black mark on my machine so I know where a quarter inch really is.
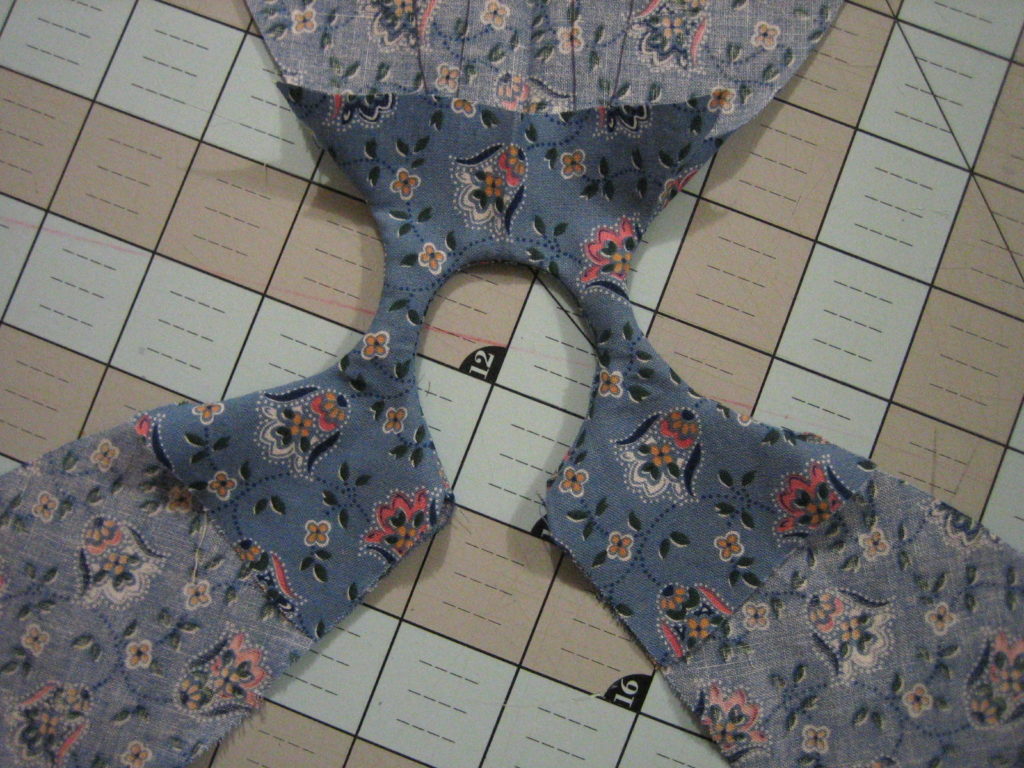
Place pattern on fold, cut one large shape for the dress and a shorter one for the facing. Cut through the fold in the back.
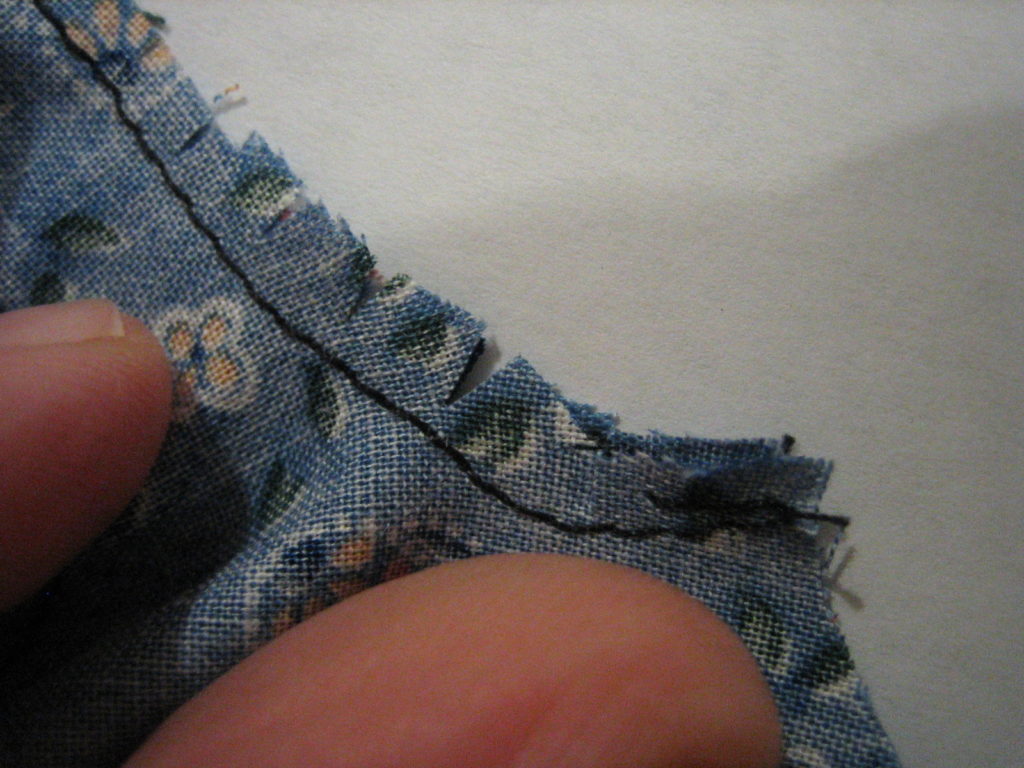
Lay the facing and dress right sides together, stitch armholes and necklines with narrow seams. You have to be very careful and precise about this step. Flip over to be sure the seams are even.
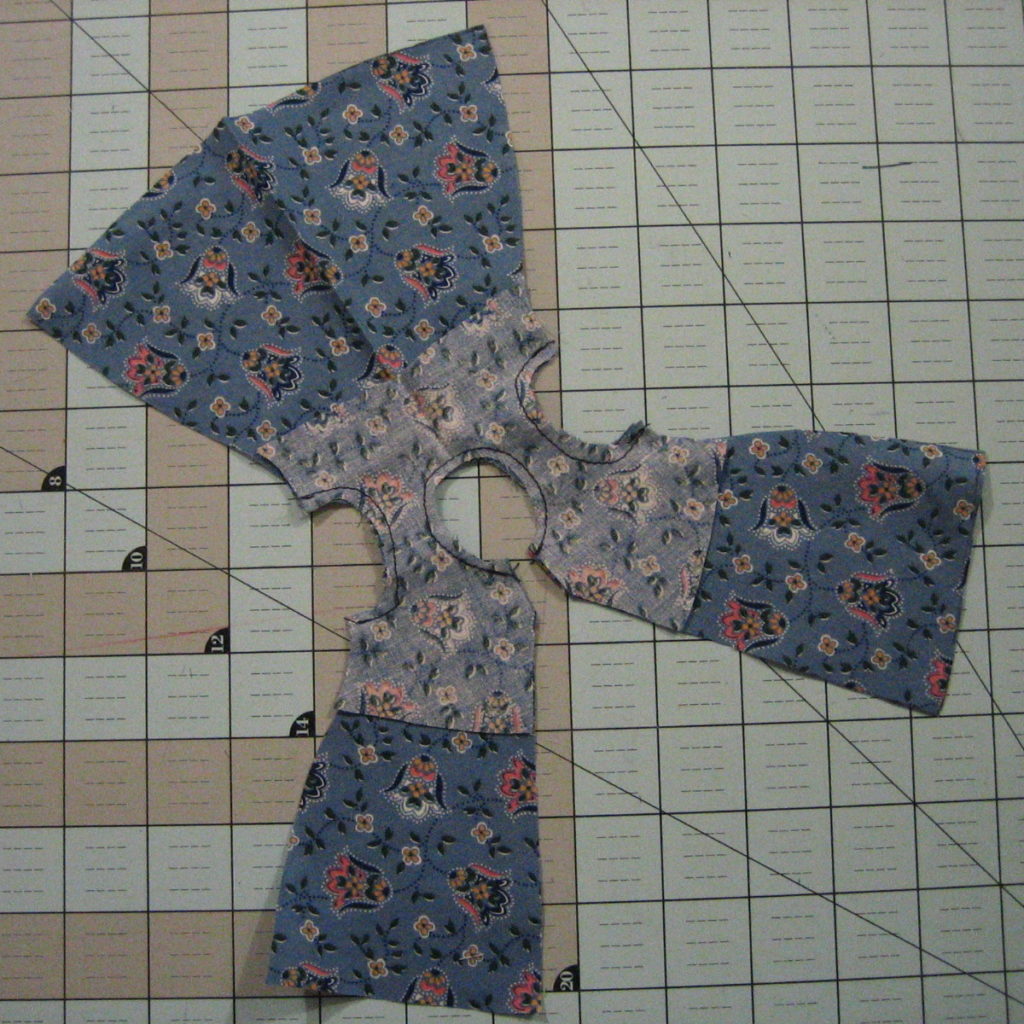
Then clip the curves.
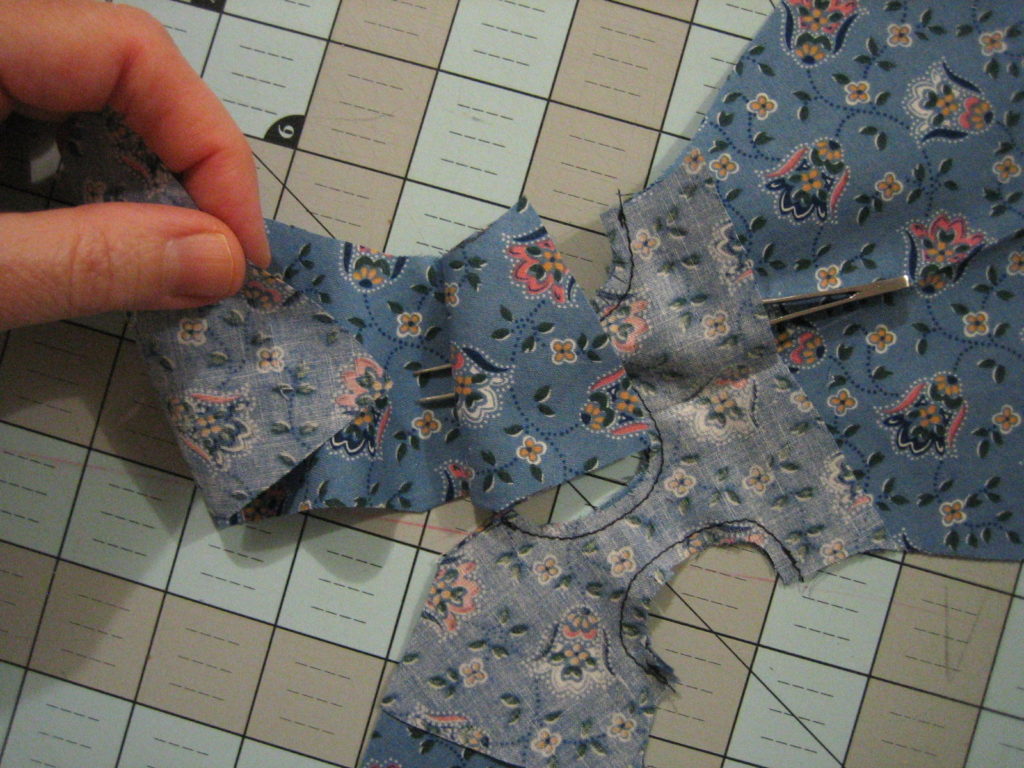
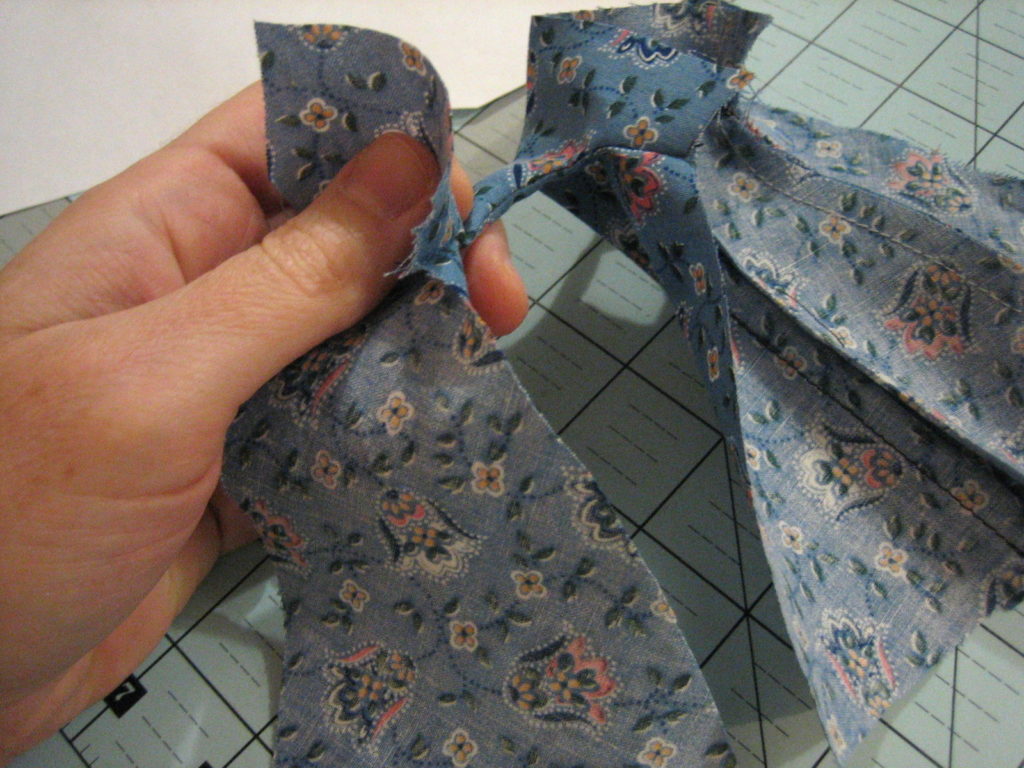
The next part is tricky but doable. To pull the back through the shoulders you’ll need a long tweezer or forceps.
Reach through the shoulder, get the bottom corner of the back and pull through. Keep the bulk smooth. If it bunches up and you pull hard, it’ll rip those tiny seams.
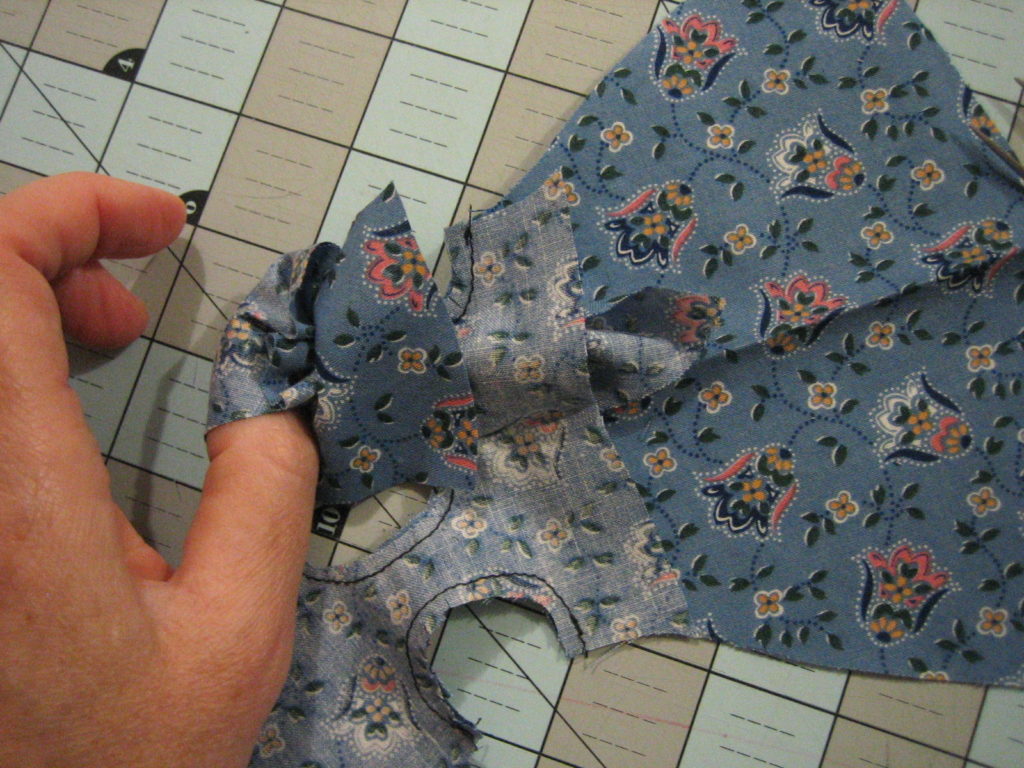
After the back section is through, gently ease the facing through.
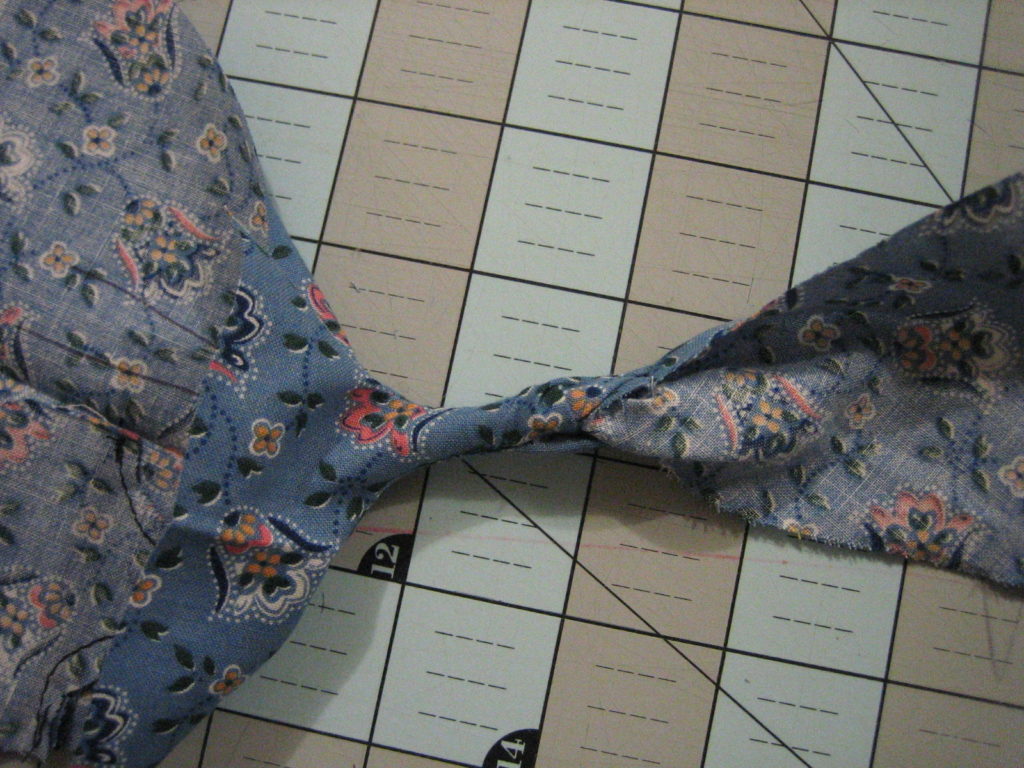
Stitch up the darts on the dress and facing. (That could have been done as the first step but it’s easier to have the whole thing lying flat while dealing with the shoulders.)
After the darts, put facings right side to right side and sew down sides of facing, then continue, with the dress pieces rights side together, sew down the side seams as well.
Tack the facing to the dress at the side seams.
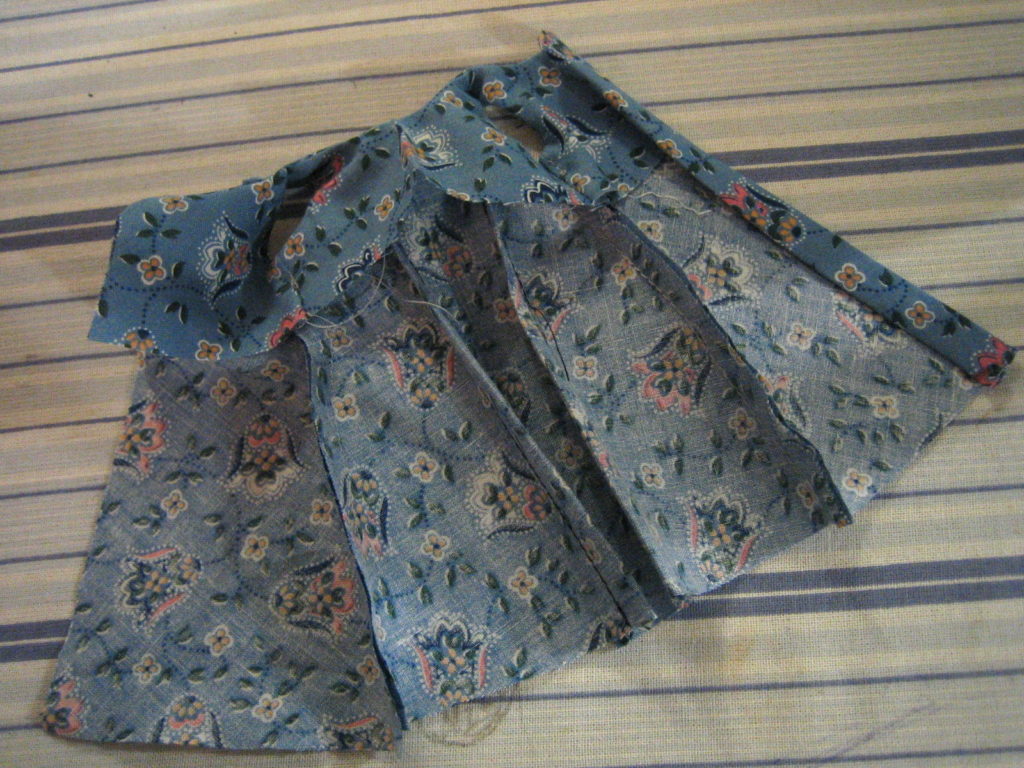
Fold the backs over, once as narrowly as possible then a little wider. Doesn’t hurt to try it on the doll at this point.
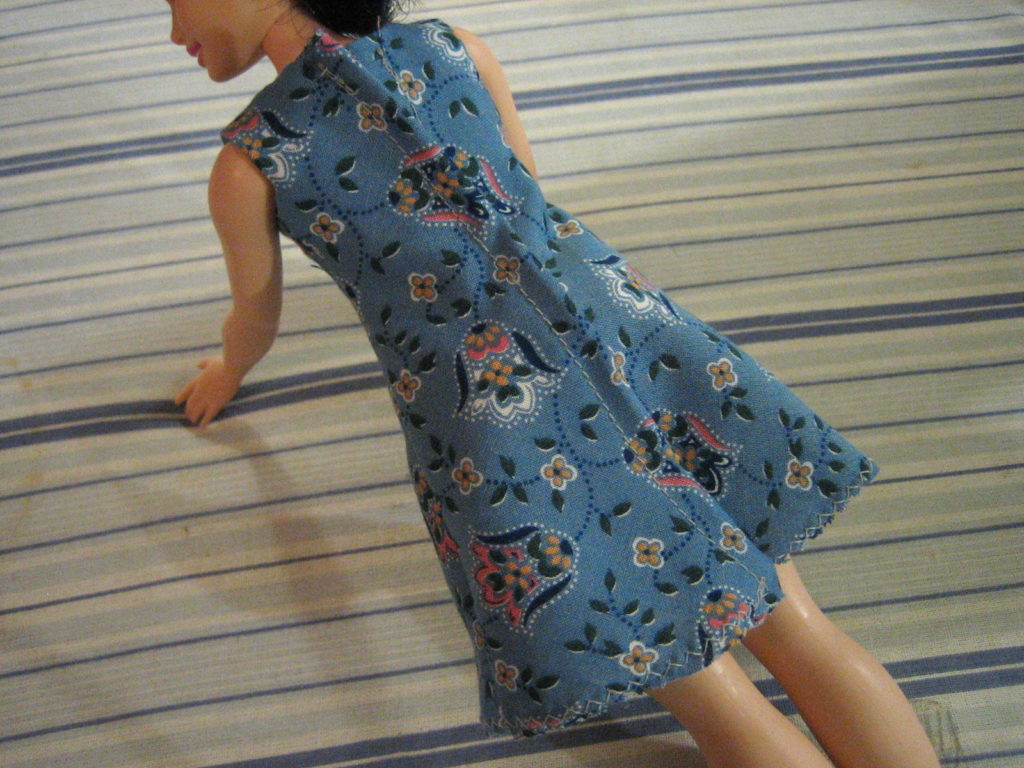
That’s a cute length for a mini-dress and looks flattering on this body type.
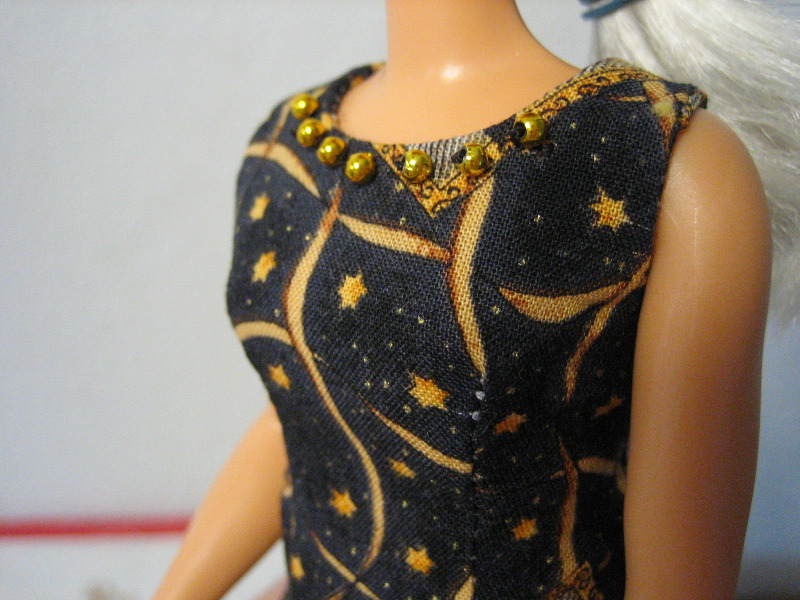
Unfortunately I’m allergic to curved hems, so I added a 13 x 3″ ruffle.
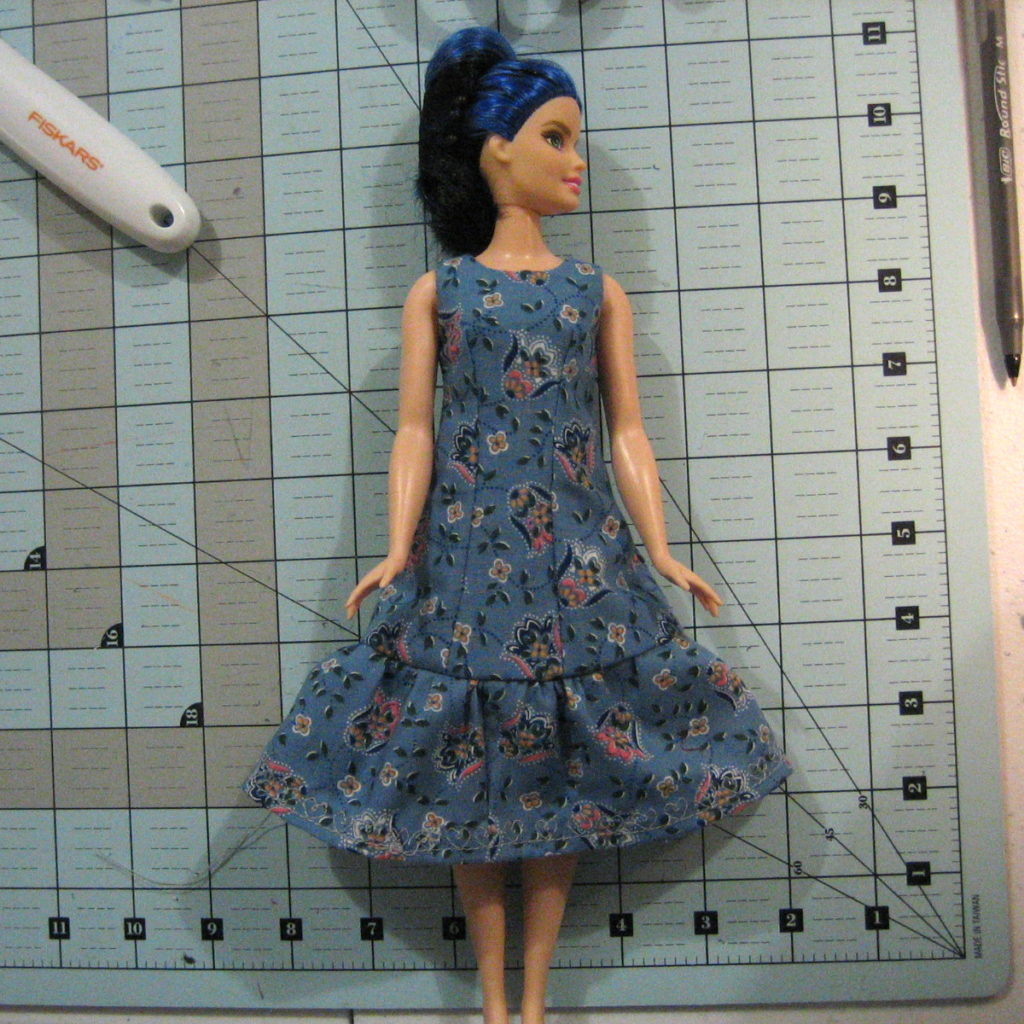
And velcro. All done!
A line of Velcro makes it easy for a young child to dress, or you can stitch the skirt up to the point marked on the pattern.


Thanks for sharing. I’m going to give this a try soon … FIESTA 🙂
Oh you’re welcome! If you have any feedback after trying it I’d love to hear it. If it works out share a picture!
Hi Janel, Im from Venezuela, I dont know how to make this dress. Do I separate the shoulders or not?
Big hug
Valentina
The fronts and backs are cut out together in one piece, so the shoulders are connected. It makes fewer seams 🙂
This is a great simple outfit. Love it. Great job. 😊💚👍
Thank you for the pattern! Maybe next time I'll add a ruffle, this was my first dress for Curvy Barbie.
Oh it's just darling the way it is! It looks like the 60s style. Thanks so much for showing me!
I love this pattern for the curvy Barbie. I added a big bow at the ruffle seam on the front. Have made several of this dress for nieces and granddaughter.
I’m so glad to hear it worked for you!
I’d love to see a picture 🙂
Thank you for the pattern and instructions! My curvy Barbie is very happy with her new dress. I’ll definitely make more.
Oh that’s cool! Thanks for sharing the picture!
[…] I felt that Party Time deserved something more than the Capri trousers that I’d put on her. Ideally, until I could resize the patterns I already had, I wanted to make her a sensible dress. Having looked on Etsy for patterns, I didn’t immediately find what I wanted so I searched Google and found a wonderful free pattern from Janel Was Here. […]
Thank you so much for your sharing your perfect sewing pattern. Here’s a photo of my curvy doll with her dress that I made from using it. (I’ve credited you on my latest blog post & linked to your post.)
Thank you so much, I really appreciate it! The dress came out so cute!
Hi Janel, I have just started sewing barbie dresses and thanks to your Taylor Wentworth download patterns I can now have outfits for my Cami dolls as well. I’m 69 yrs old getting in touch with my inner child and having a wonderful time. Have a wonderful new year sewing and stay happy and creative